
Appearance
How to set up the Revinate integration with CaptiFi
Follow every step below and your WiFi guests will be exported into Revinate automatically, enriching your guest profiles with real visit data rather than reservation data alone.
Time needed: about 5 minutes in CaptiFi, plus however long Revinate takes to issue your token.
Built for hospitality
This integration is aimed at hotels, B&Bs, resorts and serviced accommodation that already use Revinate. If you are in another industry, use Mailchimp, Klaviyo or Google Reviews instead.
What this integration does
When a guest signs in to your WiFi, CaptiFi sends their contact details to your Revinate list. Revinate updates an existing guest profile or creates a new one, so WiFi visitors, including restaurant, bar and spa guests who never appear in your PMS, become reachable for pre-arrival campaigns, post-stay review requests and loyalty workflows.
Before you start
- A Revinate account with API access enabled
- A Revinate access token for the list guests should join, issued by your Revinate account manager
- A CaptiFi plan that includes integrations (Growth or above)
- A splash page collecting at least an email address
Part 1: Get your Revinate access token
Revinate issues tokens through your account team rather than a self-service screen, so there is nothing to screenshot in this part.
Step 1: Ask Revinate for API access
Contact your Revinate account manager and ask for API access so a third-party system can add contacts to a list.
Step 2: Collect the token
Revinate issues a single access token tied to the list that contacts are added to. Keep it safe: it is the only credential CaptiFi needs.
Multiple properties
Ask for a separate token per property. In CaptiFi each venue holds its own token, so each property's guests land in that property's Revinate list.
Part 2: Connect Revinate in CaptiFi
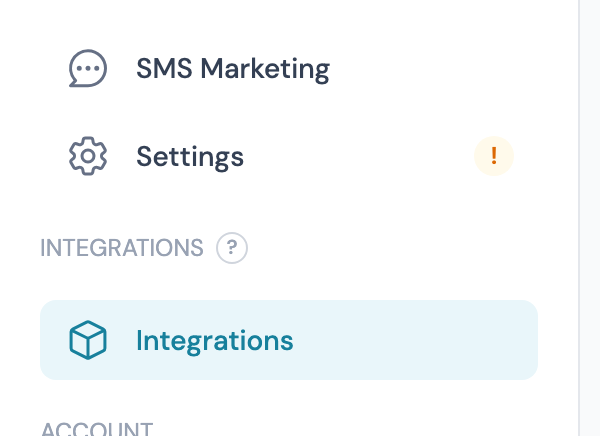
Step 3: Open the Integrations page
Log in to my.captifi.io and click Integrations in the left sidebar.
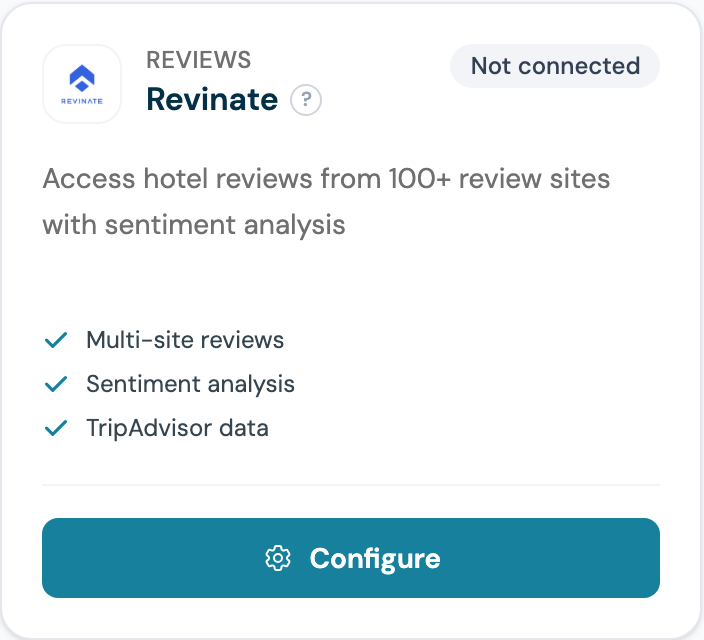
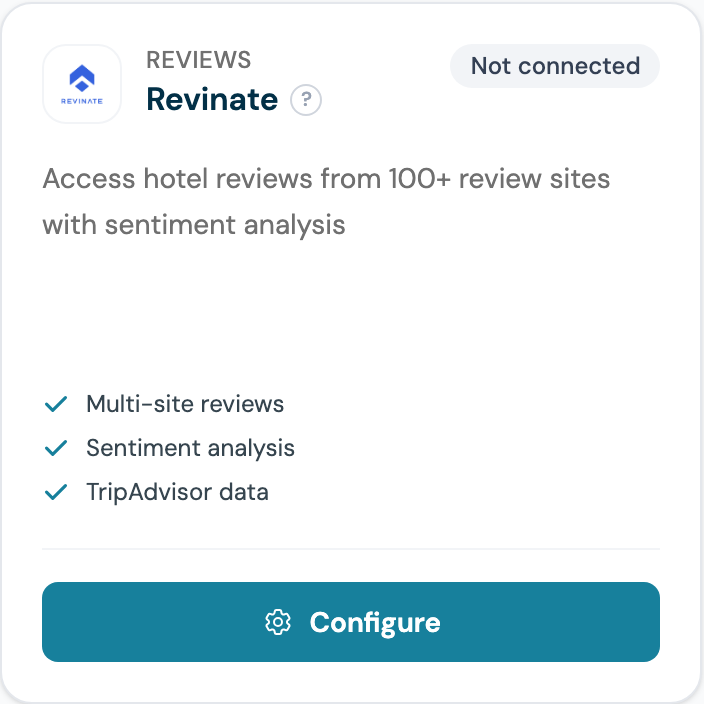
Step 4: Find the Revinate card and click Configure
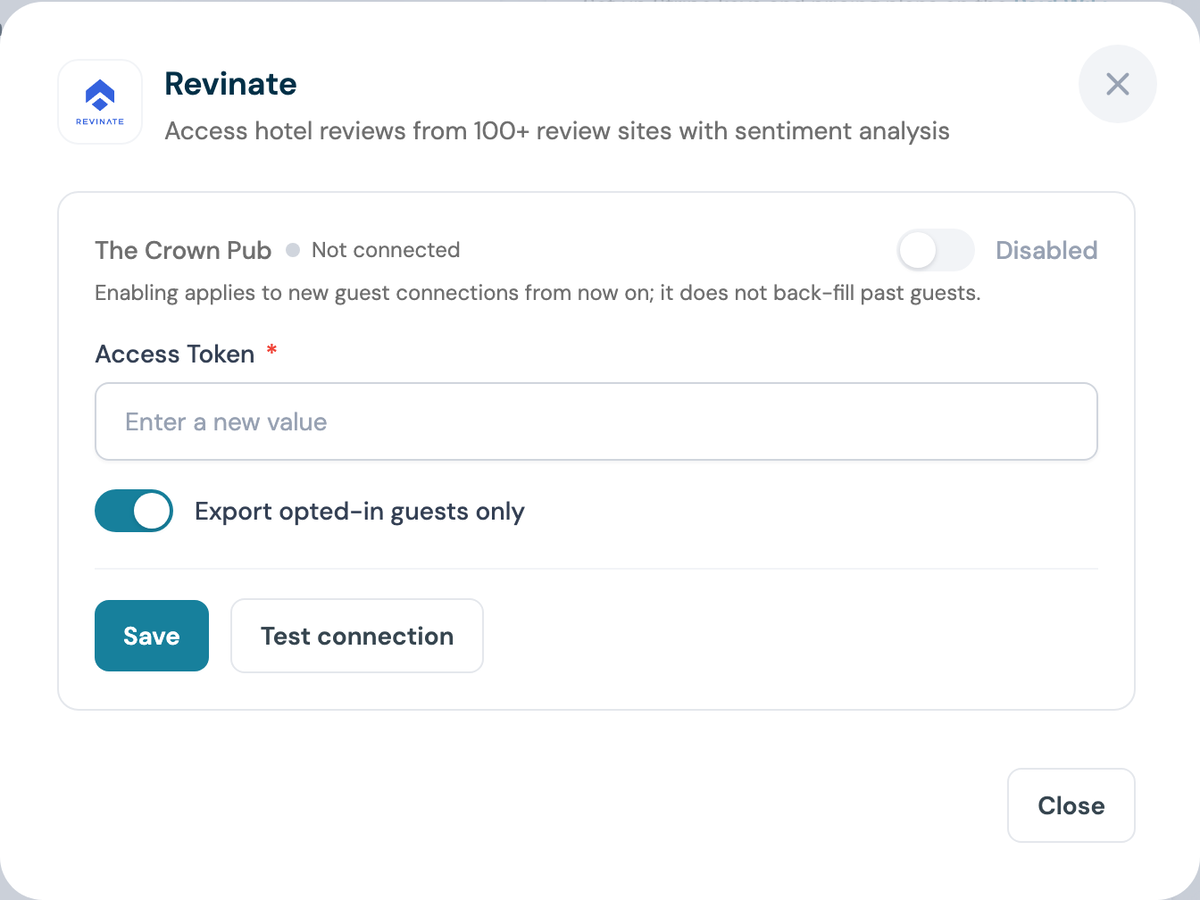
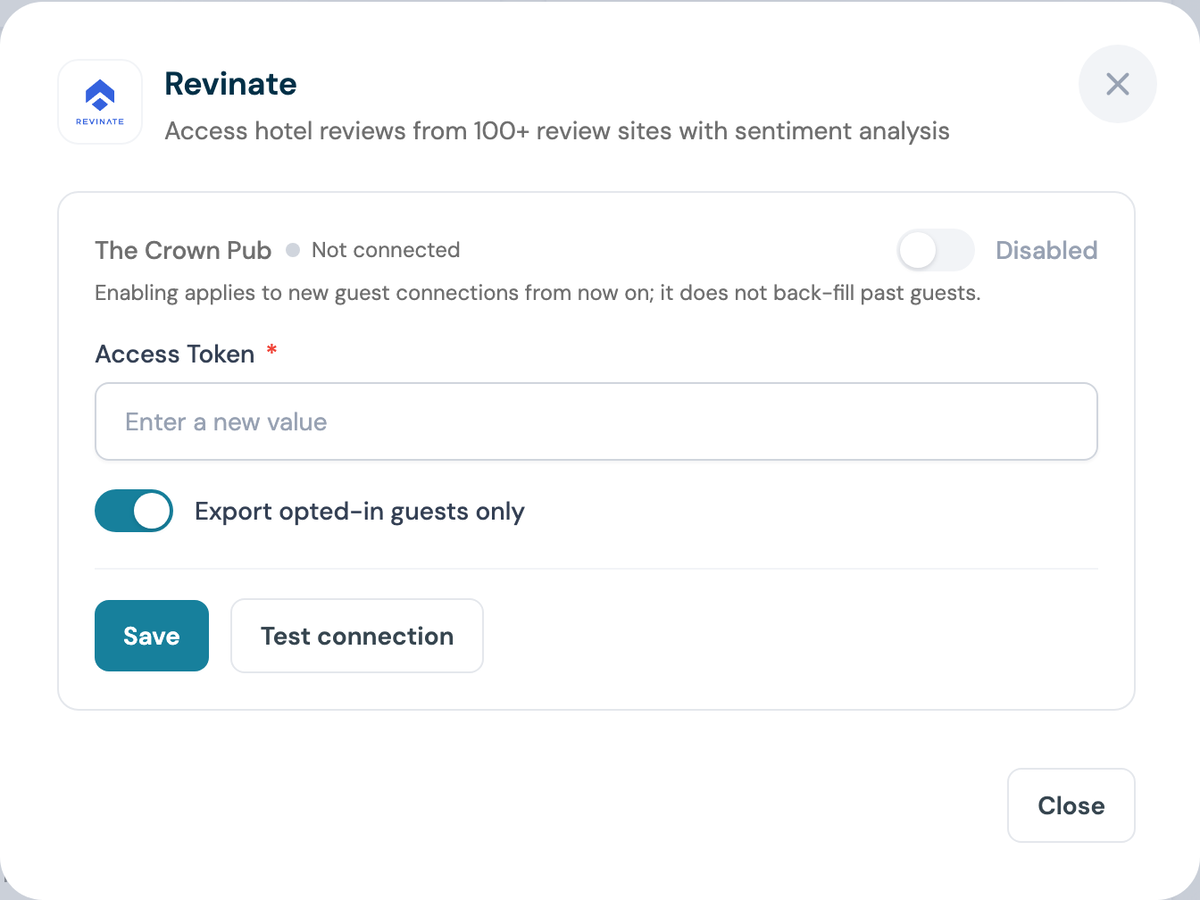
Step 5: Paste your access token
The panel shows one section per venue you manage. Paste the token from Step 2 into Access Token. It is write-only: once saved, CaptiFi only ever shows a masked preview.
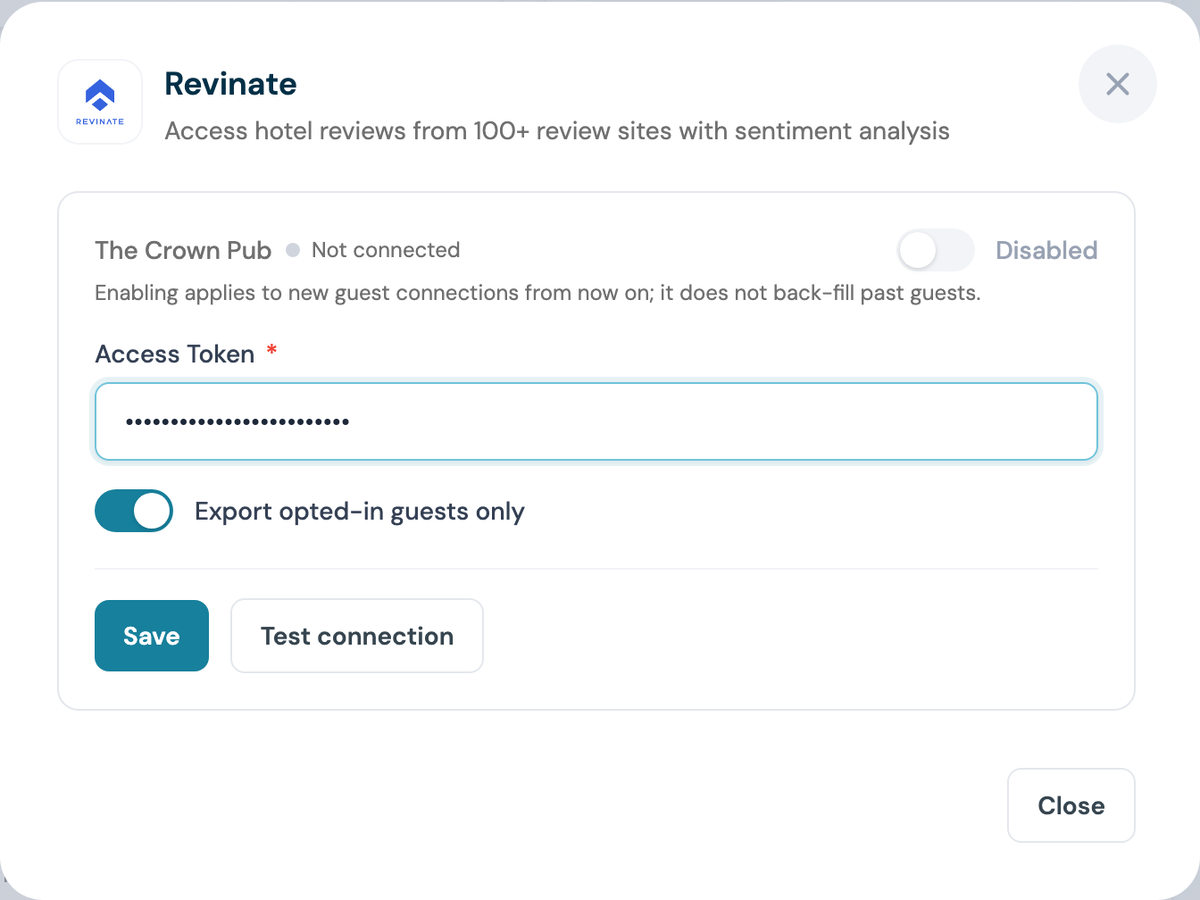
Step 6: Choose who gets exported
Export opted-in guests only is on by default, and we strongly recommend leaving it on: only guests who accept marketing are sent to Revinate, which keeps you on the right side of GDPR and PECR. Switch it off only if your legal basis genuinely covers every guest.
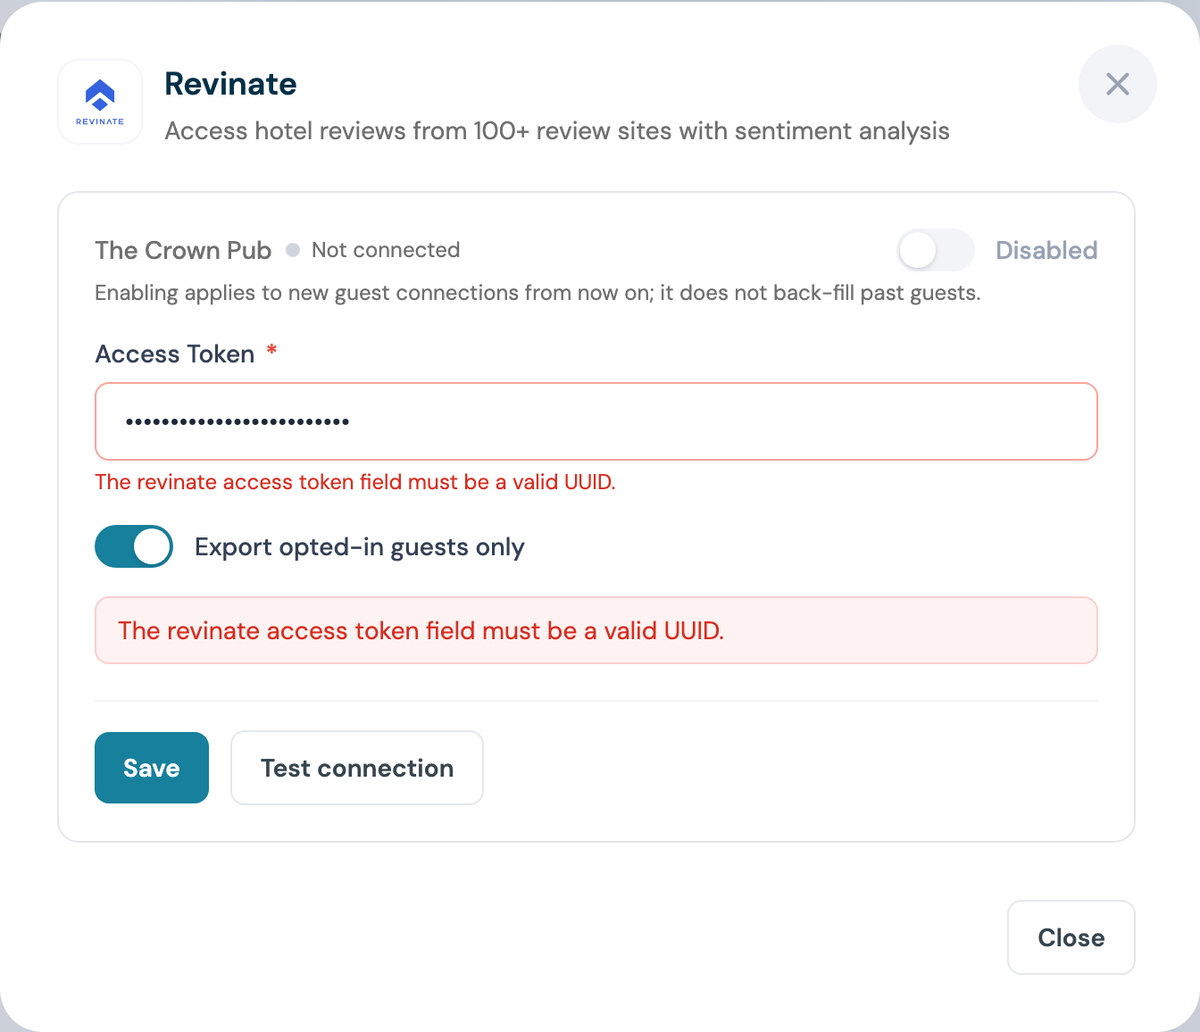
Step 7: Click Save, then Test connection
The test checks that the token is in the right format. It does not contact Revinate, so an expired or revoked token is not caught here. To confirm the connection, send a test sign-in and check the guest appears in your Revinate list, as Part 3 walks through. Once guests have been sent, the test also tells you when Revinate last accepted one.
Step 8: Switch the venue on
Flip the venue toggle to Enabled. The switch stays greyed out until a valid token is saved and the venue shows as connected, so complete Step 7 first.
Enabling is not retrospective
Only guests who connect after you enable the integration are exported. Guests captured earlier are not back-filled.
Step 9: Confirm the card says Connected
Part 3: Test it end to end
Step 10: Sign in as a guest
Forget the WiFi on a phone, reconnect, and complete the splash page with a real email address. Accept marketing when the splash page asks, otherwise the guest is skipped while Step 6 is on.
Step 11: Find the guest in Revinate
Search Revinate for that email. Within a few minutes the contact appears in the list your token belongs to. Archive the test contact when you are done.
Step 12: Check Last activity in CaptiFi
Open the Revinate panel again. Under the venue's name, Last activity shows when Revinate last accepted a guest from CaptiFi, so it should now read a few minutes ago. It only tells you Revinate accepted the request. Finding the guest in your list in Step 11 is how you know the connection works.
What gets synced
CaptiFi sends the fields below when your splash page collects them. Nothing else leaves CaptiFi.
| CaptiFi data | Revinate contact field | Notes |
|---|---|---|
| Email address | email | Required, and the identifier Revinate matches on |
| First name | first_name | If collected |
| Last name | last_name | If collected |
| Phone number | phone | If collected, and only for guests who agreed to receive texts. Sent in international format, for example +447700900123 |
| Date of birth | dateOfBirth | If collected as a splash page question |
| Postcode | zip | If collected as a splash page question |
| Gender | gender | If collected as a splash page question |
Sync behaviour:
- New guests create a new Revinate contact
- Returning guests update the existing contact, matched on email address
- Guests without an email address are never exported
- Exports run within minutes of the WiFi sign-in, and Last activity under each venue in the Revinate panel shows when the last guest was sent
- Failed calls are retried automatically on timeouts and Revinate rate limits
Multi-property groups
Each CaptiFi venue holds its own Revinate token, so a group runs one CaptiFi account across many properties:
- Repeat Part 2 for each venue, pasting that property's token
- Enable each venue separately
- Reporting in Revinate stays property-specific, matching your existing workflows
If the same guest visits two of your properties, their contact is updated in each property's list. Revinate's own cross-property matching then applies.
Troubleshooting
Test connection says the token format is invalid - the token was not copied in full. A Revinate token looks like 9617d668-8a9b-466f-aa0b-d5f046299611. Copy it again, paste it and save.
Last activity stops moving while guests are signing in - Revinate is refusing the exports, most often because the token has expired or been revoked. Ask Revinate to reissue it, then paste the new one and save.
The Enabled switch is greyed out - no valid token is saved for that venue yet. Complete Steps 5 to 7.
Guests are not appearing in Revinate - check the venue is Enabled, and remember that with Export opted-in guests only on, guests who decline marketing are skipped. Guests with no email address are always skipped. If Last activity keeps moving but the guests never reach your list, ask your Revinate account manager to check the token and the list it belongs to.
Data went to the wrong property - the venue is holding another property's token. Re-check the token on each venue.
Contacts arrive with no name or phone - your splash page is not collecting those fields, or the guest did not agree to receive texts, which a phone number needs. Add the fields in the Splash Page Builder.
FAQ
Do I need a special Revinate plan? You need a Revinate account with API access enabled. Your Revinate account manager can confirm.
Which CaptiFi plan do I need? Growth or above. Integrations are not included on Essentials.
Can I run Revinate alongside other integrations? Yes. One WiFi sign-in can feed Revinate, an email platform and Google Reviews at the same time.
How do I disconnect? Open the Revinate panel and click Disconnect. Future exports stop immediately; contacts already in Revinate stay there.
Is the transfer secure? Yes. Data is sent over HTTPS authenticated with your Revinate token, and the token is stored encrypted and never displayed again.