
Appearance
Email Template Builder
The email builder is where you design the emails your campaigns and automations send. It is a drag and drop editor: pick a block from the panel on the left, drop it where you want it in the email, click it to change the words and colours, and drag any block to a new spot when you change your mind. Everything you build saves itself as you go.
Plan requirement: Email marketing is included on the Growth plan and above. See Plans & Pricing.
Open the Builder
- Log in to my.captifi.io
- Go to Email Marketing → Templates
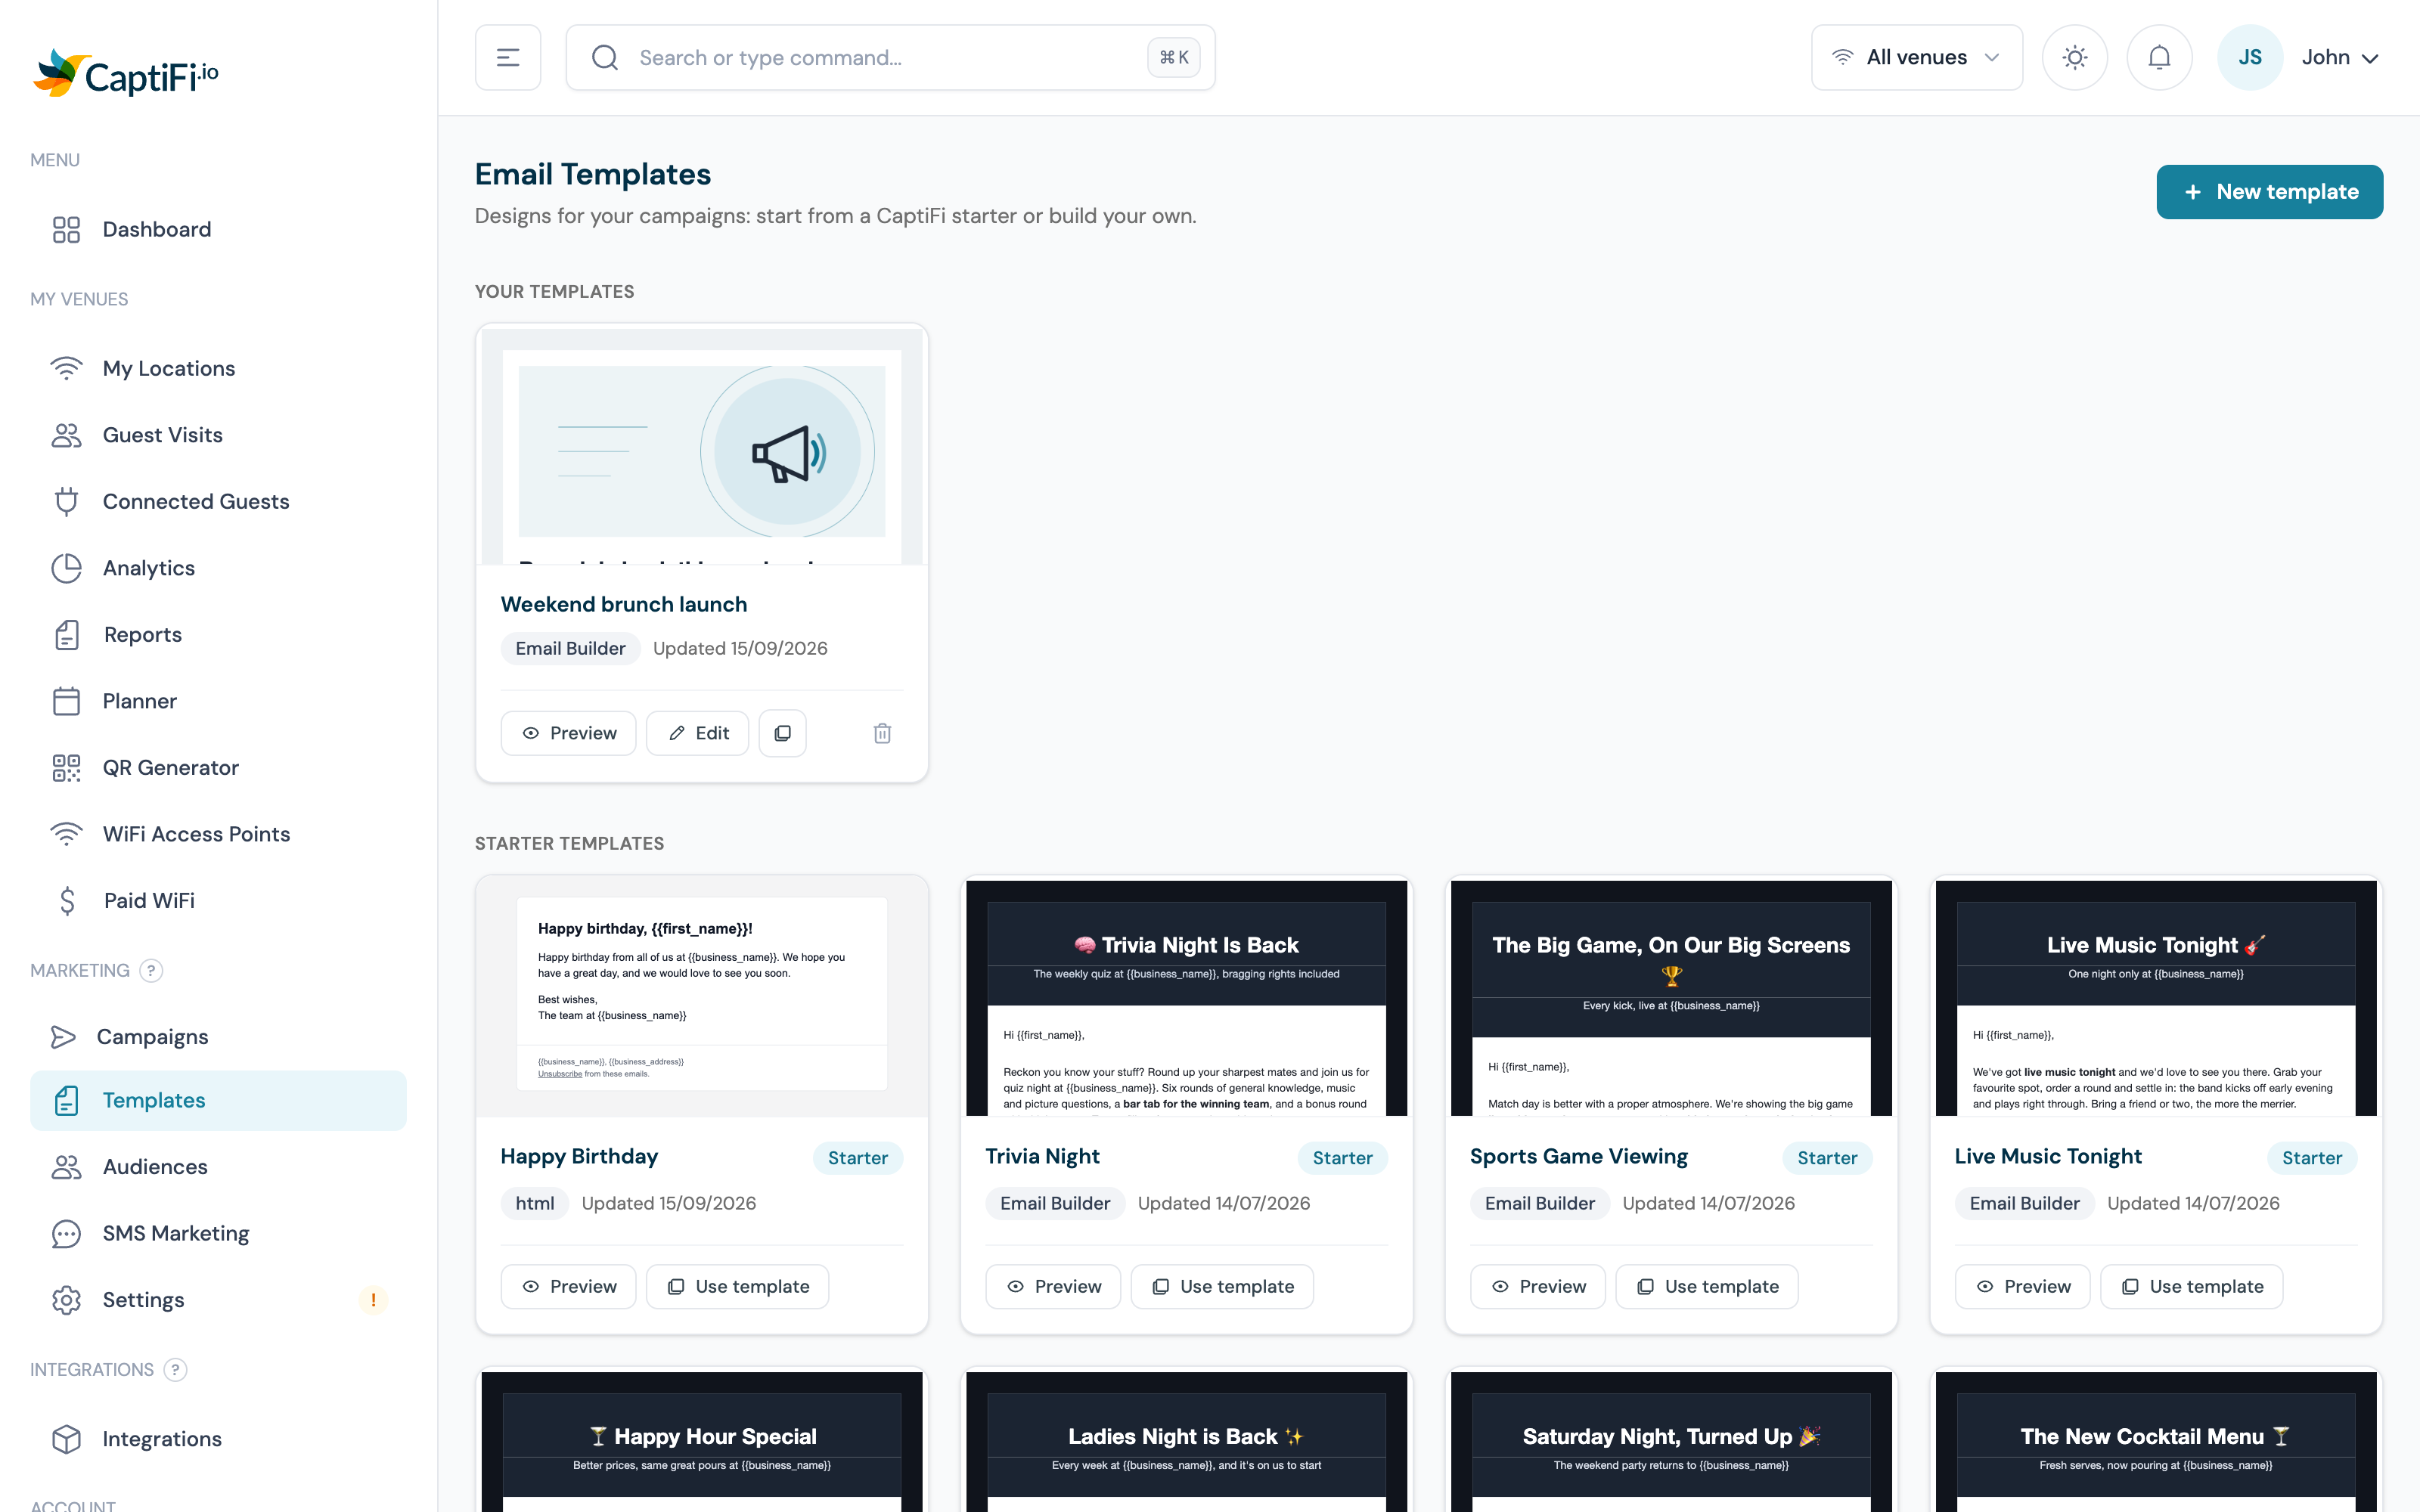
- Click Edit on one of your own templates. To start a new one, click New template, give it a name and click Create and edit, or click Use template on one of the starters to copy it into your library first
Your own templates, with the Edit button on each card. Starters lower down are copied into your library before you can edit them.
On the classic dashboard at app.captifi.io the same builder opens from the campaign wizard: on the Design step, pick a template and click Open the designer.
Know Your Way Around
The builder fills the whole window. From left to right: the Blocks panel, the email itself on a grey backdrop, and the Styles and Inspect panel on the right. Along the top sit the back arrow, the template name, the Edit and Preview tabs, undo and redo, the Subject box, Personalise, the desktop and phone preview switch, the save status and the Send test, Save and Save & Continue buttons.
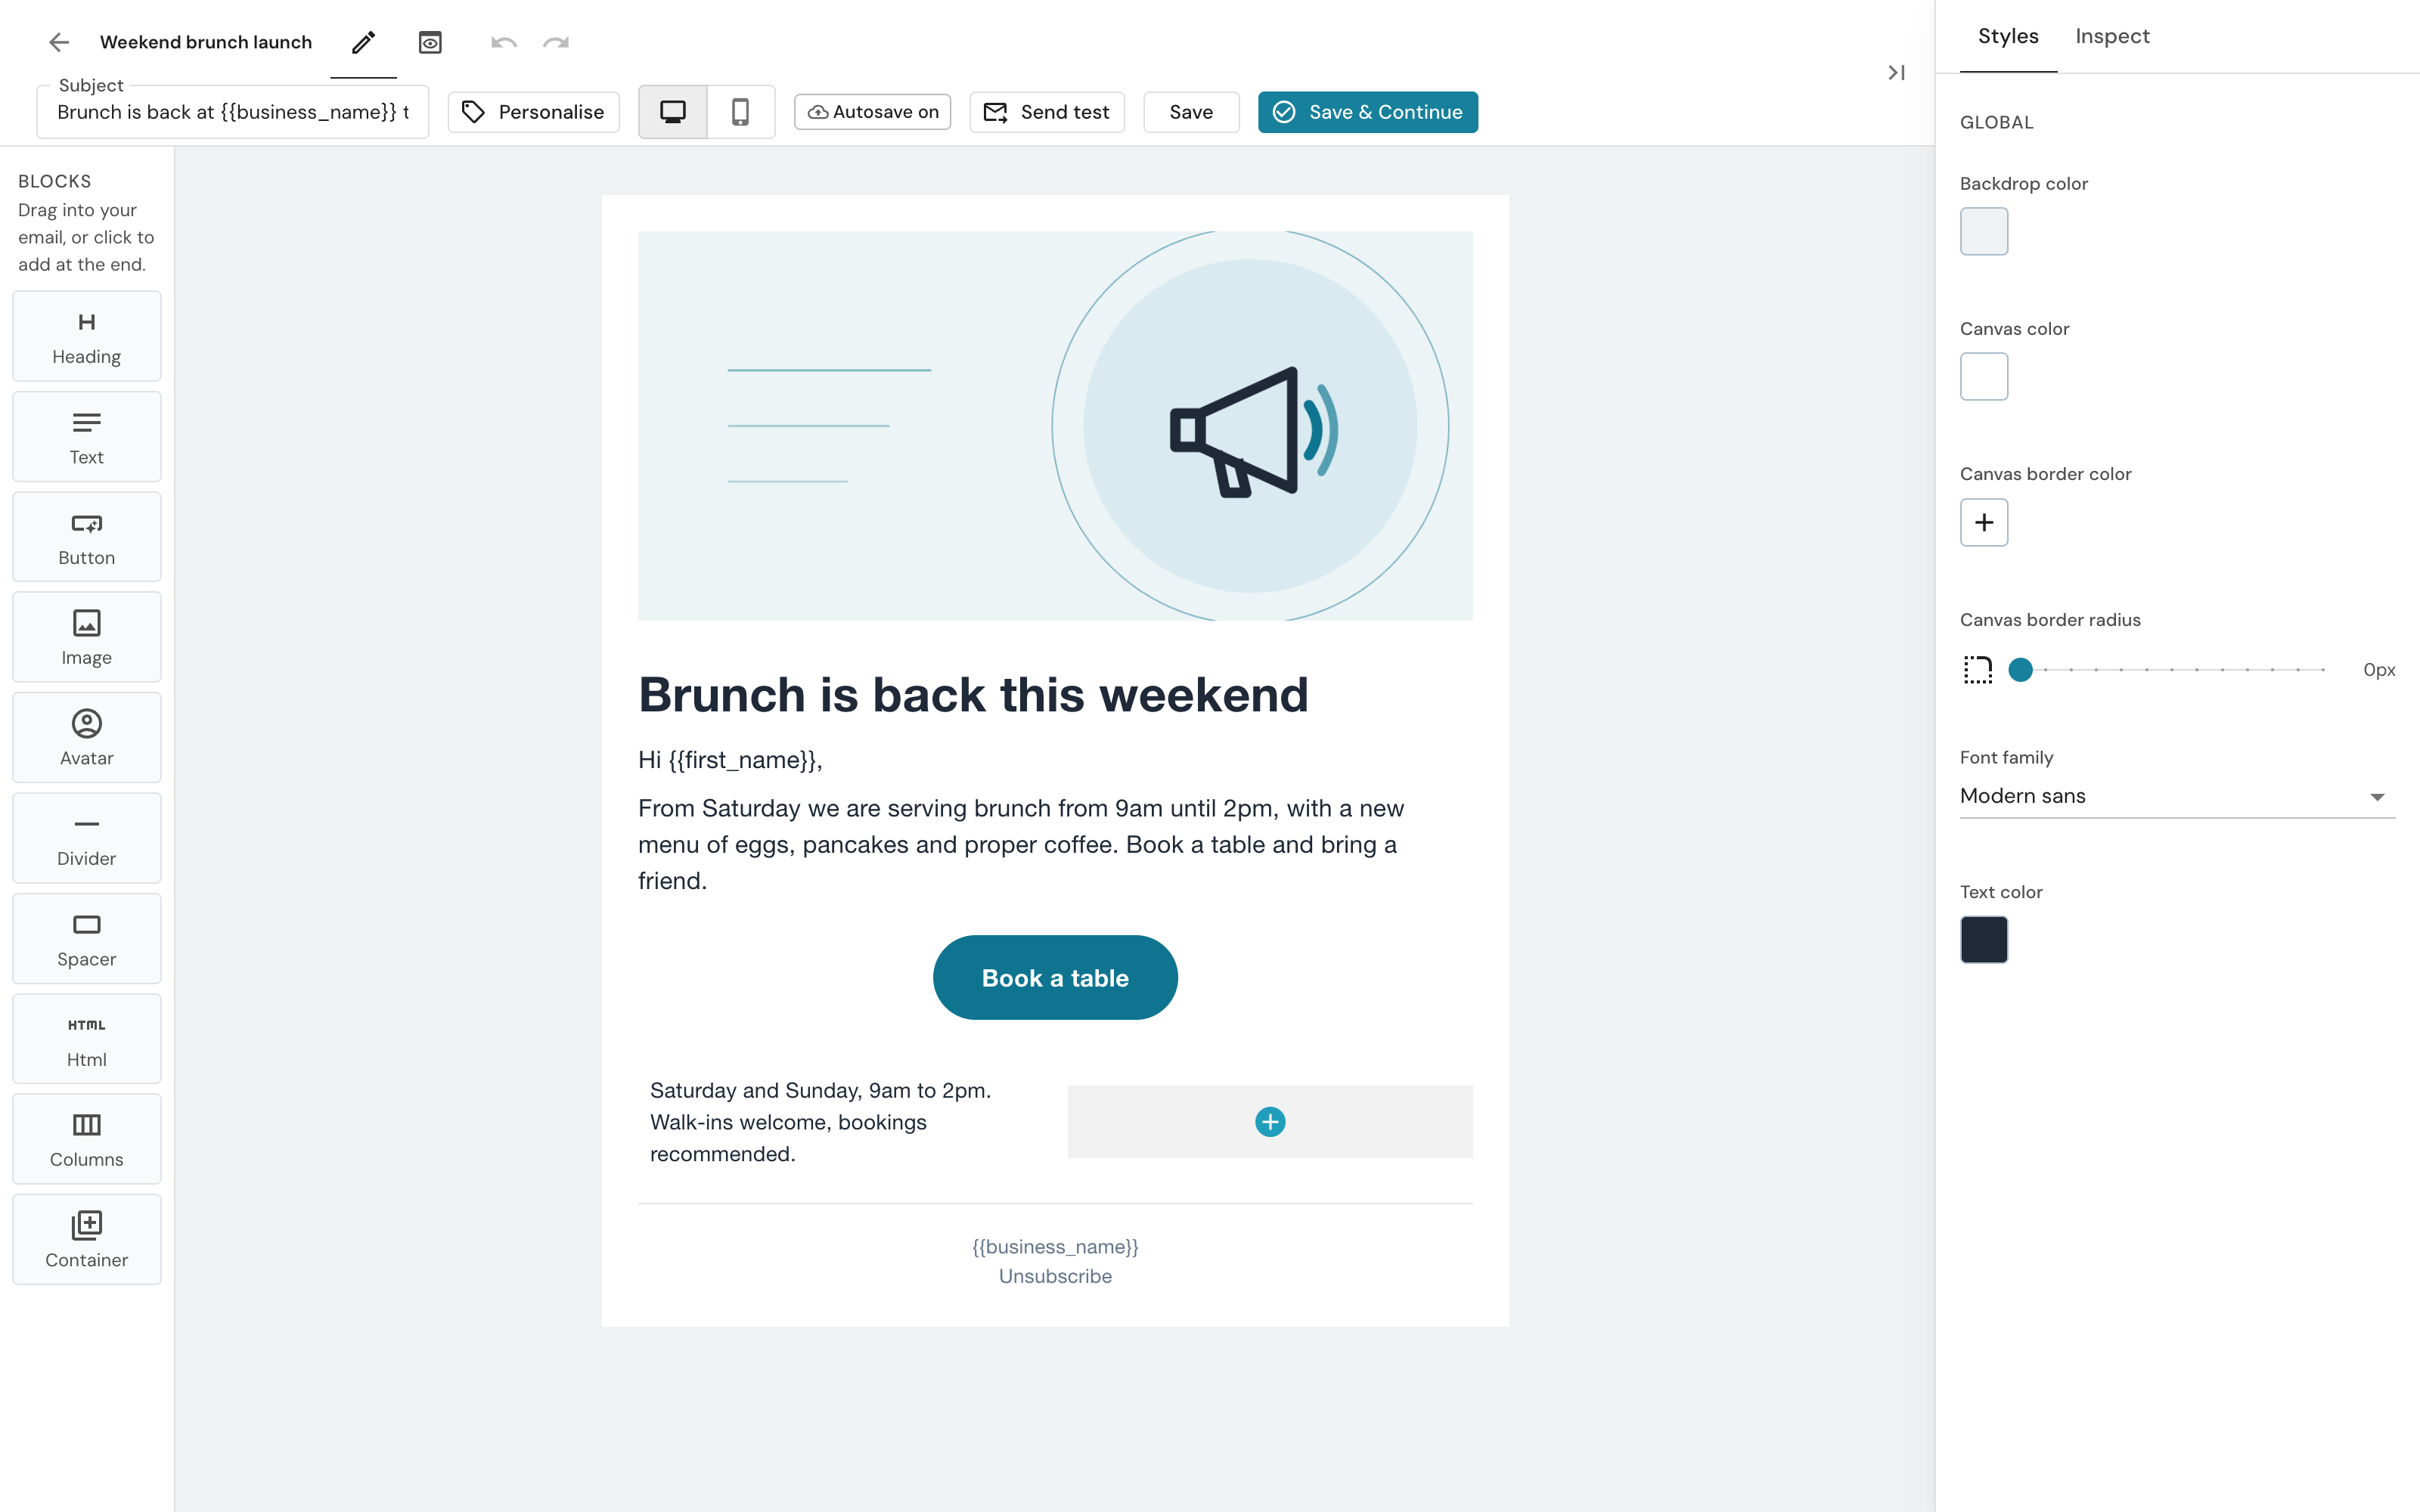
On a narrower window the top bar wraps onto a second line, the template name is hidden and the Personalise and Send test buttons show as icons with the same names when you hover them.
Step 1: Add a Block
Every block type sits in the Blocks panel. There are two ways to add one:
- Drag it in. Press and hold a tile, drag it over the email, and a blue line shows where it will land. Let go to drop it there
- Click it. The block is added at the bottom of the email, selected and ready to edit
A Button block being dragged out of the Blocks panel, with the blue line showing it will land between the heading and the text.
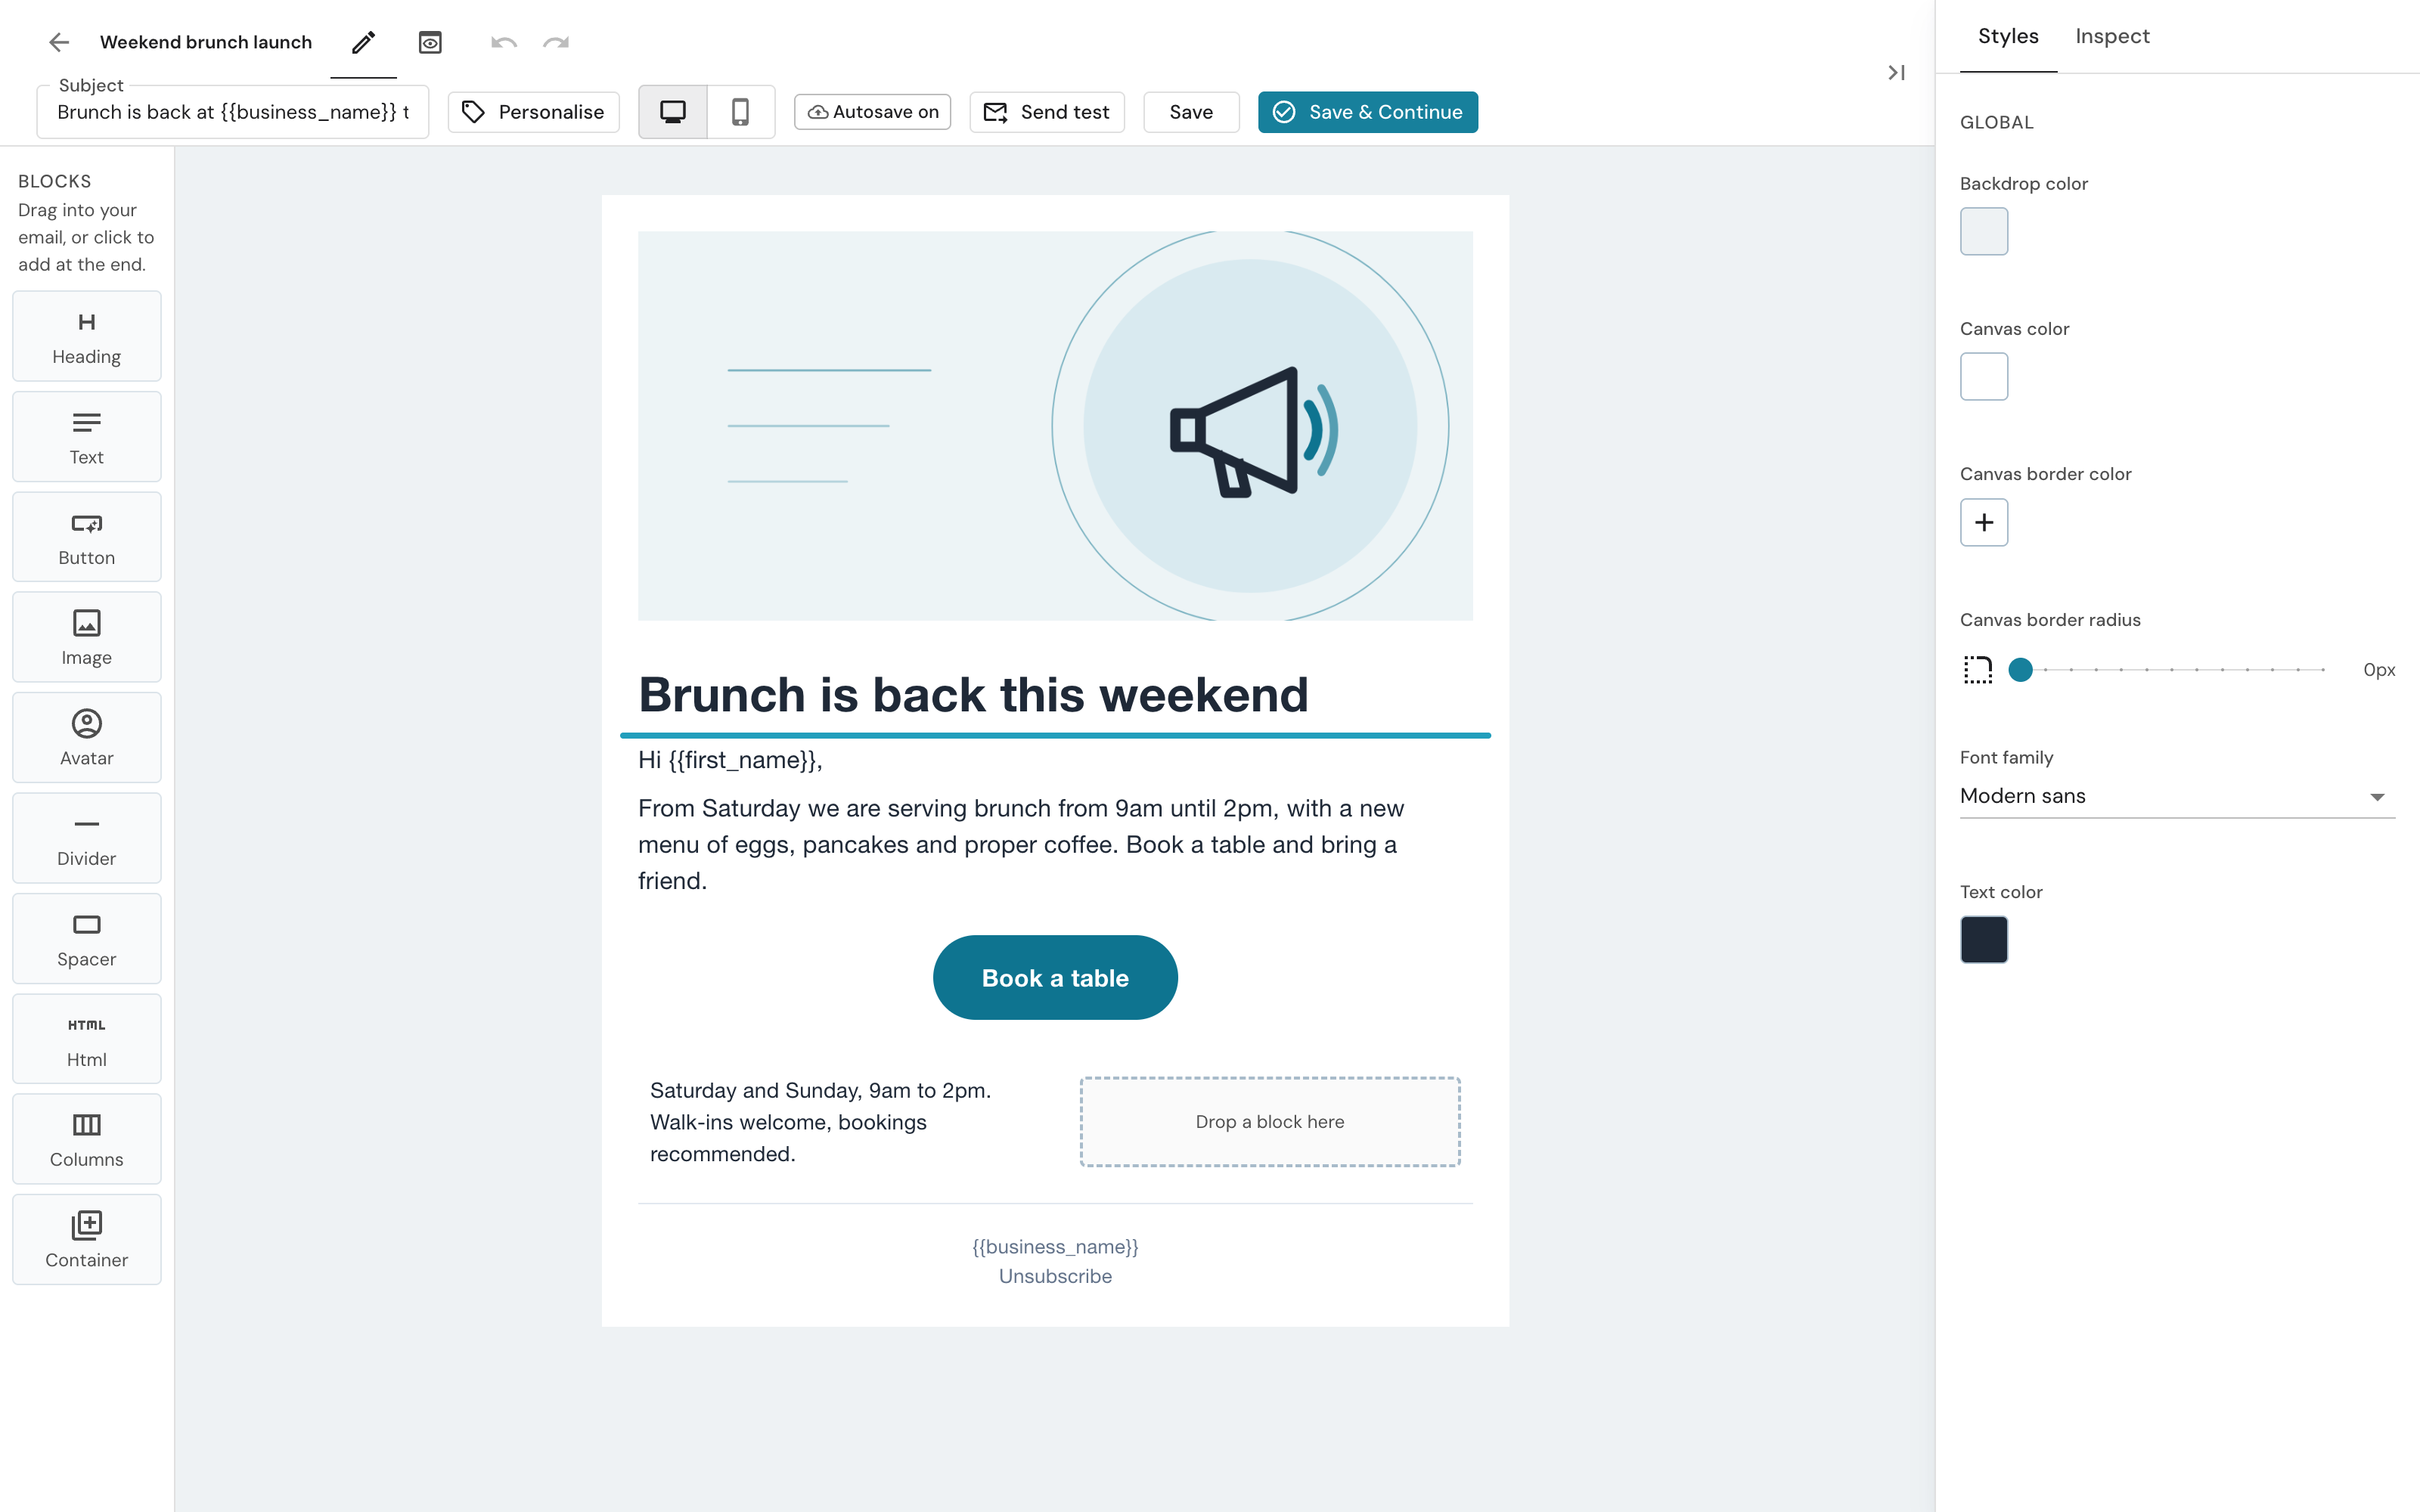
You can also hover the gap between two blocks and click the round + that appears to pick a block for exactly that spot. On screens narrower than about 1200 pixels the Blocks panel is hidden to leave room for the email, and the + is the way to add blocks.
| Block | What it is for |
|---|---|
| Heading | A headline: choose H1, H2 or H3 |
| Text | A paragraph. Turn on Markdown for bold, links and lists |
| Button | A call to action linking to your booking page, menu or offer |
| Image | A photo. Upload your own, pick from your library or paste a link |
| Avatar | A small round or square picture, for example the owner's photo beside a note |
| Divider | A thin line between sections |
| Spacer | Empty vertical space |
| Html | Your own HTML, for anything the other blocks cannot do |
| Columns | Two or three columns side by side; each column holds its own blocks |
| Container | A box with its own background colour and padding that holds other blocks |
Step 2: Move a Block
- Hover over a block. A grip (six dots) appears to its left. When a block is selected, the same grip sits at the top of its toolbar
- Press and hold the grip and drag. The block you are moving fades, and a blue line follows your pointer to show the drop position: the top half of another block means "before it", the bottom half means "after it"
- Let go to drop the block. It stays selected so you can carry on editing
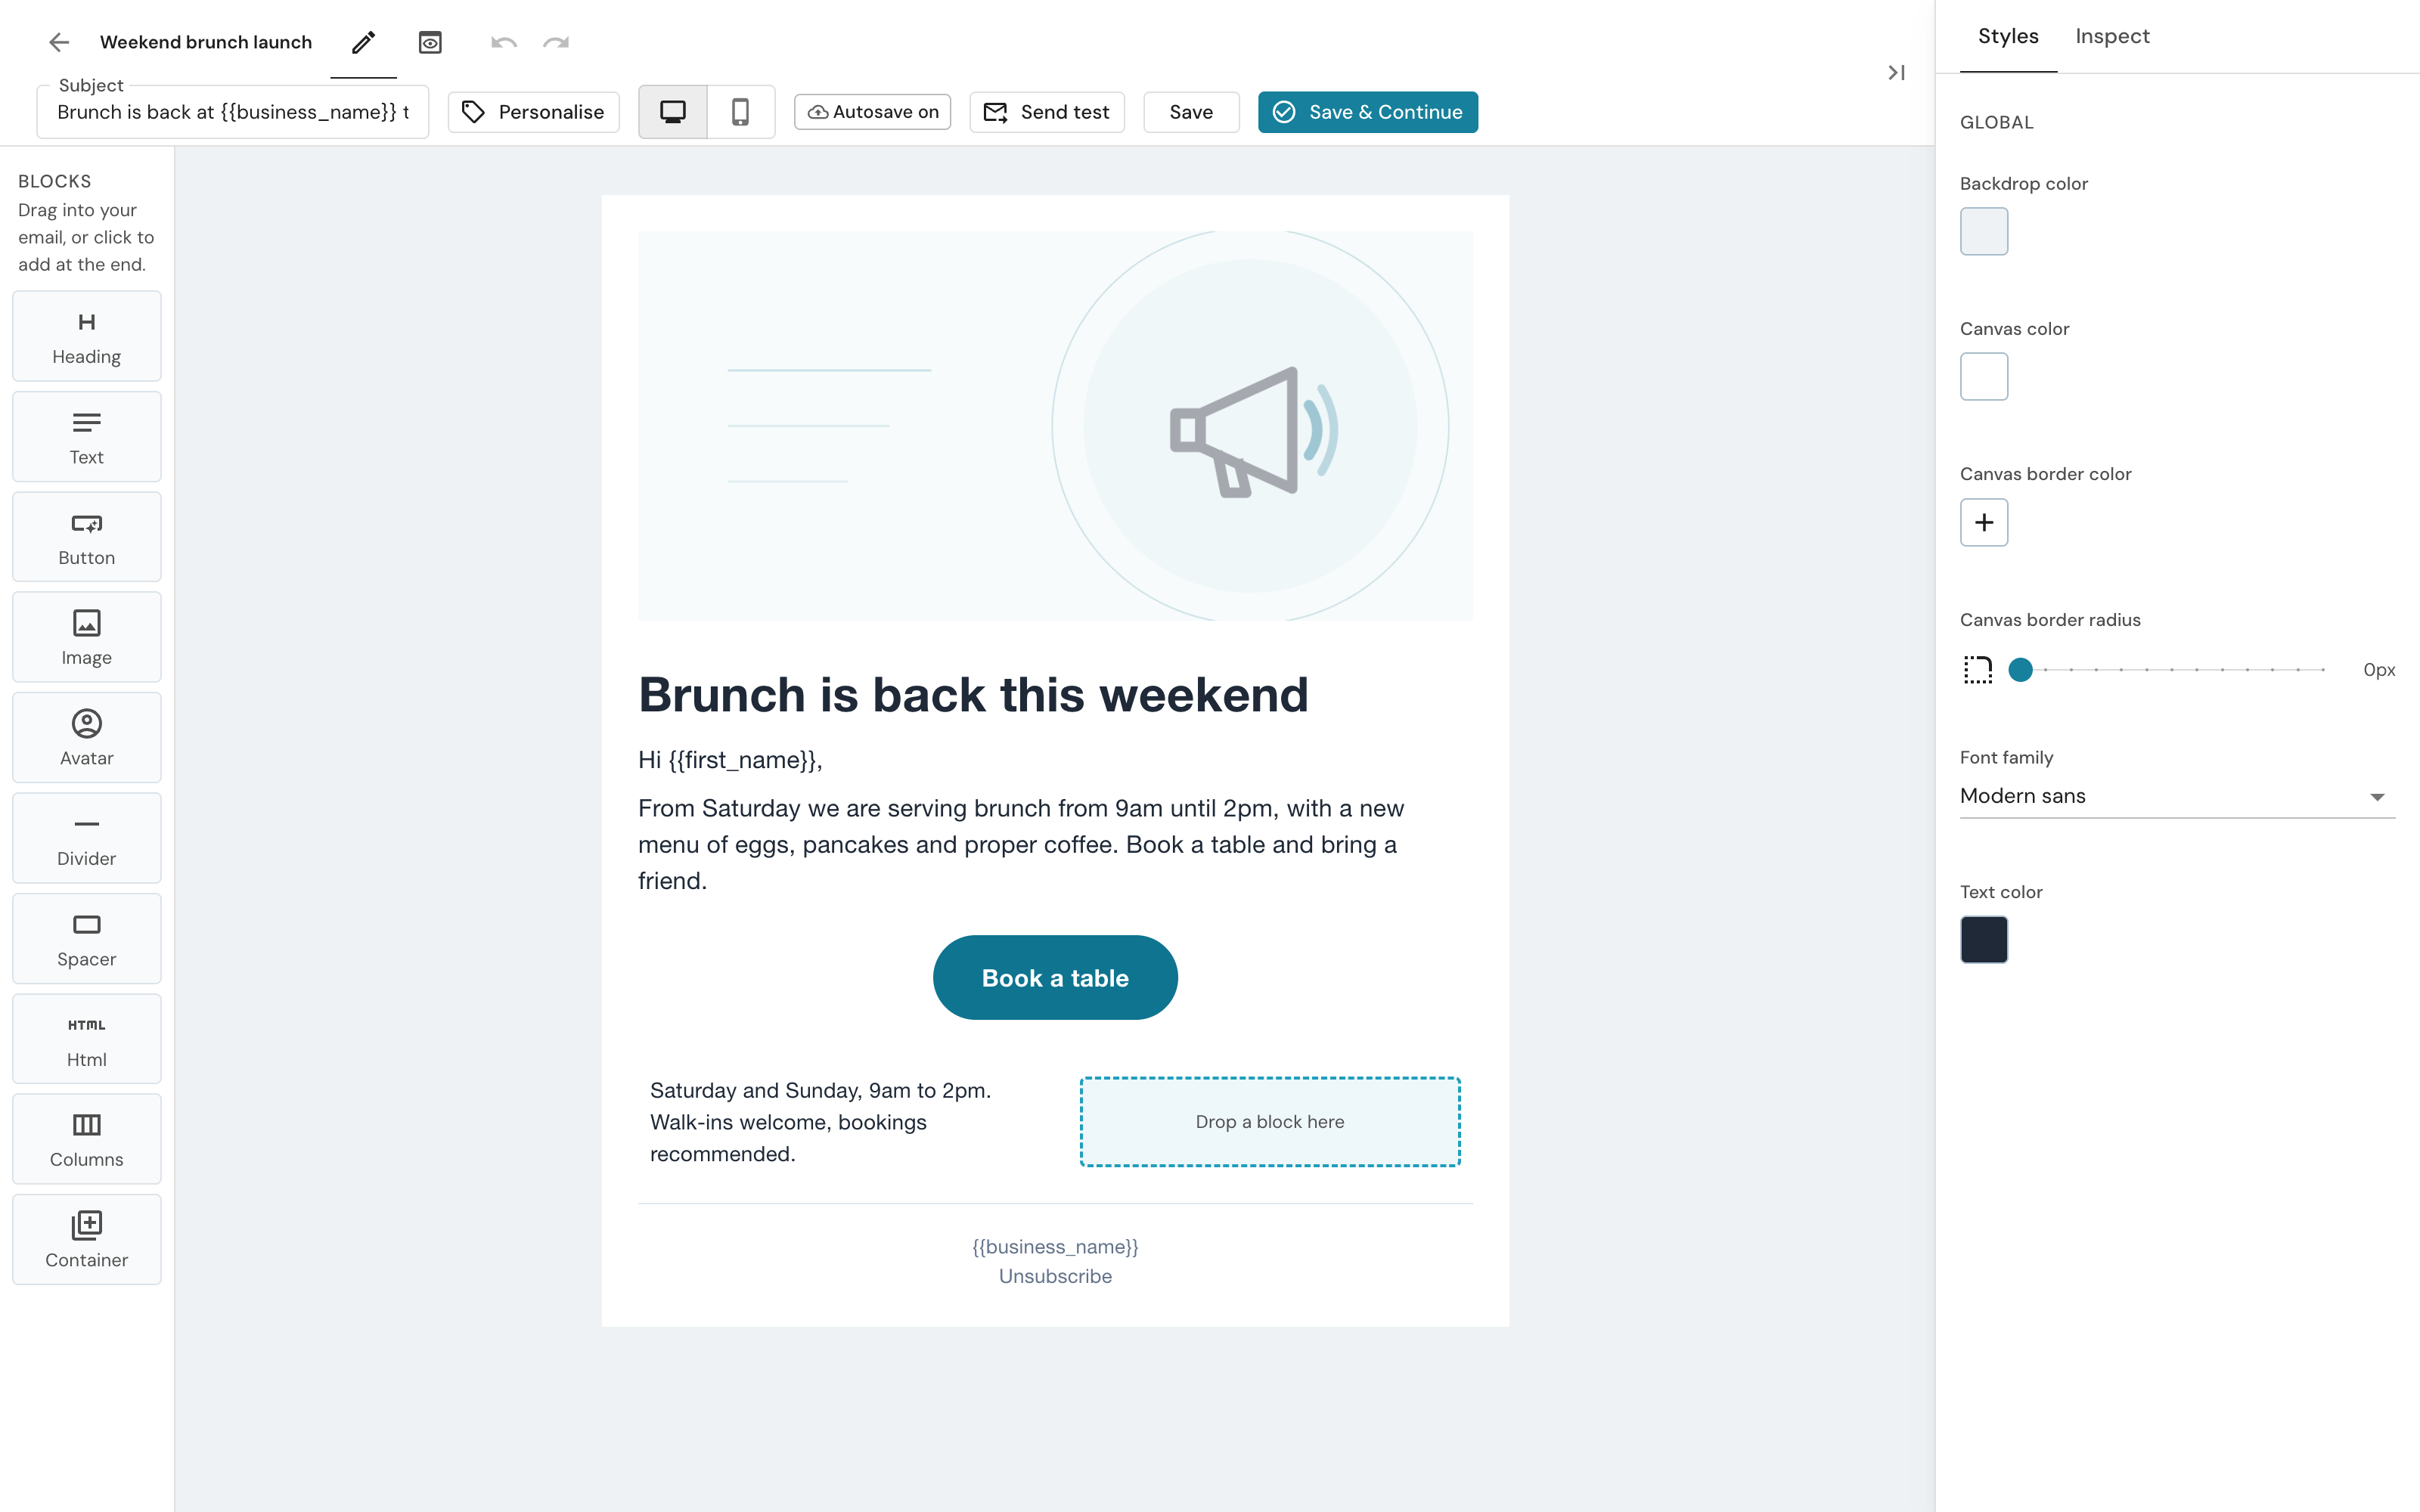
The Text block being dragged by its grip, with the blue line under the button showing where it will drop.
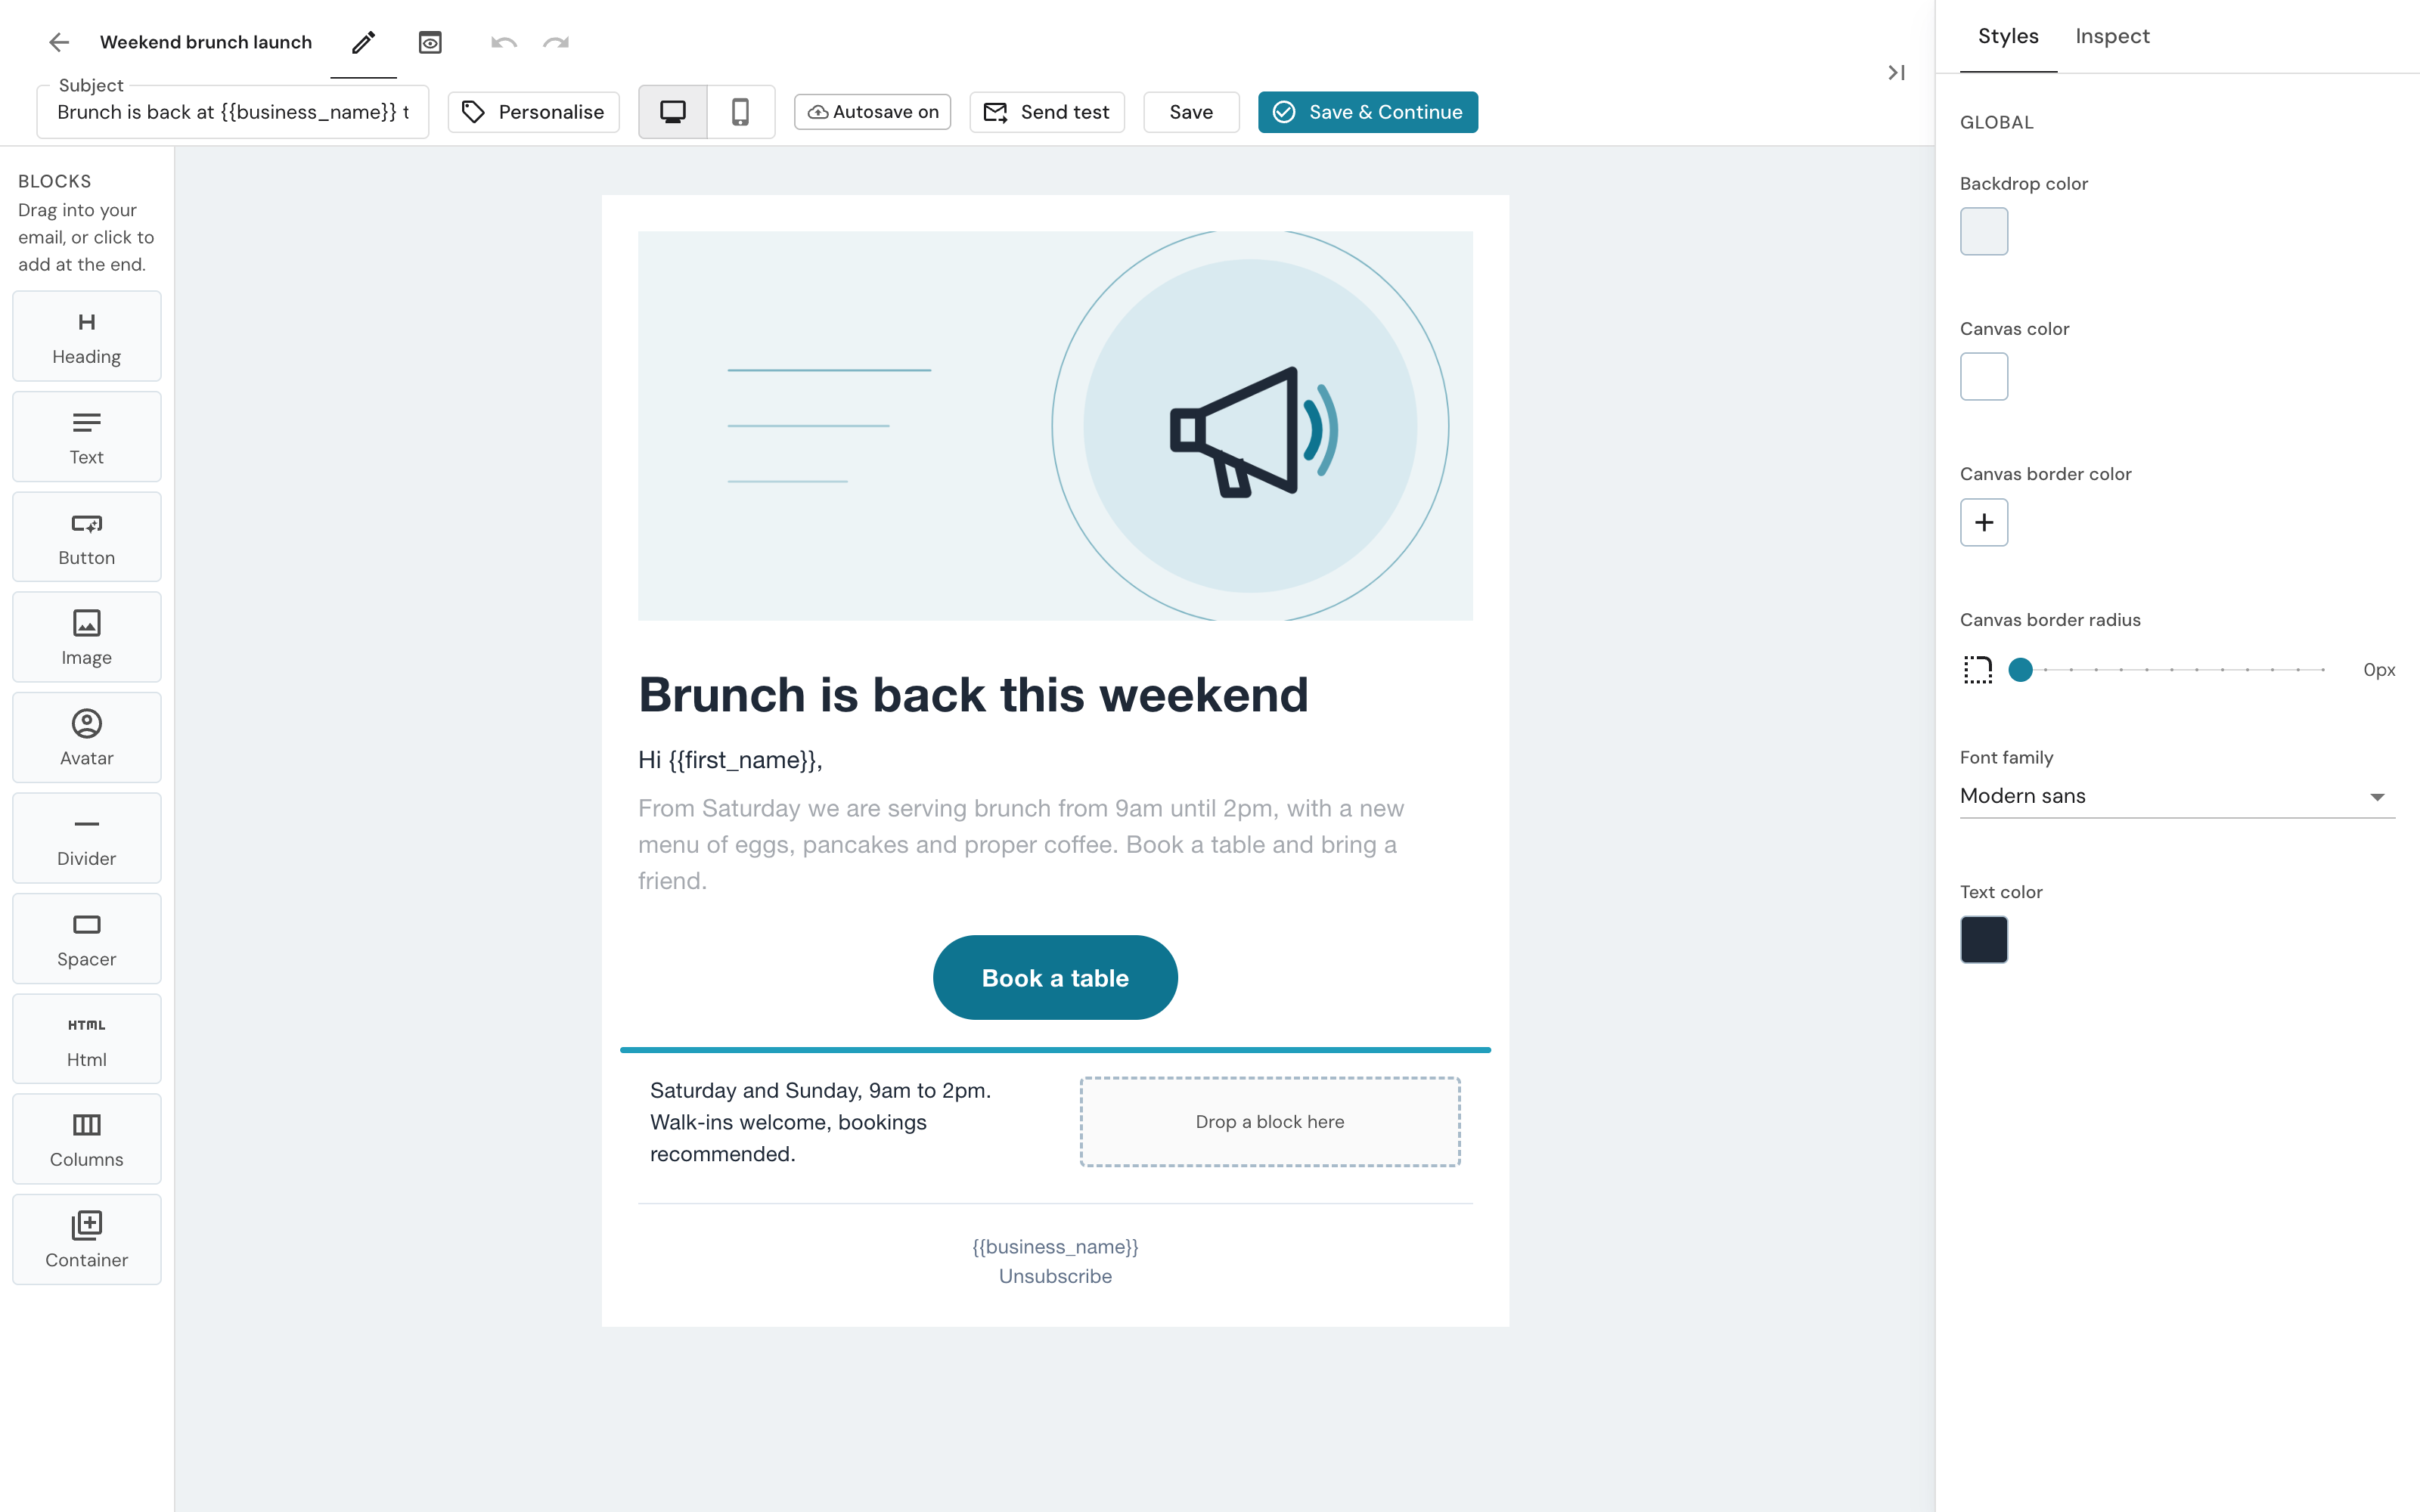
You can drop a block into a Container or into any column of a Columns block in the same way. An empty container or column shows a dashed Drop a block here box while you are dragging.
A few rules keep the layout sensible:
- A container cannot be dropped inside itself, and the slots inside it are greyed out while you drag it
- The two slots either side of the block you are dragging are greyed out too, because dropping there would change nothing
- Dropping on the grey backdrop lands the block on the last position the blue line showed. If no line has shown yet, nothing moves: letting go in the margin is how you change your mind
- On a touchscreen use the up and down arrows in the block toolbar instead, which move a block one place at a time
Step 3: Edit a Block
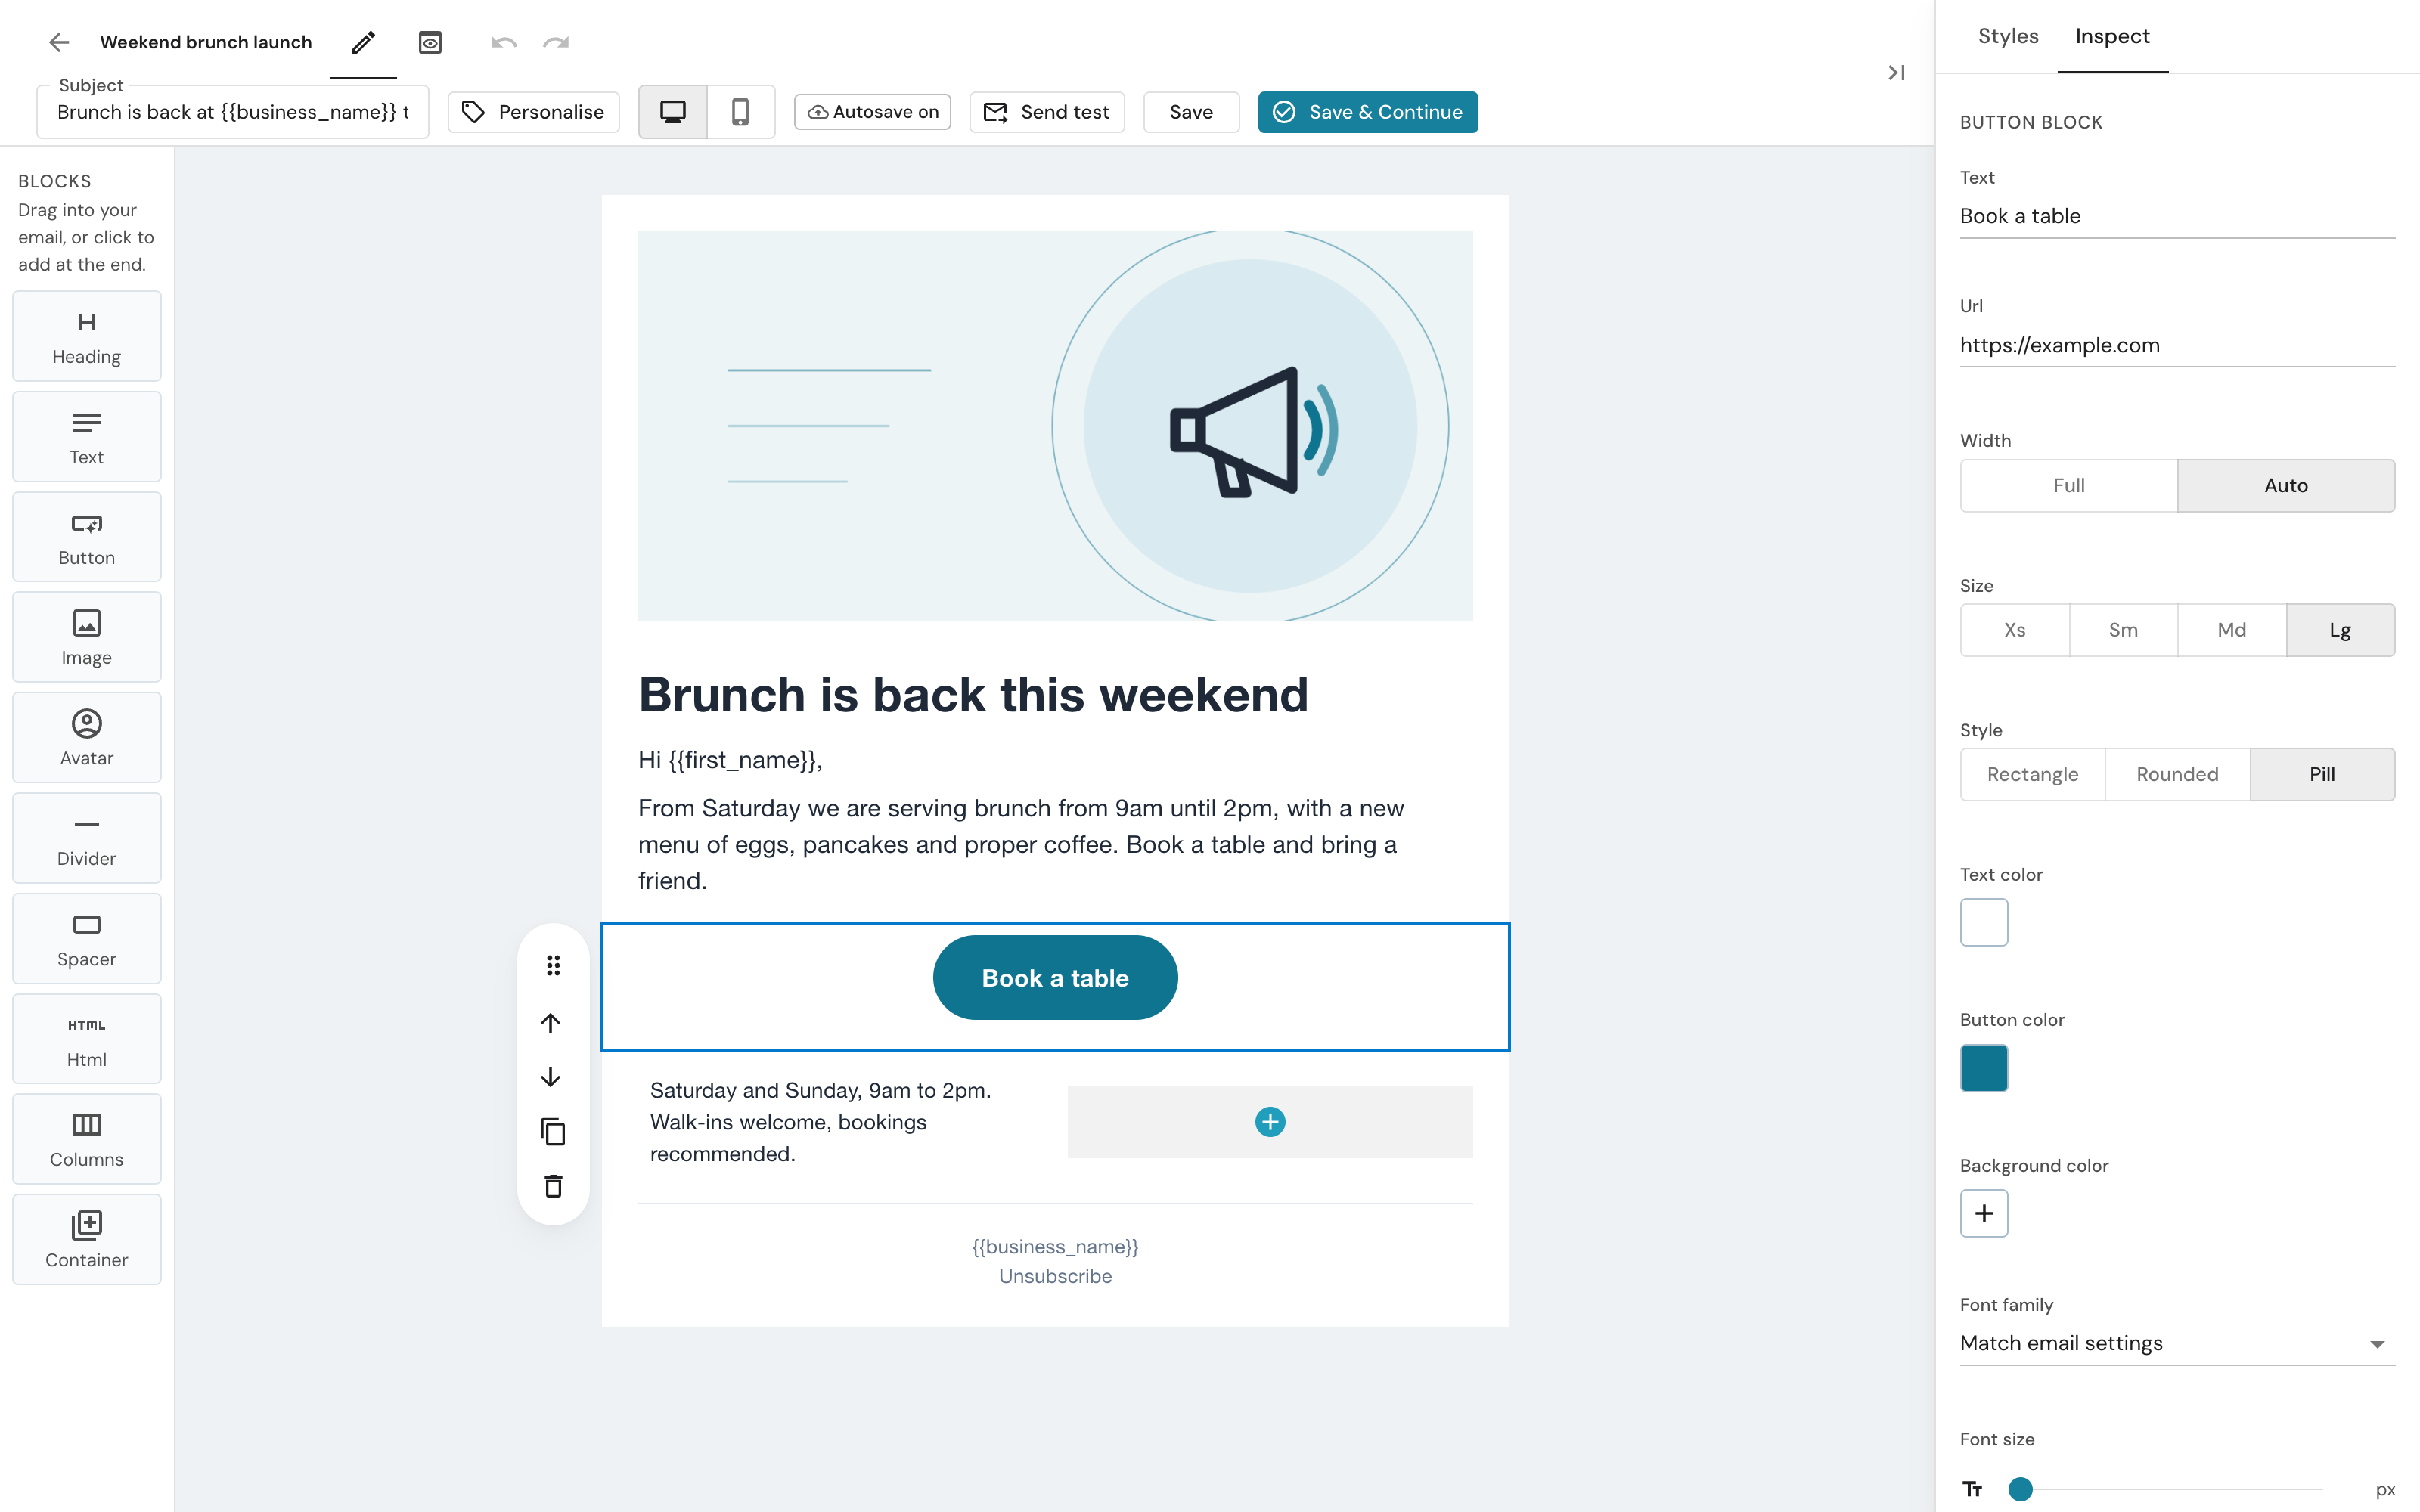
Click a block to select it. The right-hand panel switches to Inspect and shows that block's settings: the words, the link, the image, alignment, font size, colours and padding. Changes appear in the email as you make them.
The Inspect panel for a selected Button block, with its text, link, colours and size.
The Styles tab covers the whole email: the backdrop colour, the email's background colour, the default text colour and the font family. Click anywhere on the grey backdrop to return to it.
Step 4: Duplicate, Delete, Undo
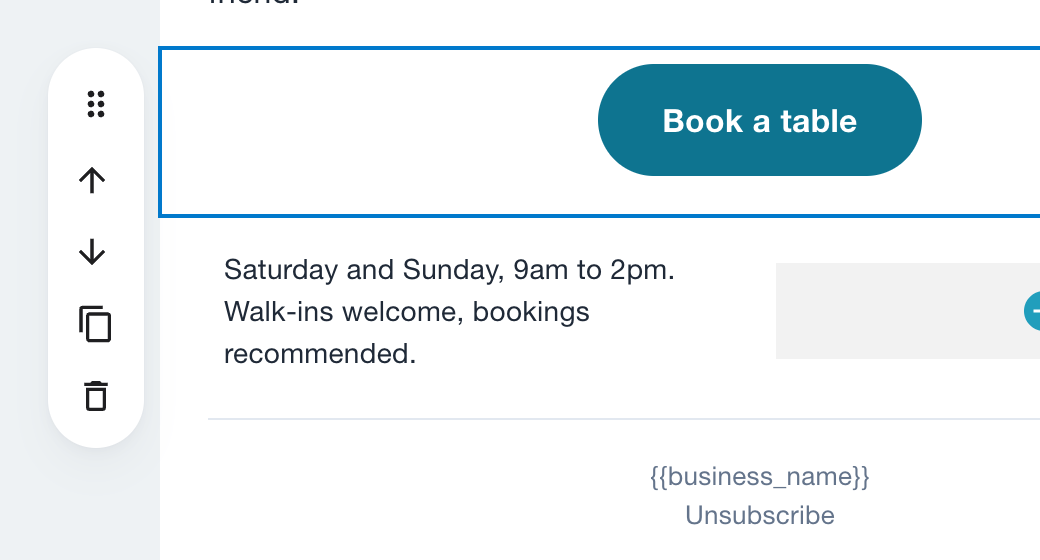
The toolbar beside a selected block has, from top to bottom: the drag grip, Move up, Move down, Duplicate and Delete. Duplicate places an exact copy directly beneath the original, contents included. Delete removes the block and, for a container or columns block, everything inside it.
The block toolbar with its grip, move arrows, duplicate and delete buttons.
Keyboard shortcuts:
| Keys | What happens |
|---|---|
| Delete or Backspace | Removes the selected block, when nothing else on the page has focus (never while you are typing in a box or using a control) |
| Esc | Deselects the block |
| Ctrl+Z (Windows) or ⌘Z (Mac) | Undo |
| Shift+Ctrl+Z or ⇧⌘Z | Redo |
Undo and redo also have buttons in the top bar. Every drop, move, duplicate and delete is one undo step, so one press puts a block back where it came from.
Step 5: Personalise
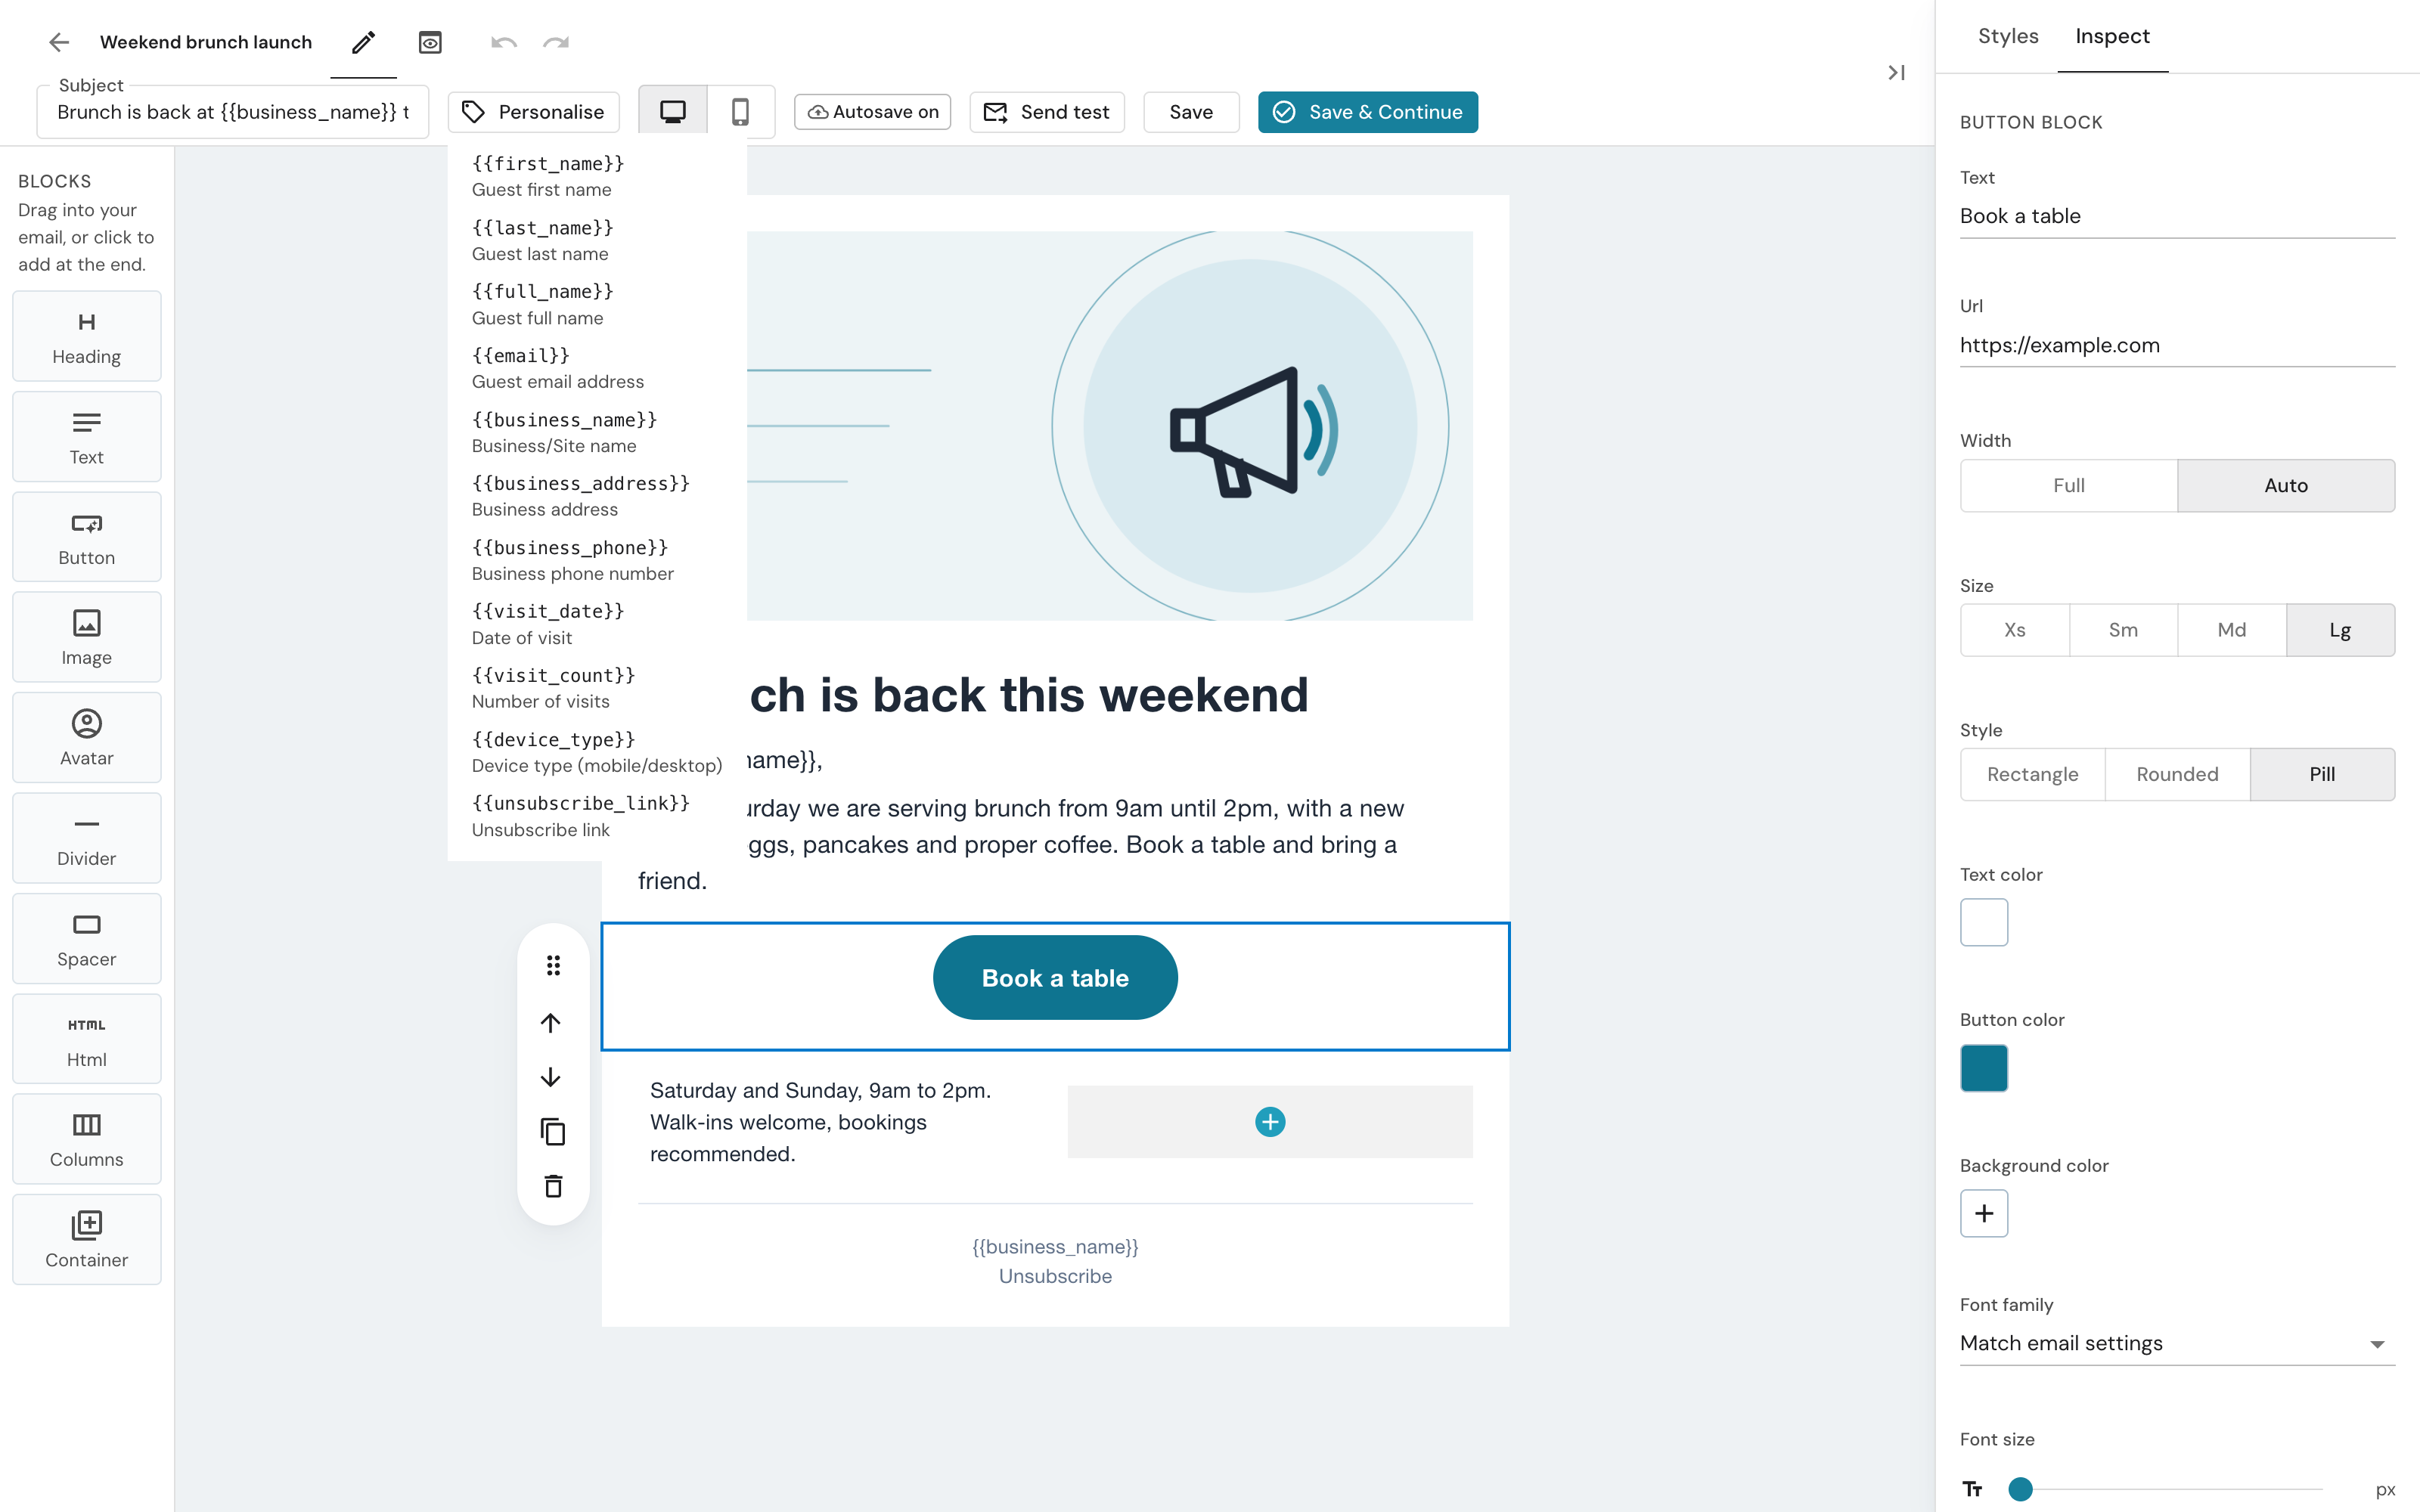
Click Personalise in the top bar to see the merge tags you can use, such as the guest's first name and your venue name. Click a tag to copy it, then paste it into any Text or Heading block, or into the Subject box. When the email is sent, each tag is replaced with the real value for that guest.
The Personalise menu listing the available merge tags.
Step 6: Preview
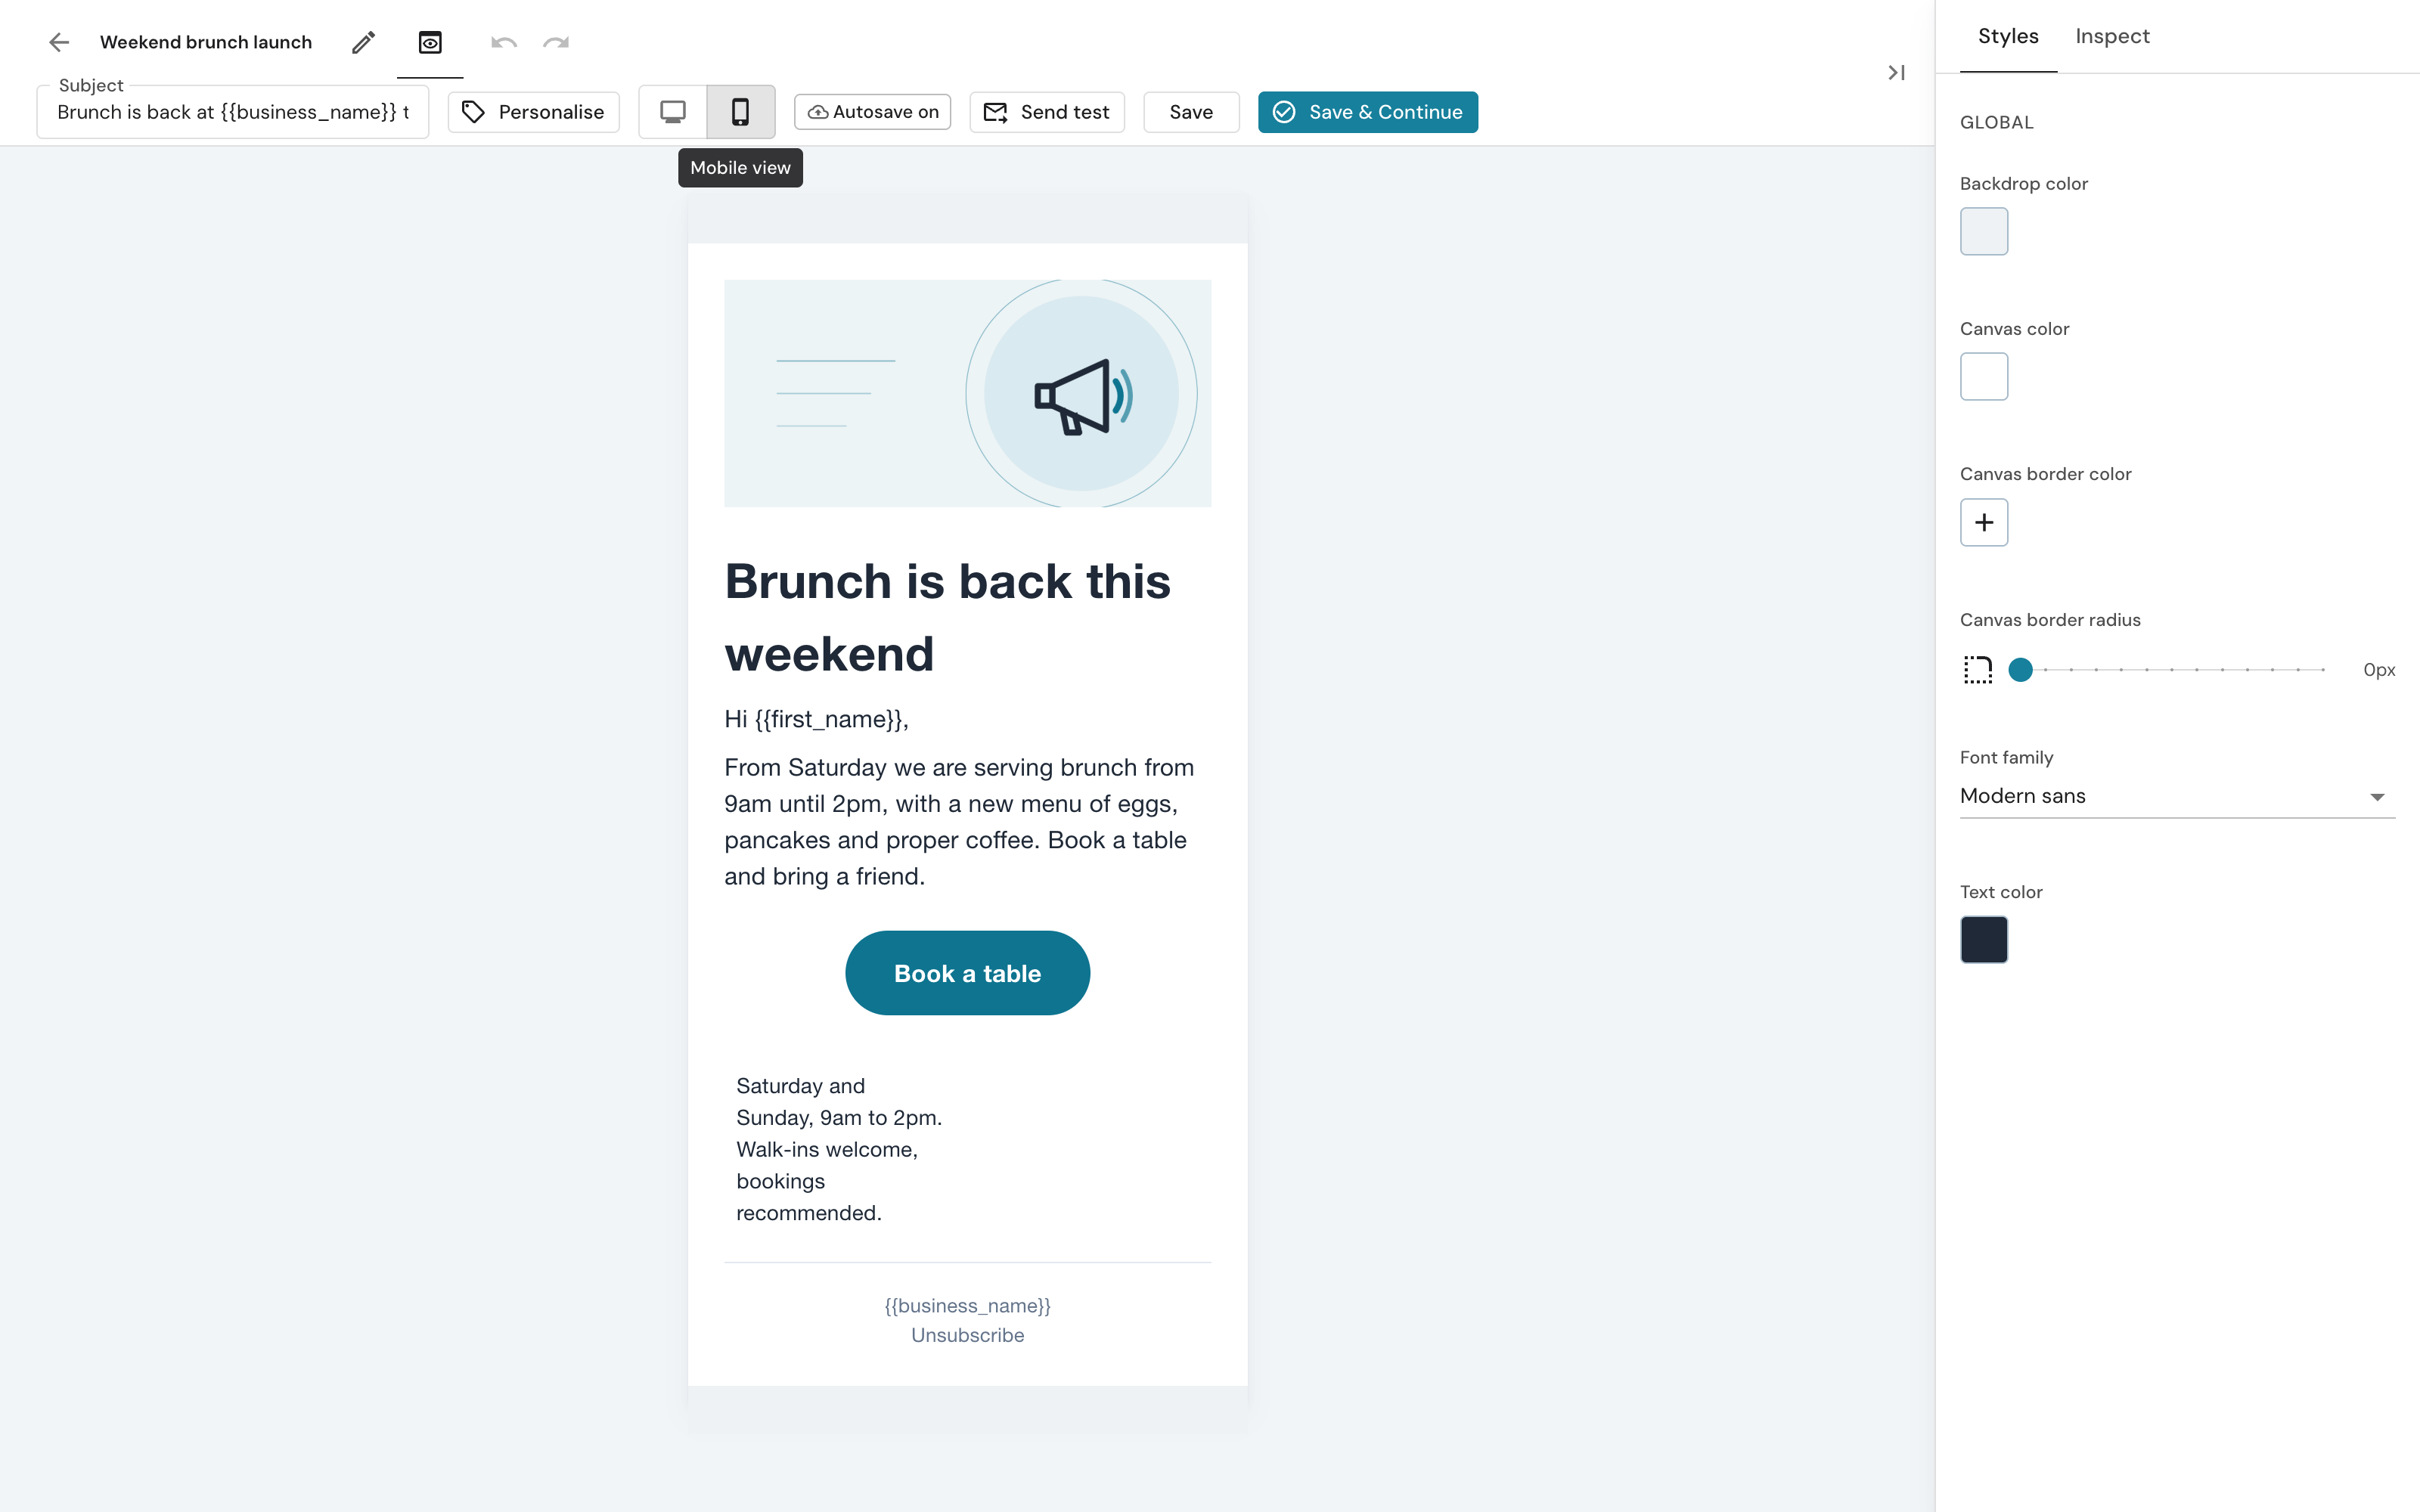
Click the Preview tab to see the email without the editing controls, and the phone icon to see it at phone width. When the email is sent, two and three column layouts stack on top of each other in mail apps on small screens.
The Preview tab at phone width.
Step 7: Save, Test and Finish
The builder saves on its own ten seconds after your last change. The status beside the buttons tells you where you stand: Unsaved changes while an edit, including a change to the Subject box, is waiting to be saved, Saving… while it goes up, and Saved once it is on the server. Click Save to save straight away.
The save status, Send test, Save and Save & Continue buttons in the top bar.

- Send test saves the design and emails it to your own login address with sample values filled in, so you can check it in a real inbox before a campaign goes out. Test emails are limited to a few per minute
- Save & Continue saves and takes you back to where you came from: the Templates page, or the campaign wizard if you opened the builder from there
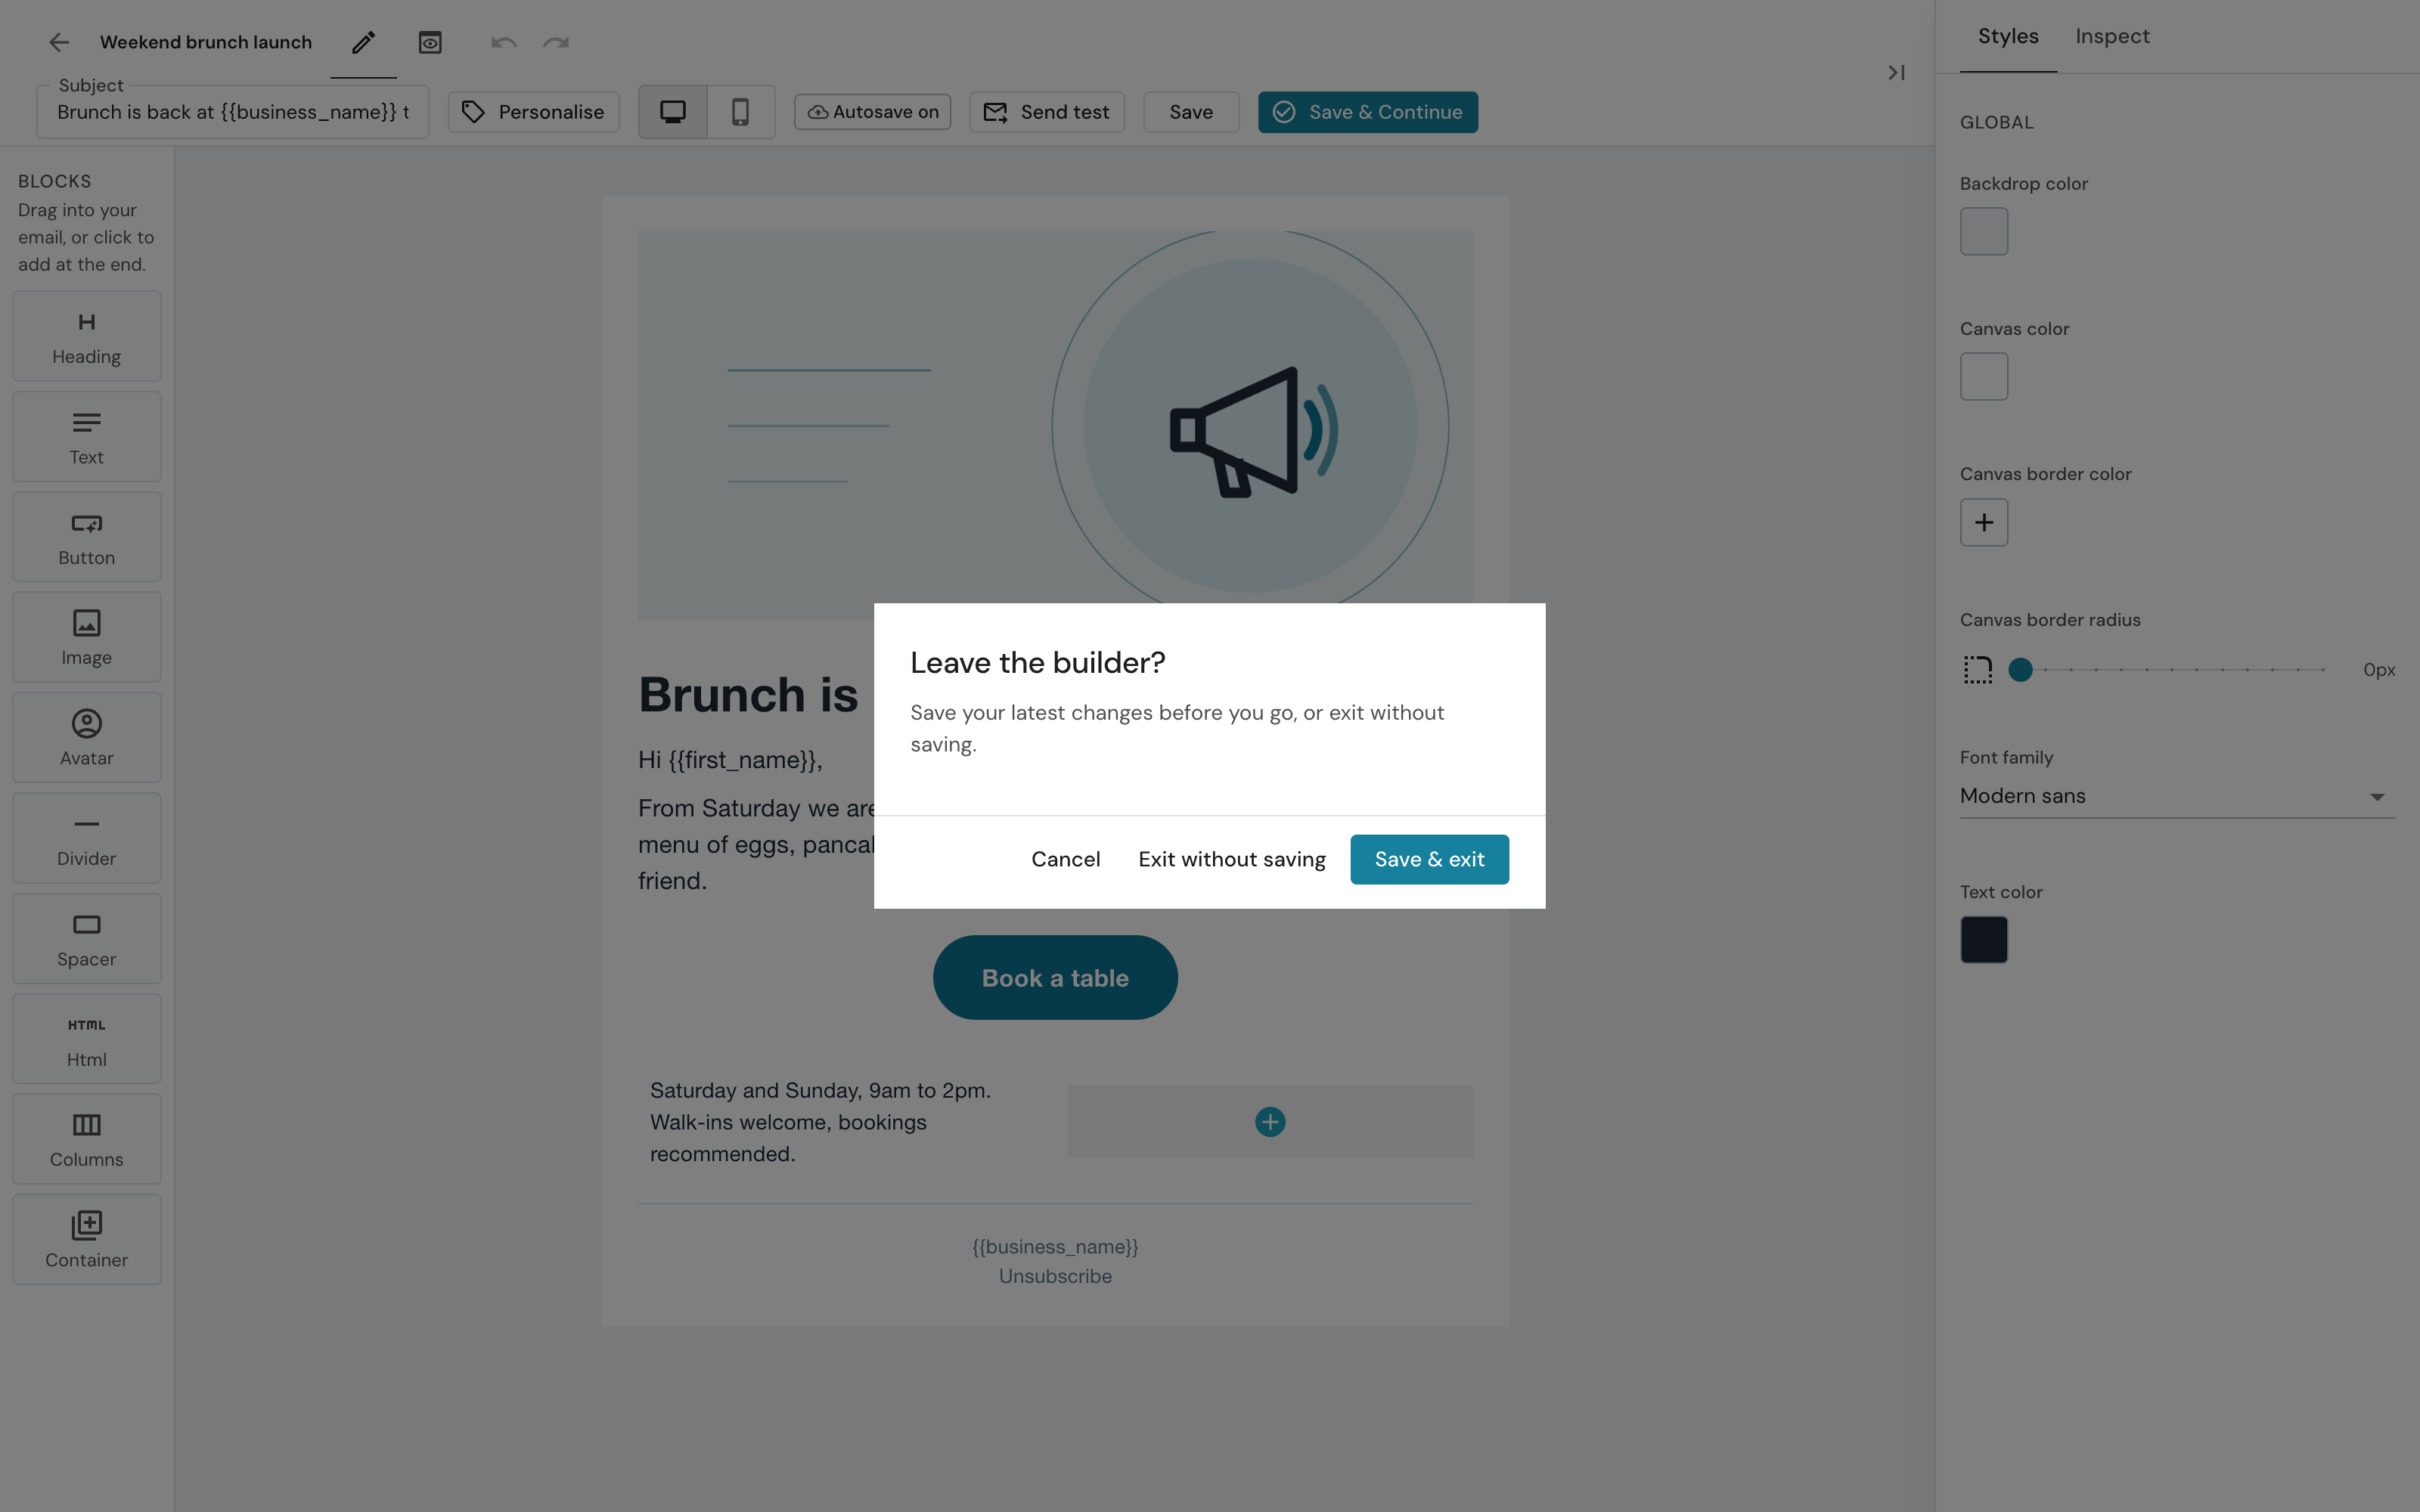
- The back arrow (top left) asks whether to Save & exit or Exit without saving, so you cannot lose work by accident
- If you try to close or refresh the tab while changes are still pending, your browser asks you to confirm first
The Unsubscribe Footer
Every marketing email must carry an unsubscribe link. The starters include one in the footer. If your design has no unsubscribe link when it is saved, CaptiFi adds a short footer with one for you, and a note under the email in the builder tells you so. You can restyle the footer, but you cannot send without it.
Troubleshooting
| Issue | Cause | Solution |
|---|---|---|
| A block will not drop where I want | You are dragging a container onto itself, or onto its own current position | Those slots are greyed out. Drop it anywhere else, or use the move arrows |
| Nothing happens when I drag on my phone or tablet | Touchscreens do not support drag and drop in the builder | Select the block and use the Move up and Move down arrows |
| The status says Unsaved changes | Autosave waits ten seconds after your last edit | Wait a moment or click Save |
| Undo did not put my block back | Undo works one step at a time | Press it again; every move is its own step |
| Edit is greyed out on a starter | Starters are shared designs | Click Use template to copy it into your library, then edit the copy |
| Test email did not arrive | Sent to your login address; a few per minute allowed | Check spam and the address on your account, then try again in a minute |
Related Features
- Email Campaigns: send the template to an audience
- Email Automations: send it automatically when a guest connects, returns or stays away
- Email Marketing Best Practices: what to put in the email