
Appearance
How to set up the MailerLite integration with CaptiFi
Follow the steps below and guests who accept marketing on your WiFi splash page join your MailerLite groups automatically, ready for your campaigns and automations.
Time needed: about 10 minutes.
What this integration does
When a guest connects to your WiFi and accepts marketing, CaptiFi adds them to the MailerLite groups you choose, with their email address and name. MailerLite matches subscribers by email, so a returning guest updates their existing subscriber instead of creating a duplicate. Any MailerLite automation that starts when someone joins one of those groups runs for WiFi guests too, so a welcome email can go out from the WiFi sign-in.
Before you start
- A MailerLite account
- A CaptiFi plan that includes integrations (Growth or above)
- Your venue live in CaptiFi with a splash page that collects an email address
Part 1: Create your MailerLite API token
Step 1: Open the MailerLite API integration
Log in to MailerLite and click Integrations in the left sidebar. Under MailerLite API, click Use next to API.
Step 2: Generate a token
Click Generate new token and give it a name you will recognise later, for example CaptiFi WiFi.
Leave the IP allowlist empty
MailerLite lets you limit a token to certain IP addresses. Leave that empty for the CaptiFi token, or CaptiFi cannot reach your account and every sync is refused.
Step 3: Copy the token straight away
Click Create token. MailerLite shows the token once, so copy it now (or click Download to save it as a text file) and keep it somewhere safe. The token is long, so make sure you copy all of it.
Part 2: Find your group IDs
Step 4: Choose or create the groups guests should join
In MailerLite go to Subscribers, then Groups. Pick the group you want WiFi guests added to, or create a new one, for example WiFi Guests. You can add guests to up to 10 groups.
Step 5: Copy each group's ID
MailerLite lists the ID of each group with the group under Subscribers > Groups. Copy the ID of every group guests should join.
Not sure of an ID?
Enter your token and your best guess at the group ID in CaptiFi and press Test connection (Step 9). If MailerLite has no group with that ID, or you typed the group's name, the test lists the groups on your account with their IDs, so you can copy the right one from there.
Part 3: Connect MailerLite in CaptiFi
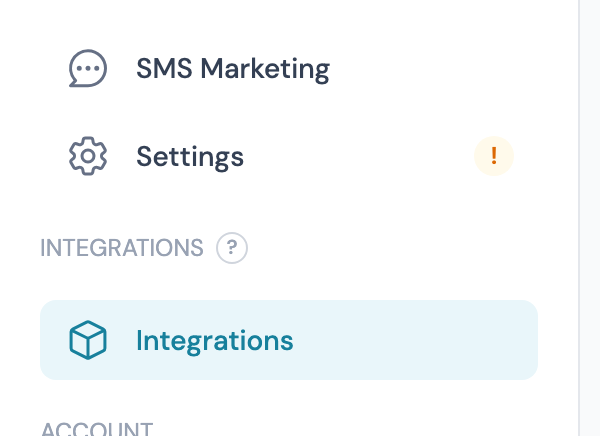
Step 6: Open the Integrations page
Log in to my.captifi.io and click Integrations in the left sidebar.
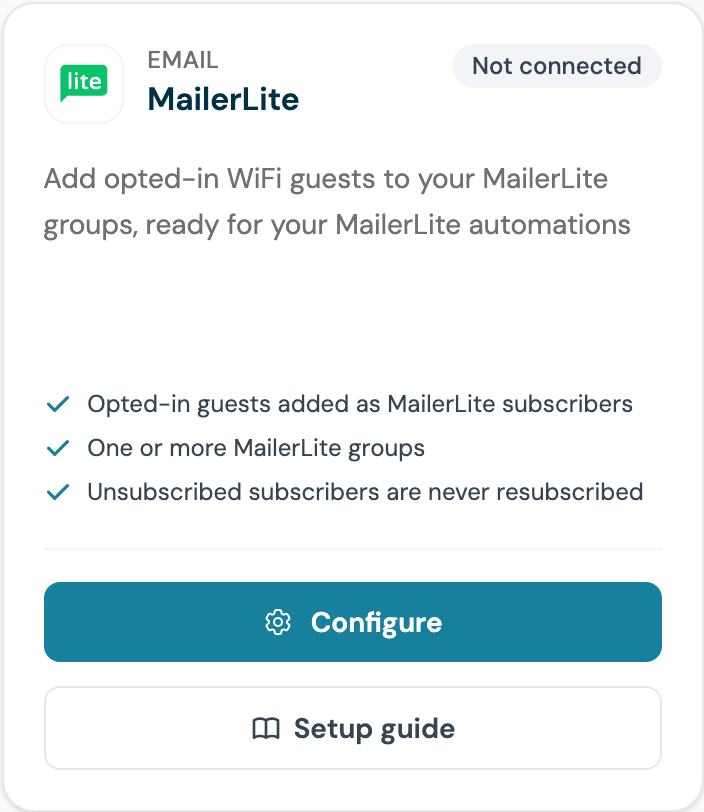
Step 7: Find the MailerLite card and click Configure
The Setup guide button under it opens this page.
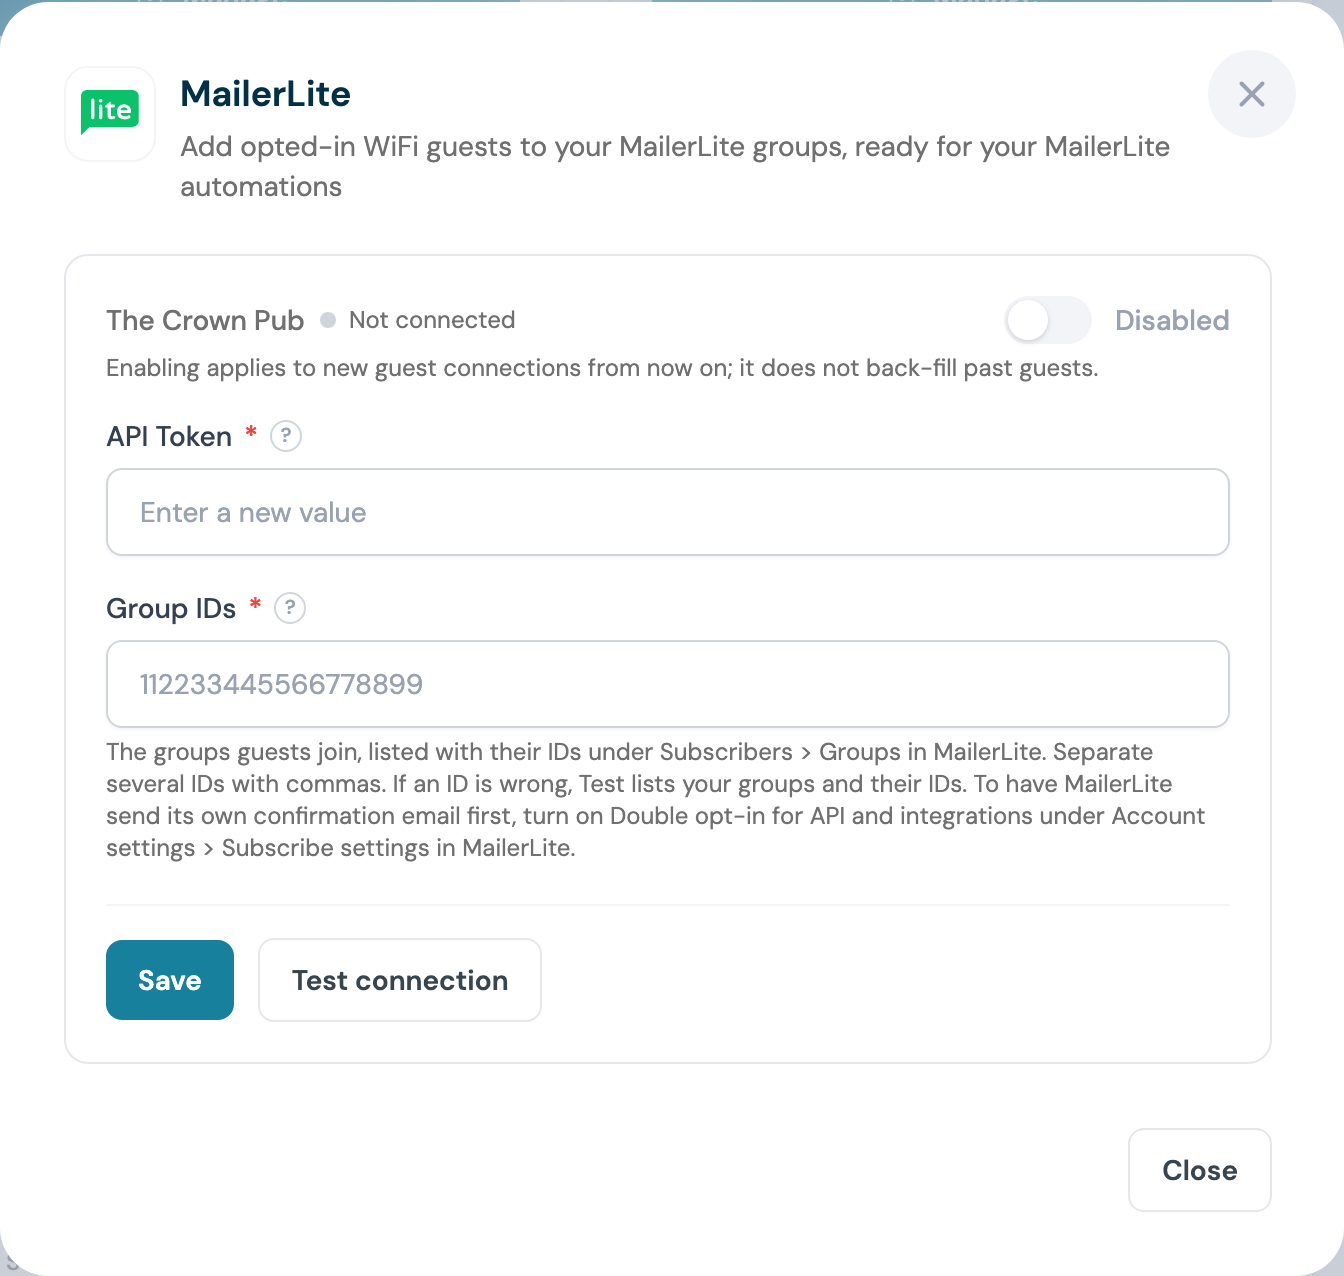
Step 8: Paste the API token and group IDs
Both fields are required. Separate several group IDs with commas. The token is write-only: once saved, CaptiFi shows only its first and last few characters, with a Replace button if you ever need to change it.
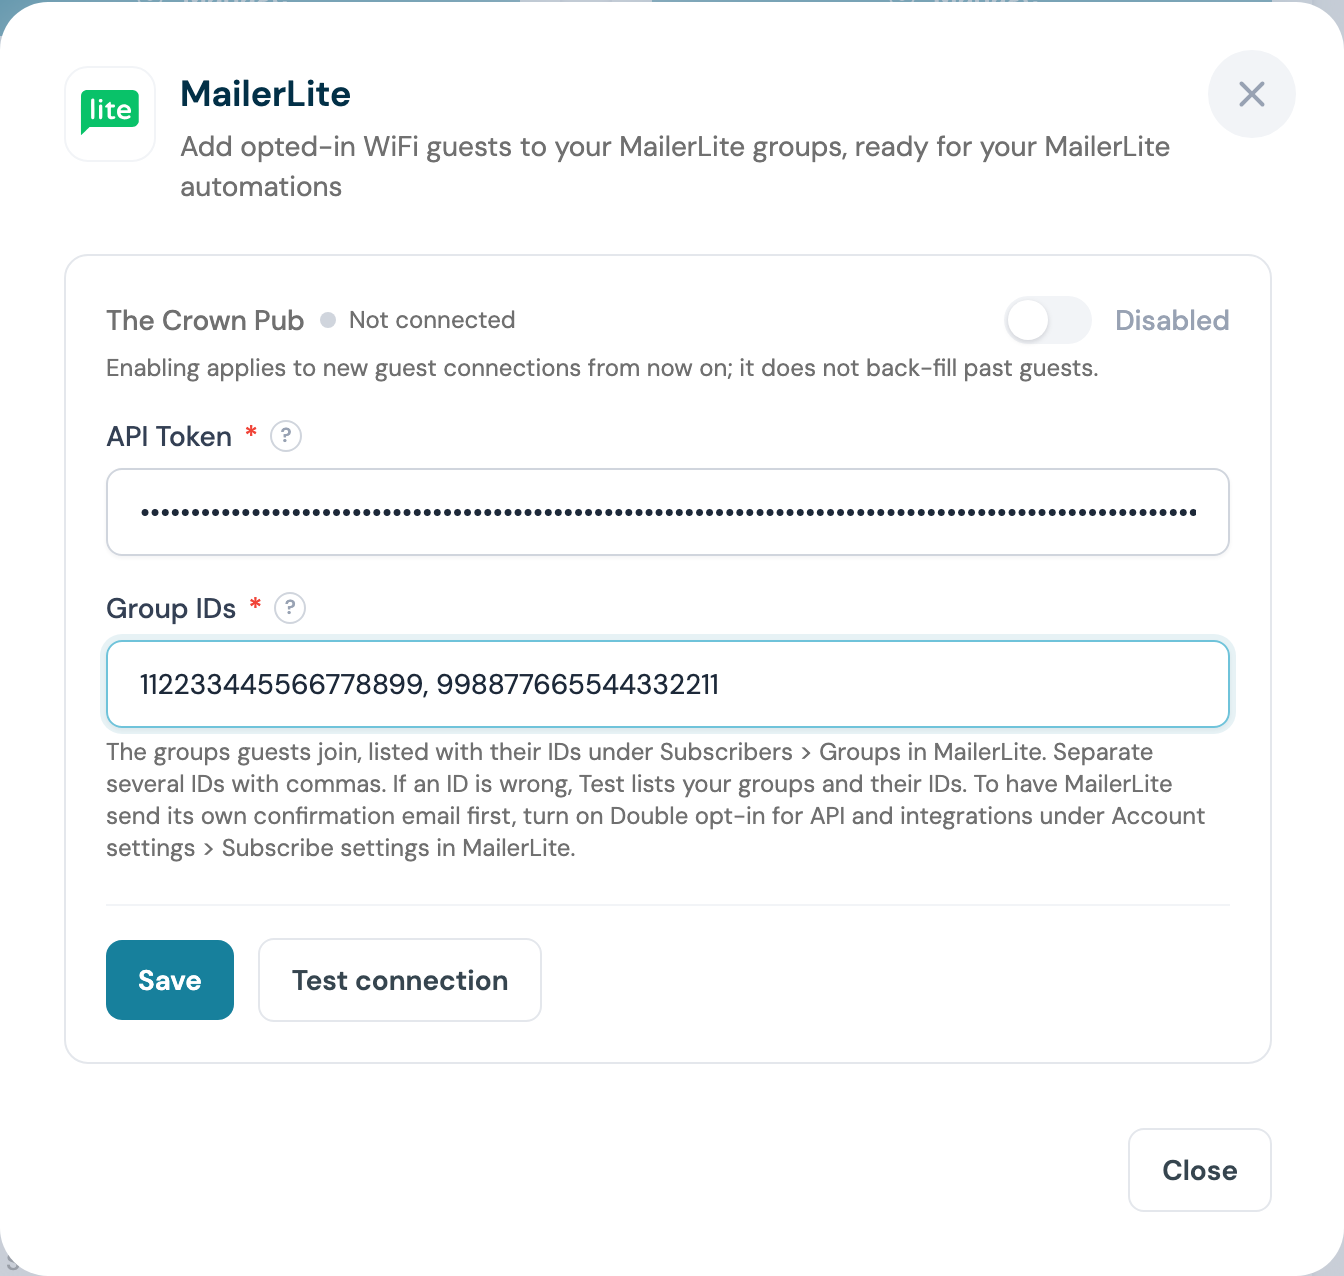
Step 9: Click Save, then Test connection
The test checks the token and every group together. When it passes, it names the groups guests will join.
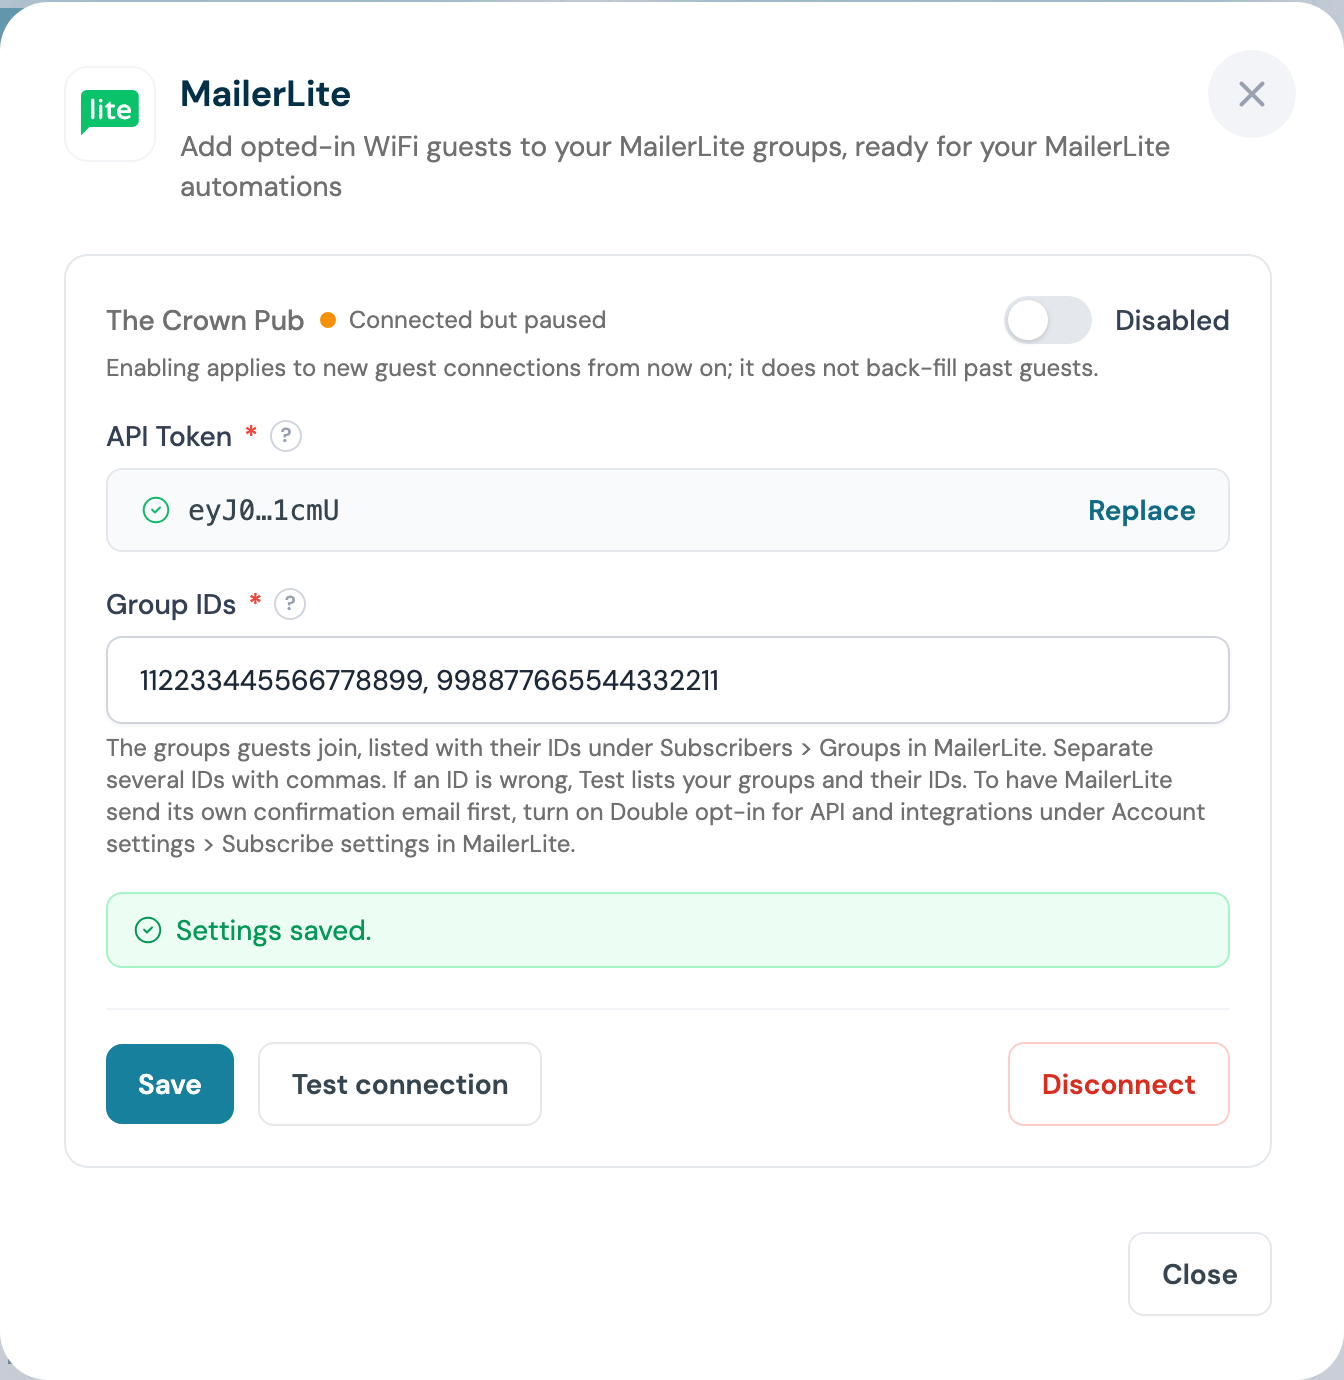
Step 10: Switch the venue on
The venue reads Connected but paused until you flip the toggle to Enabled.
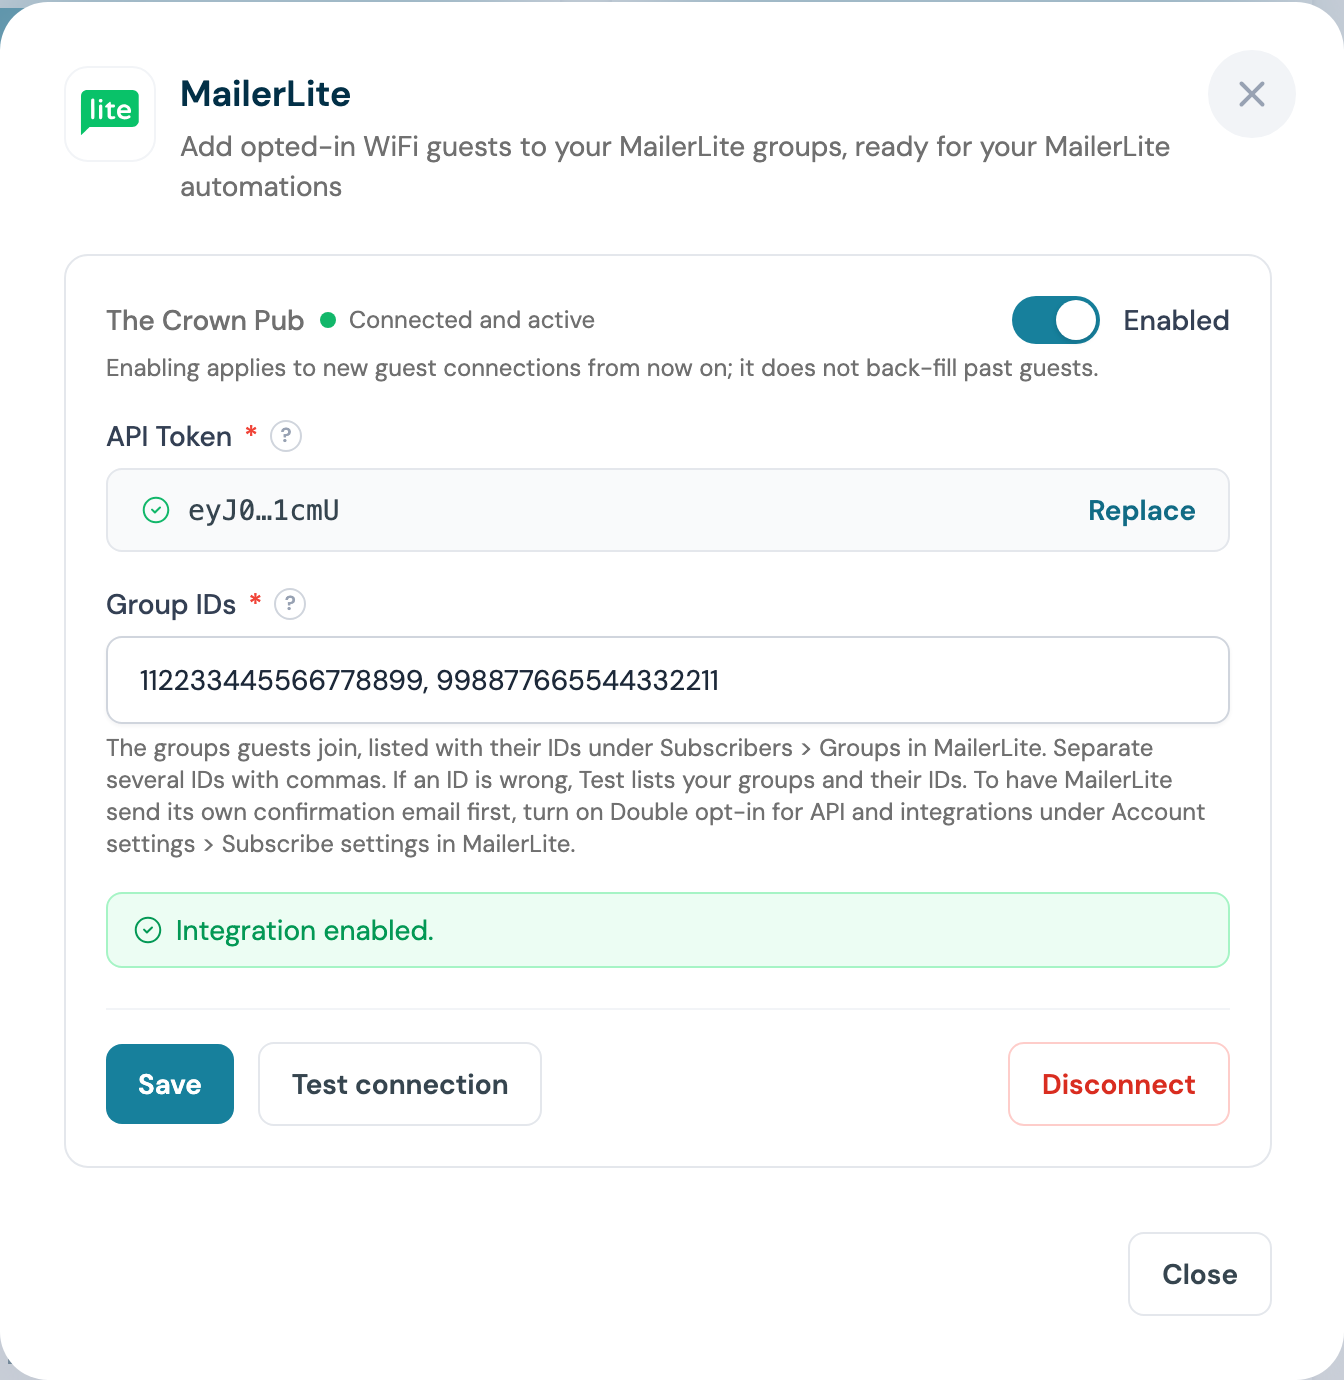
Enabling is not retrospective
Only guests who connect after you enable the integration are synced.
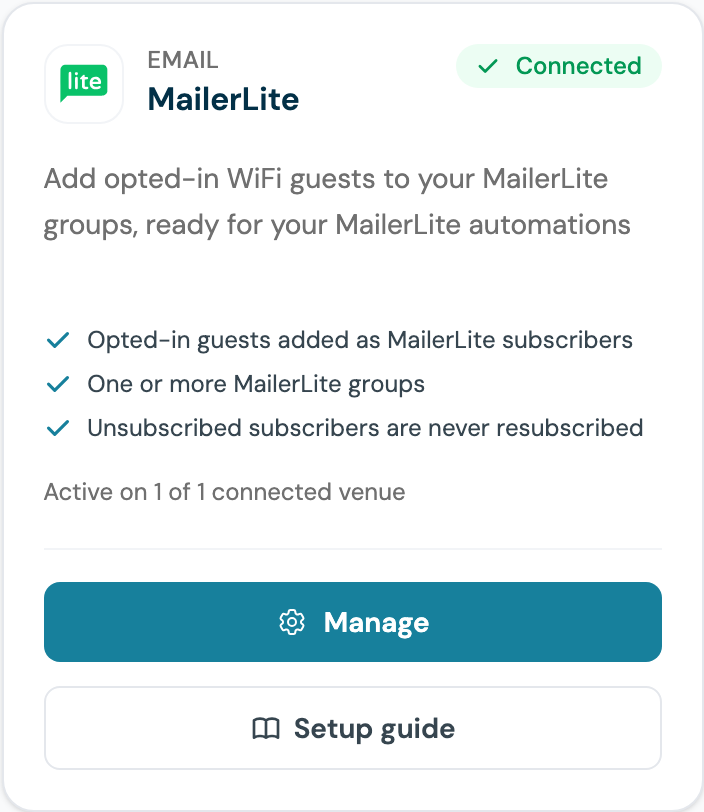
Step 11: Confirm the card says Connected
Close the panel. The card now reads Connected, with the number of venues it is active on.
Part 4: Test it end to end
Step 12: Sign in as a guest
Forget the WiFi on a phone, reconnect, and complete the splash page with a real email address. Accept marketing when the splash page asks.
Step 13: Check the subscriber in MailerLite
Open Subscribers in MailerLite and search for that email. Within a few minutes it appears in your chosen groups.
Double opt-in
If you want MailerLite to confirm each new guest's email address before they join, turn on Double opt-in for API and integrations under Account settings > Subscribe settings in MailerLite. New guests then get MailerLite's confirmation email and stay unconfirmed until they click the link. With it off, they join as active subscribers straight away. CaptiFi follows whichever you choose, so there is nothing to set in CaptiFi.
What gets synced
| Data | Notes |
|---|---|
| Email address | Only guests who accept marketing |
| First and last name | When the guest gave them. A blank name is never sent, so it cannot wipe a name MailerLite already holds |
| Phone number | Only for guests who also agreed to marketing texts and have not texted STOP |
| Group membership | Subscribers join every group whose ID you entered. CaptiFi never removes anyone from a group |
Event ticket buyers who tick the marketing box when they buy join the same groups.
Important notes
- Only guests who accept marketing are synced, which respects their GDPR consent
- Subscribers are matched by email, so repeat visits update the same subscriber
- Sync happens within minutes of the WiFi sign-in
- Each venue can point at its own groups, or several venues can share them
- Anyone who unsubscribed, bounced or was marked as junk in MailerLite stays that way, because CaptiFi never resubscribes them
Troubleshooting
"API token rejected by MailerLite": the token is wrong, incomplete or was deleted. Create a new token in MailerLite (Steps 1 to 3), copy all of it, and save it again.
"MailerLite refused the request": the token most likely has an IP allowlist. Create a new token with the allowlist left empty and save it again.
"MailerLite has no group with the ID ..." or "MailerLite group IDs are numbers ...": the token works but one of the group IDs does not match a group on your account, or a group name was entered in place of its ID. The message lists your groups with their IDs; copy the right one and save again.
Guests not appearing: check the venue toggle is Enabled (Step 10), and remember only guests who accept marketing are synced. If double opt-in is on in MailerLite, new guests show as unconfirmed until they click MailerLite's confirmation email.
Subscribers arrive without names: add first and last name fields to your form in the Splash Page Builder.