
Appearance
How to set up the Square POS integration with CaptiFi
Follow every step below and your WiFi guests will appear in your Square Customer Directory, with their till spend matched back to them in CaptiFi.
Time needed: about 10 minutes.
What this integration does
- WiFi guests appear in your Square Customer Directory. Every guest who signs in to your WiFi and opts in to marketing is added as a Square customer in a CaptiFi WiFi Guests group, ready for Square Marketing campaigns.
- In-store spend is matched back to WiFi guests. CaptiFi reads your Square orders every 15 minutes and links them to your WiFi guests, so the Square Spend Dashboard shows who your biggest spenders are and who is worth a win-back offer.
CaptiFi never changes prices, takes payments or edits orders. Order access is read-only.
Before you start
- A Square account with at least one location
- Permission to create an application in the Square Developer Console (free, about two minutes)
- A CaptiFi plan that includes integrations (Growth or above)
Part 1: Create your Square access token
Step 1: Open the Square Developer Console
Go to developer.squareup.com/apps and sign in with your normal Square account login.
Step 2: Create an application
Click Create your first application, or + New application if you already have one. Name it something you will recognise, for example CaptiFi, and click Save.
Step 3: Switch to the Production tab
Open the application and click Credentials in the left menu. At the top of the page, switch from Sandbox to Production.
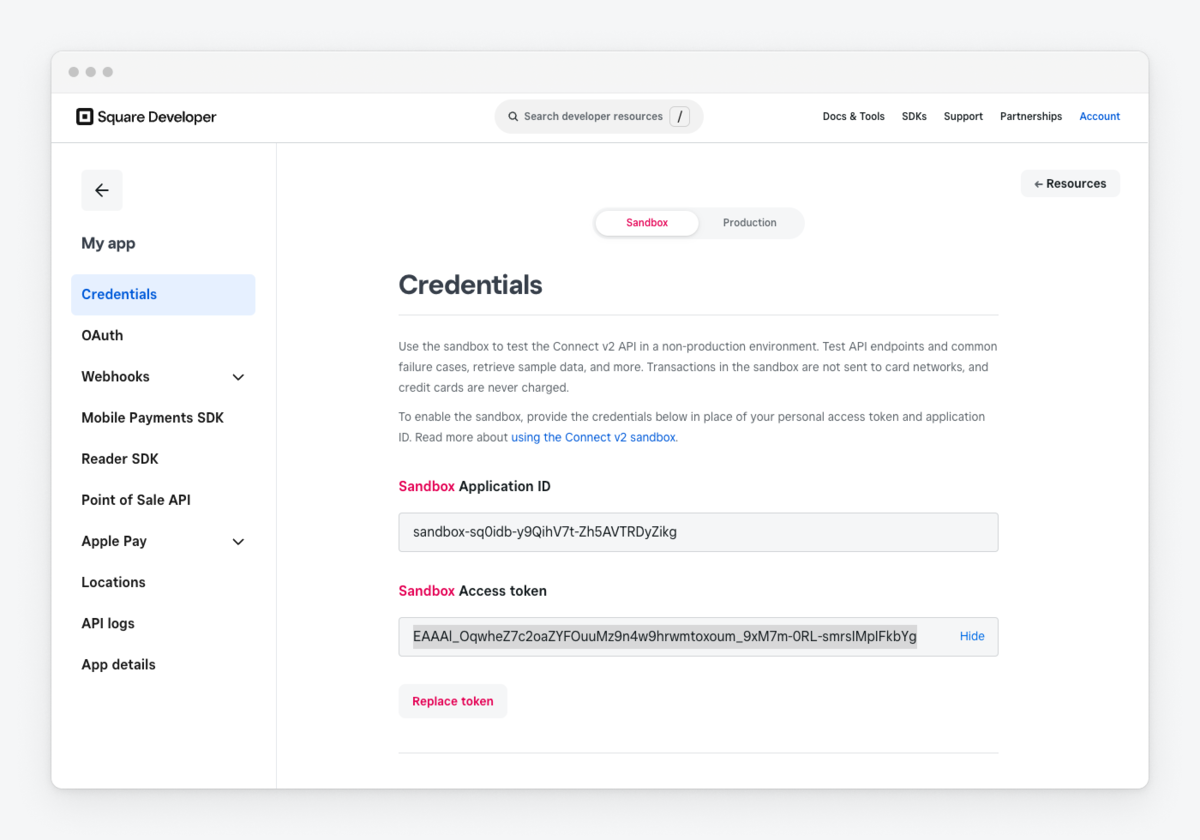
Use Production, not Sandbox
The screenshot above shows the Sandbox tab. A sandbox token connects to fake data and will never show real guests or spend. Make sure the Production tab is selected before you copy anything.
Step 4: Copy the Production Access Token
Click Show next to the access token and copy it. Treat it like a password: it gives access to your Square customer and order data.
Step 5: Optional, note your Location ID
Skip this if you run a single Square location; CaptiFi finds it automatically. If you run several, get the Location ID for this venue from the Square Dashboard under Account & Settings, Business information, Locations.
Part 2: Connect Square in CaptiFi
Step 6: Open the Integrations page
Log in to my.captifi.io and click Integrations in the left sidebar.
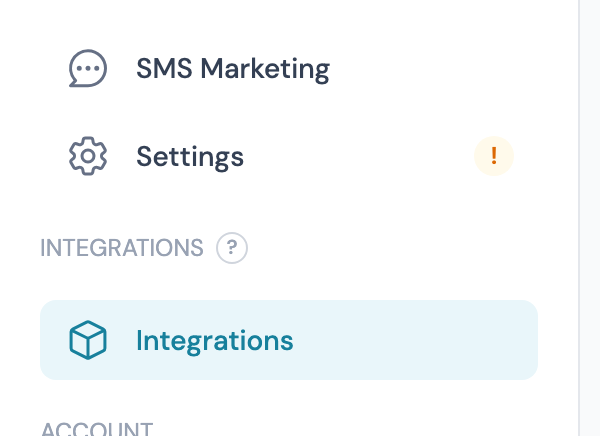
Step 7: Find the Square POS card and click Configure
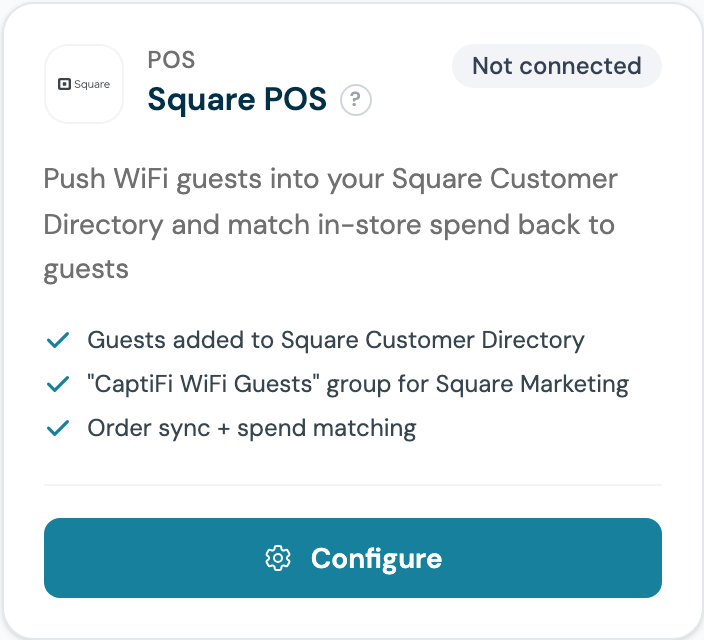
Step 8: Paste your access token
The panel shows one section per venue you manage. Paste the token from Step 4 into Access Token. It is write-only: once saved, CaptiFi only ever shows a masked confirmation.
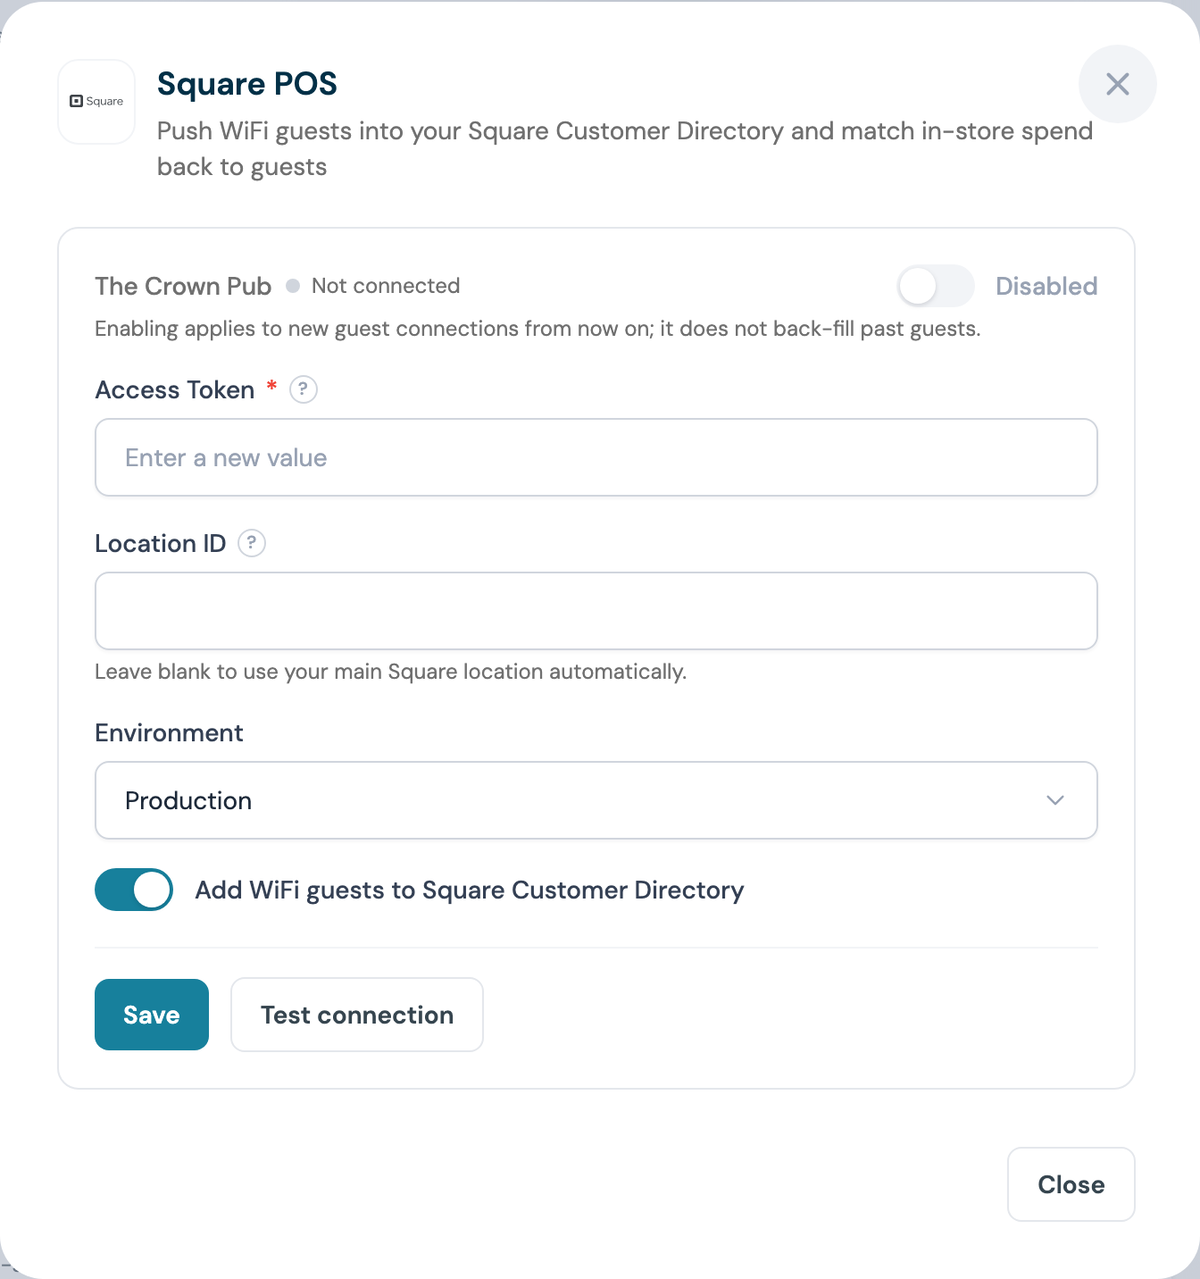
Step 9: Set Location ID and Environment
Leave Location ID blank to use your main Square location, or paste the ID from Step 5. Leave Environment set to production unless Square support has asked you to test against sandbox. Keep Add WiFi guests to Square Customer Directory switched on.
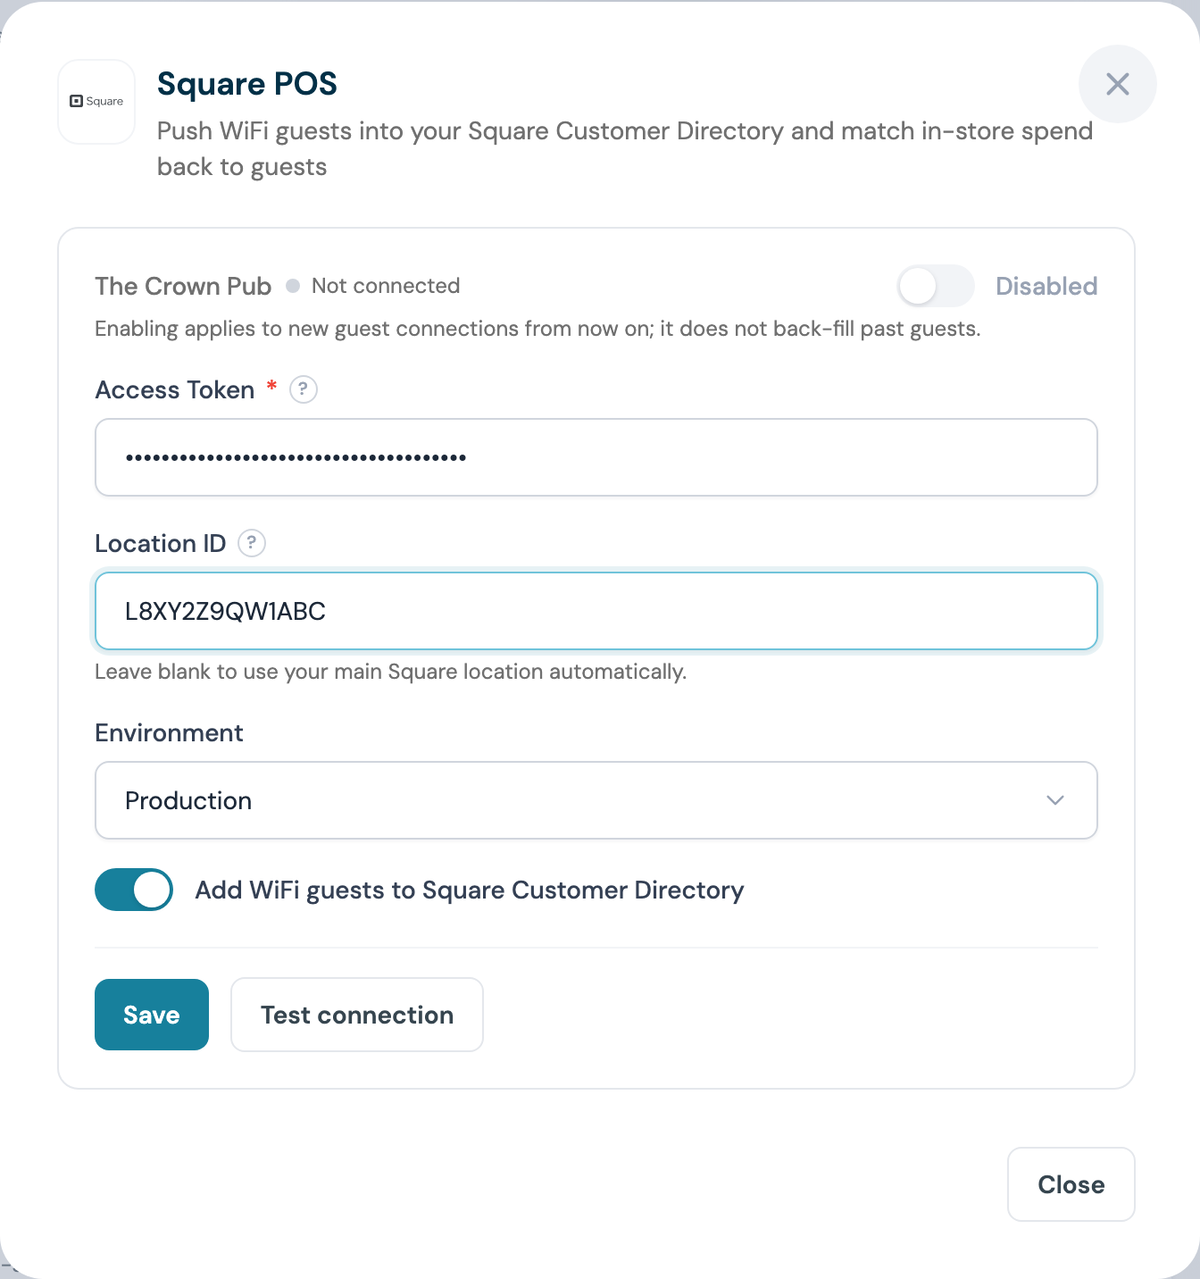
Step 10: Click Save, then Test connection
A successful test names your Square business back to you, which confirms the token belongs to the right account.
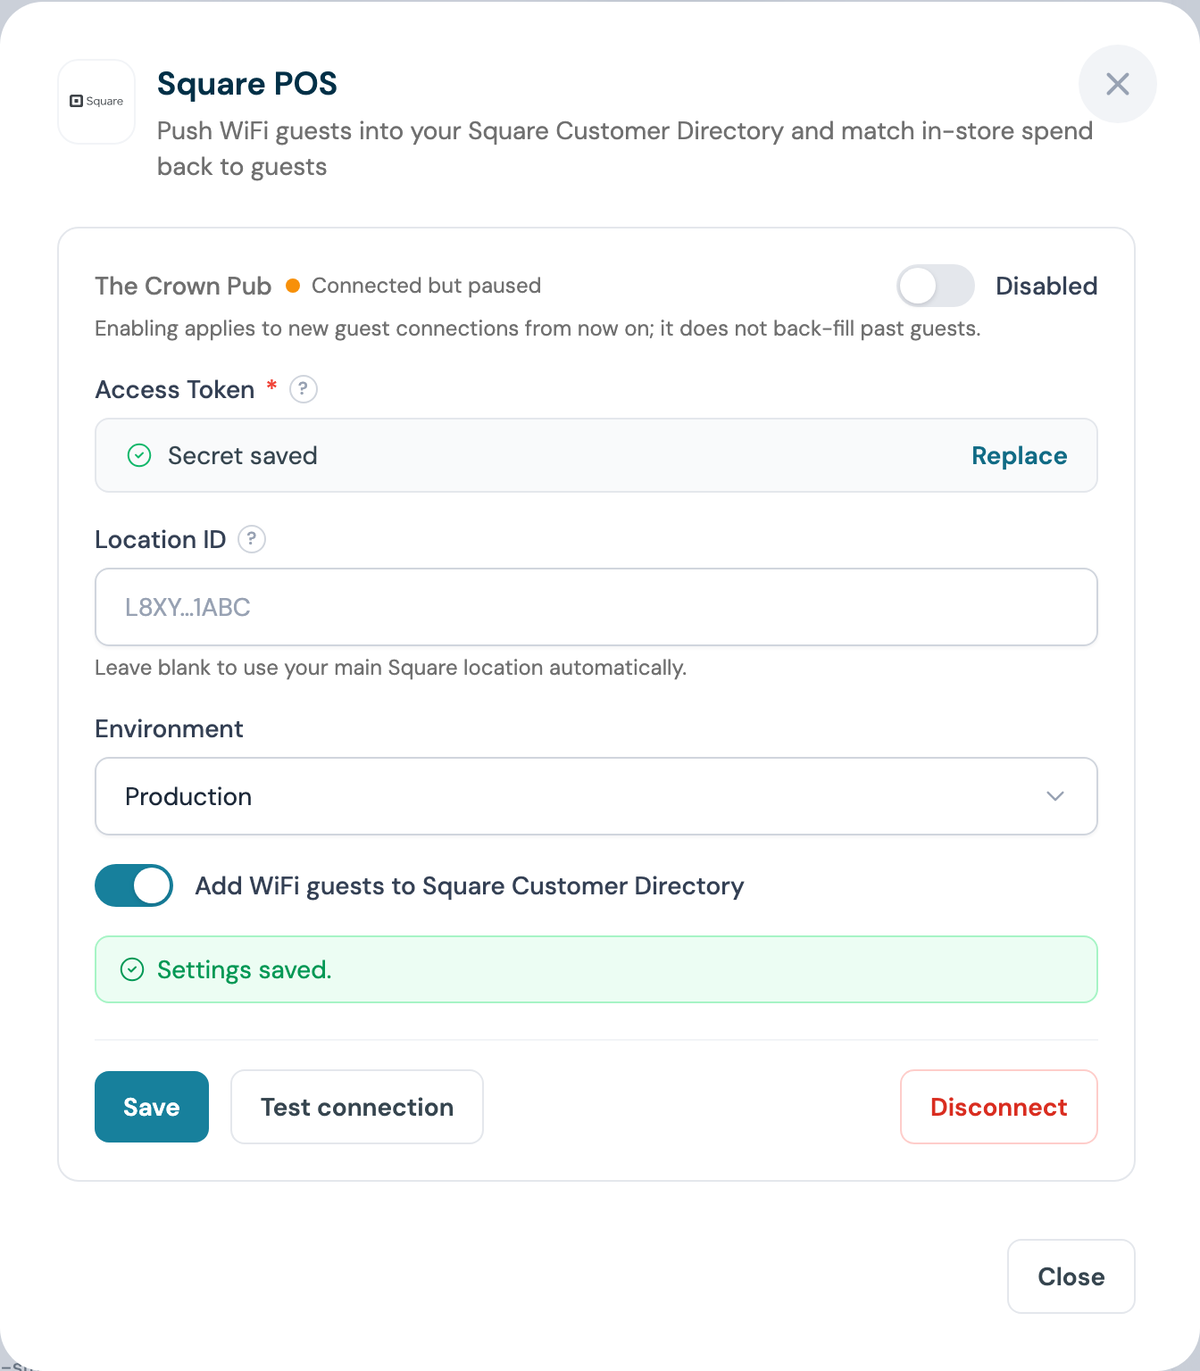
Step 11: Switch the venue on
The venue reads Connected but paused until you flip the toggle to Enabled.
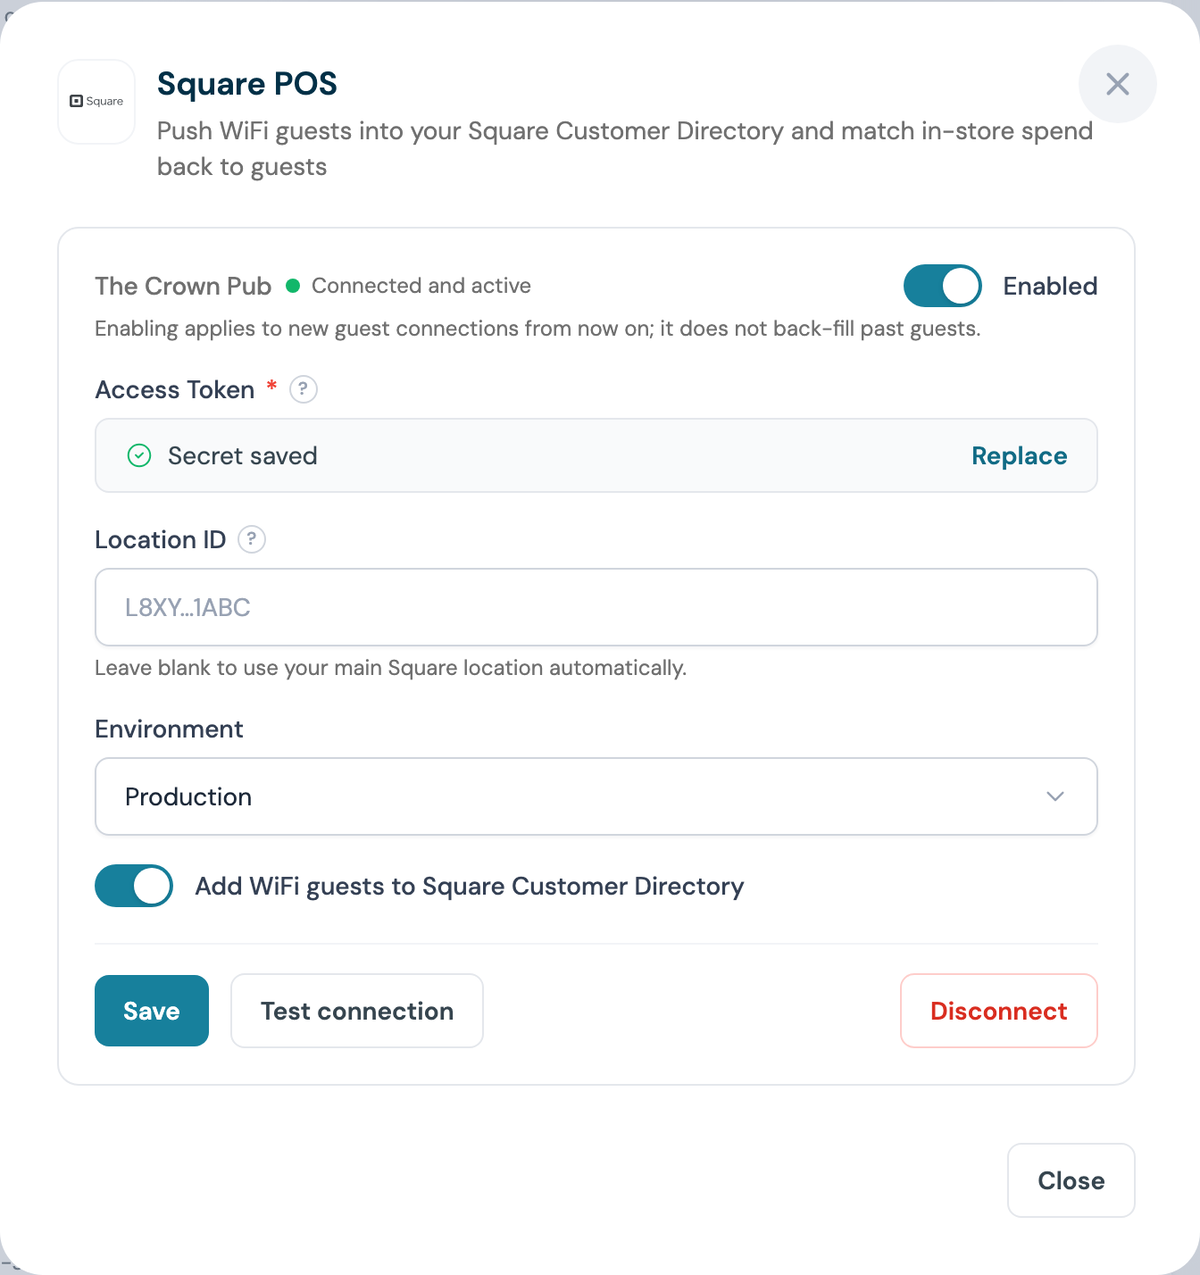
Step 12: Confirm the card says Connected
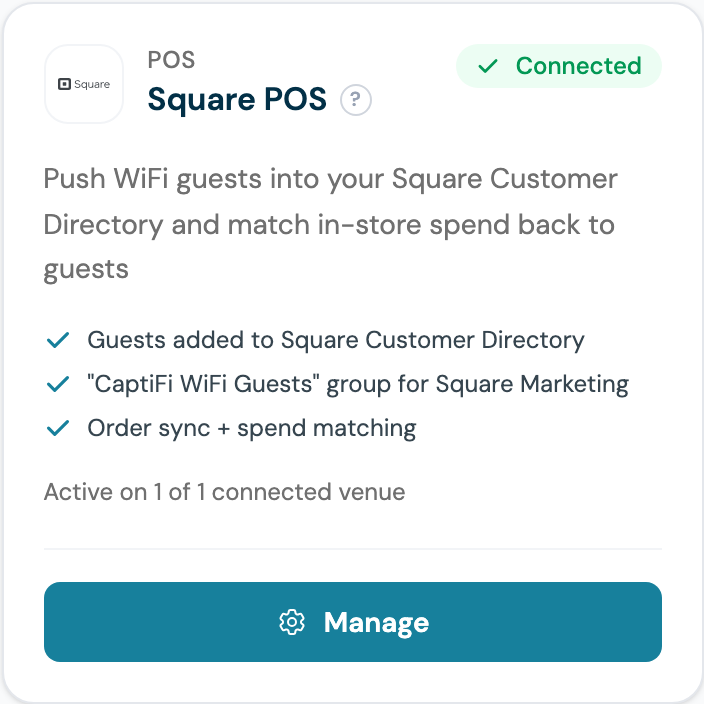
Part 3: Test it end to end
Step 13: Sign in as a guest
Forget the WiFi on a phone, reconnect, and complete the splash page with a real email address. Tick the marketing opt-in box.
Step 14: Check the Square Customer Directory
In Square open Customers. Within a couple of minutes the test guest appears in the CaptiFi WiFi Guests group.
Step 15: Take a test sale, then check the Spend Dashboard
Ring up any sale for that customer at the till. Within 15 to 30 minutes the spend appears on the Square Spend page in your CaptiFi sidebar, under Dashboard, and on the guest's profile.
What gets synced
| Data | Direction | Notes |
|---|---|---|
| Guest name and email | CaptiFi to Square | Only guests who opt in to marketing |
| Guest phone and birthday | CaptiFi to Square | If your splash page collects them |
| CaptiFi WiFi Guests group | CaptiFi to Square | Created automatically, use it in Square Marketing |
| Orders and spend | Square to CaptiFi | Read every 15 minutes, powers the Spend Dashboard |
The Square Spend Dashboard
Once connected and syncing, a Square Spend entry appears in your CaptiFi sidebar, directly under Dashboard:
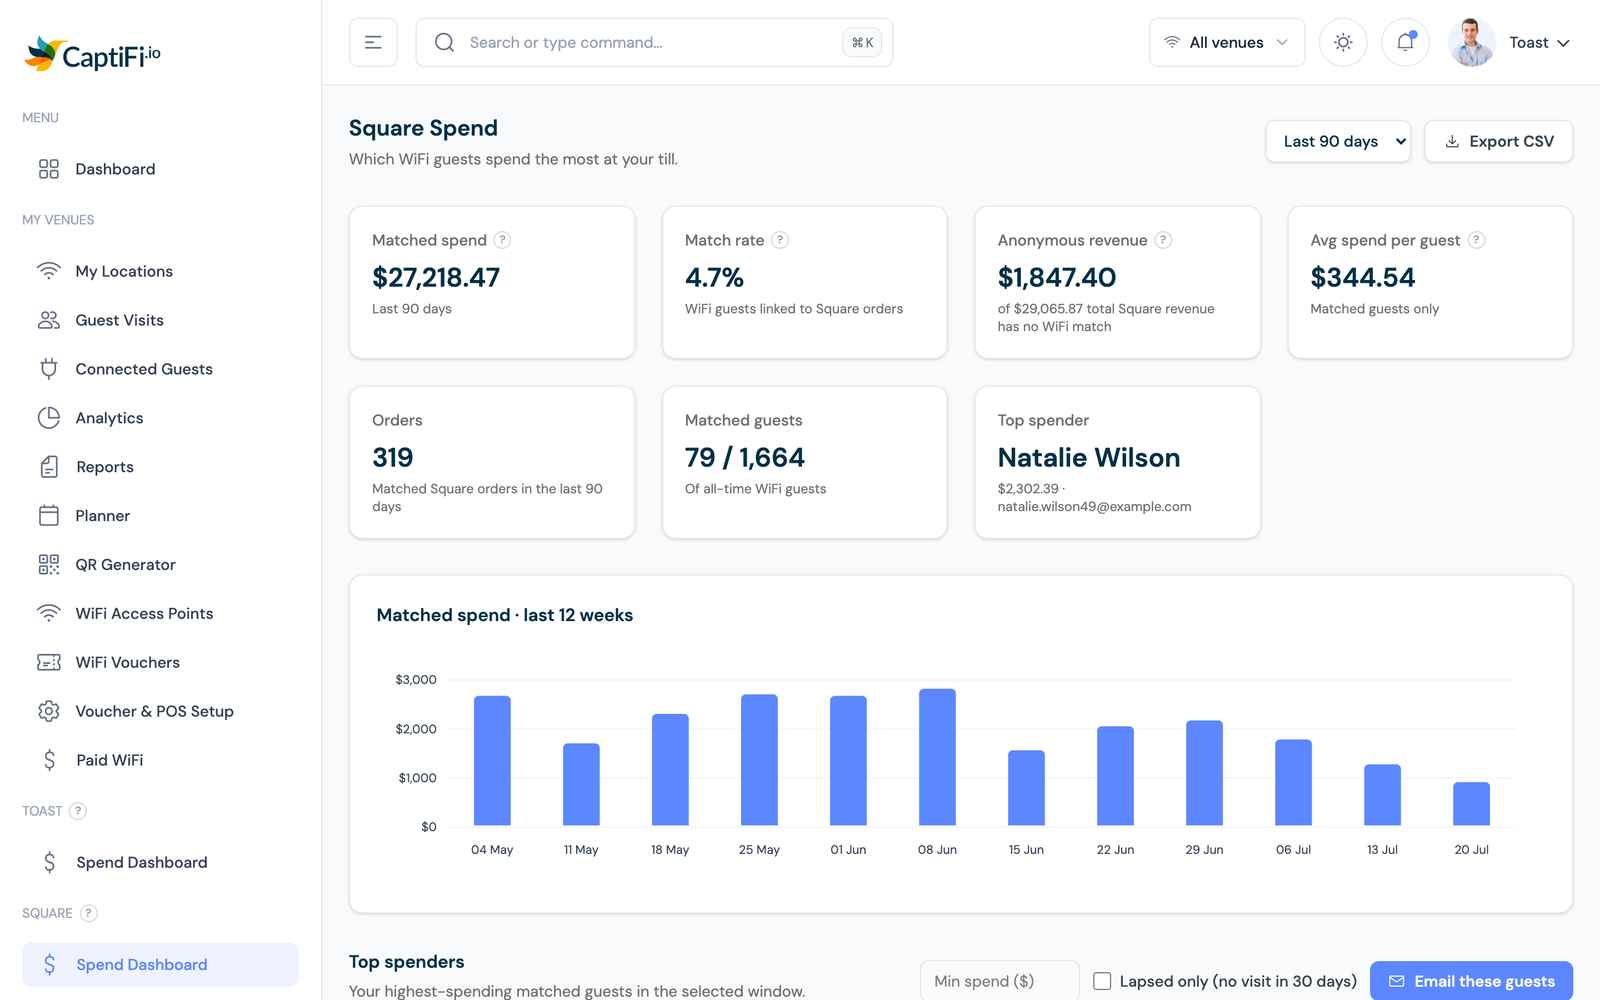
It includes:
- Matched spend, match rate and average spend per WiFi guest
- A weekly spend trend
- A Top Spenders table with VIP badges, filters for minimum spend and lapsed guests, and one-click win-back email segments
- CSV export of your top spenders
Important notes
- Only opted-in guests are synced to Square (this respects GDPR consent)
- Guests are matched to orders using the customer record Square attaches at the till (card on file or loyalty lookup), or by matching email addresses
- Disconnecting removes your Square credentials from CaptiFi immediately; spend already synced stays in your dashboard
- Orders only sync from the moment you connect; historic sales are not back-filled
Troubleshooting
Test connection returns HTTP 401 - the access token is wrong, or it was regenerated in the Developer Console. Copy the current Production token and save again.
Test reports a location error - the Location ID does not belong to this Square account. Clear the field to use your main location.
Guests are not appearing in Square - check the venue toggle is Enabled (Step 11), that the guest ticked the marketing opt-in, and that your splash page collects an email address.
Spend Dashboard shows no data - give it 15 to 30 minutes after your first sale, and check the sale was rung up against a customer record.
Everything connects but the data looks fake - you used a Sandbox token. Repeat Steps 3 and 4 on the Production tab.