
Appearance
How to set up the EmailOctopus integration with CaptiFi
Follow every step below and opted-in WiFi guests will be added to your EmailOctopus list automatically, ready for your campaigns and automations.
Time needed: about 8 minutes.
What this integration does
When a guest connects to your WiFi and ticks the marketing opt-in, CaptiFi adds them to your chosen EmailOctopus list as a subscribed contact with their email and name. Contacts are matched by email address, so a returning guest updates their existing contact instead of creating a duplicate. Any EmailOctopus automation that starts when someone joins the list fires straight away.
Before you start
- An EmailOctopus account, including the free plan
- A CaptiFi plan that includes integrations (Growth or above)
- Your venue live in CaptiFi with a splash page that collects an email address
Part 1: Create your EmailOctopus API key
Step 1: Open the API page
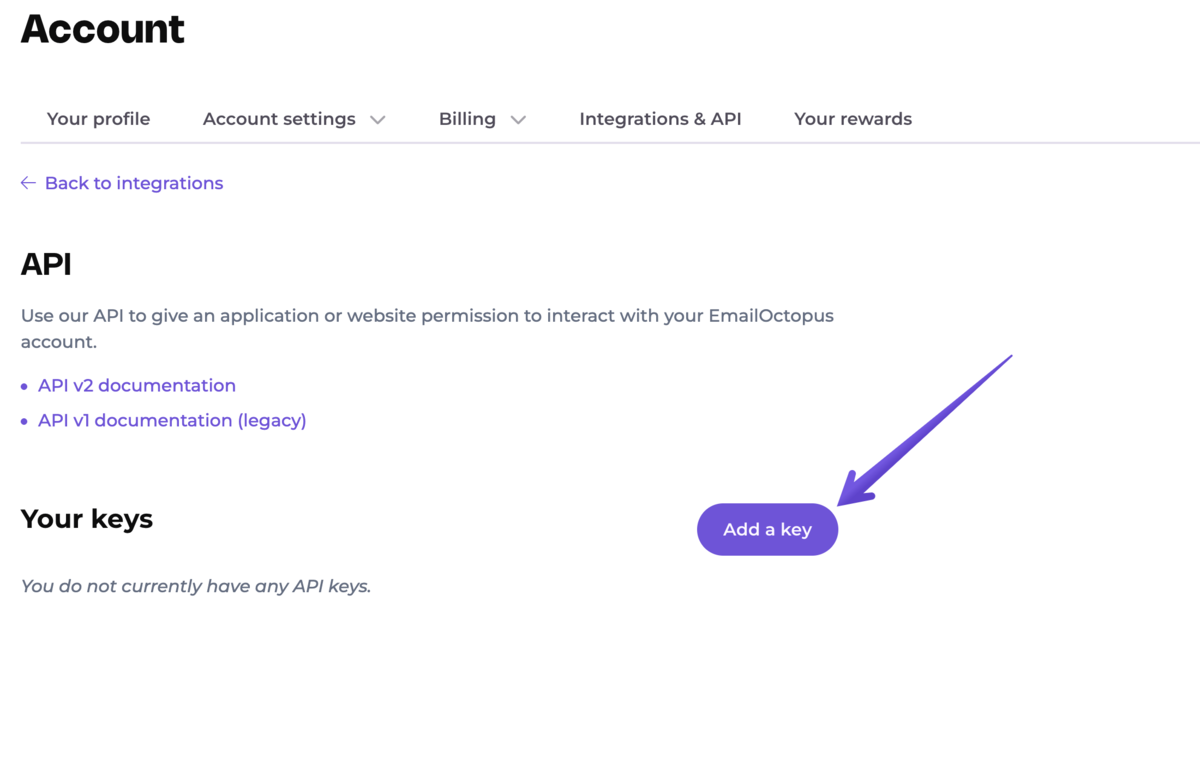
Log in to EmailOctopus, open Account, then Integrations & API. Click Add key.
Step 2: Name the key and click Create
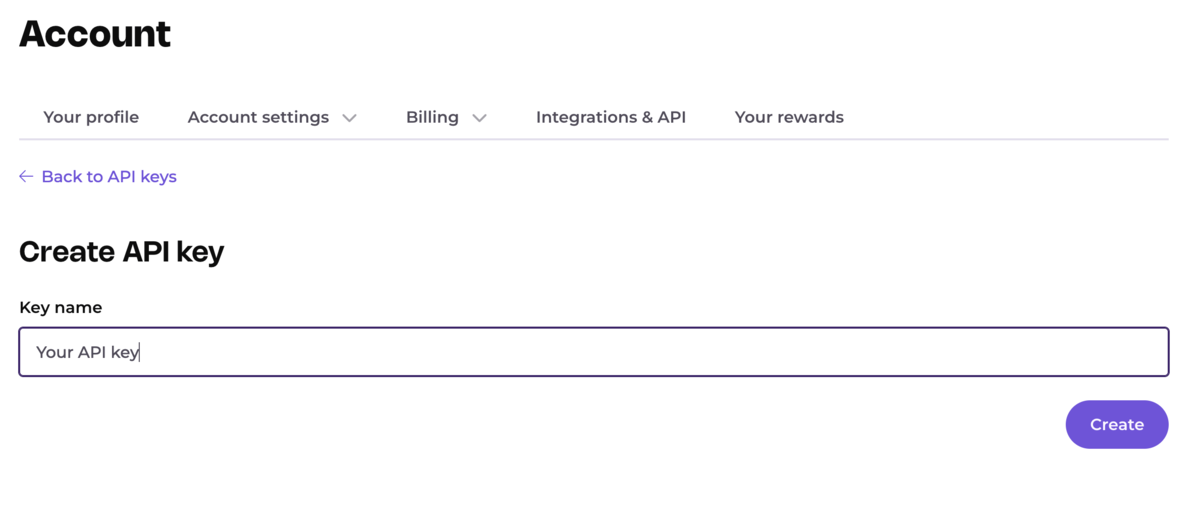
Give it a name you will recognise later, for example CaptiFi WiFi.
Step 3: Copy the key straight away
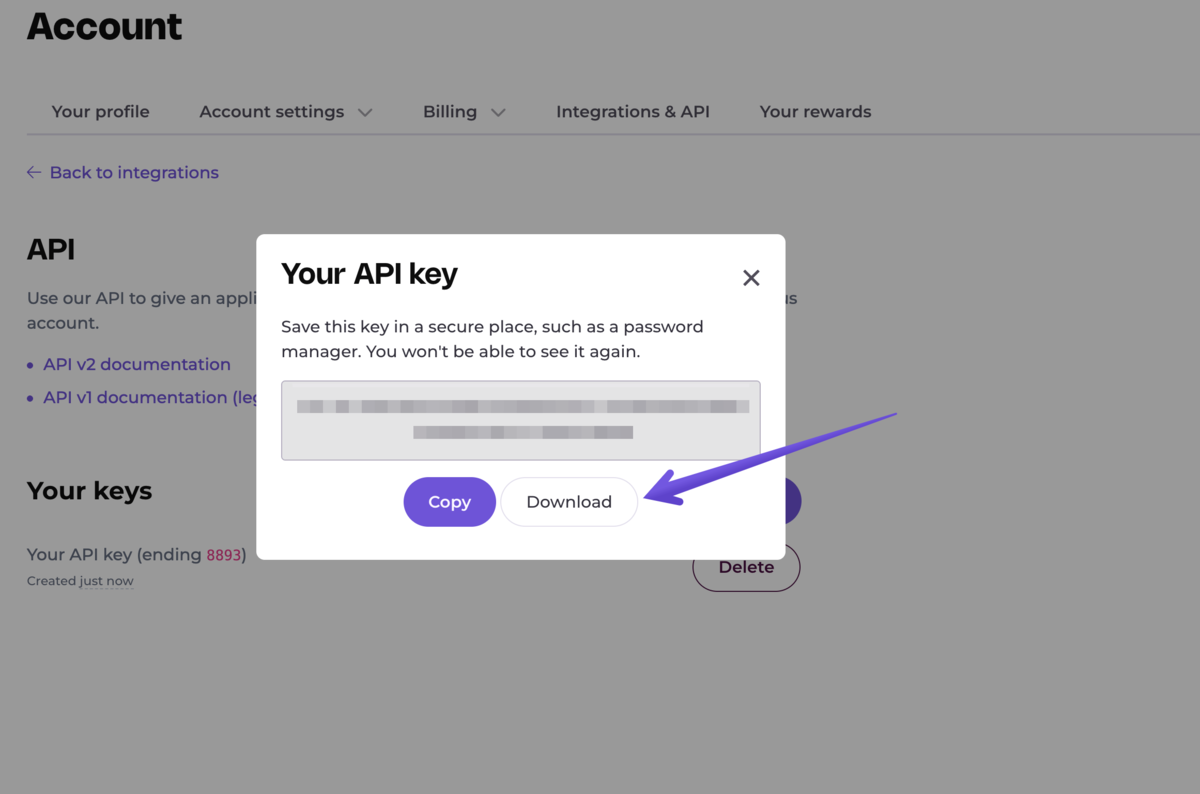
EmailOctopus shows the key once only. Copy it now, or use Download to save it, and keep it somewhere safe.
Part 2: Find your List ID
Step 4: Open the list guests should join
In EmailOctopus go to Lists and click the list you want WiFi guests added to, or click New list and create one, for example WiFi Guests.
Step 5: Copy the List ID from the URL
With the list open, look at the browser address bar. The List ID is the long code in the URL, in the form 00000000-1111-2222-3333-444444444444. Copy it.
Part 3: Connect EmailOctopus in CaptiFi
Step 6: Open the Integrations page
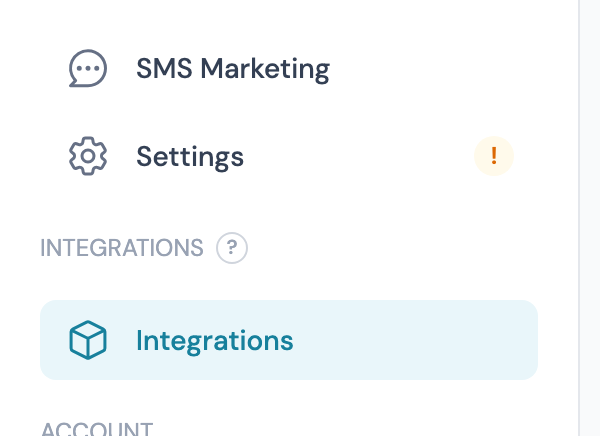
Log in to my.captifi.io and click Integrations in the left sidebar.
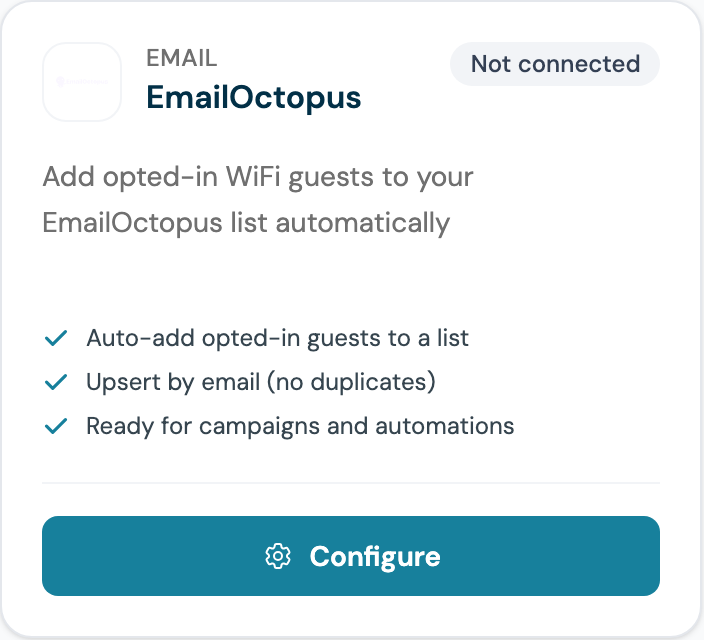
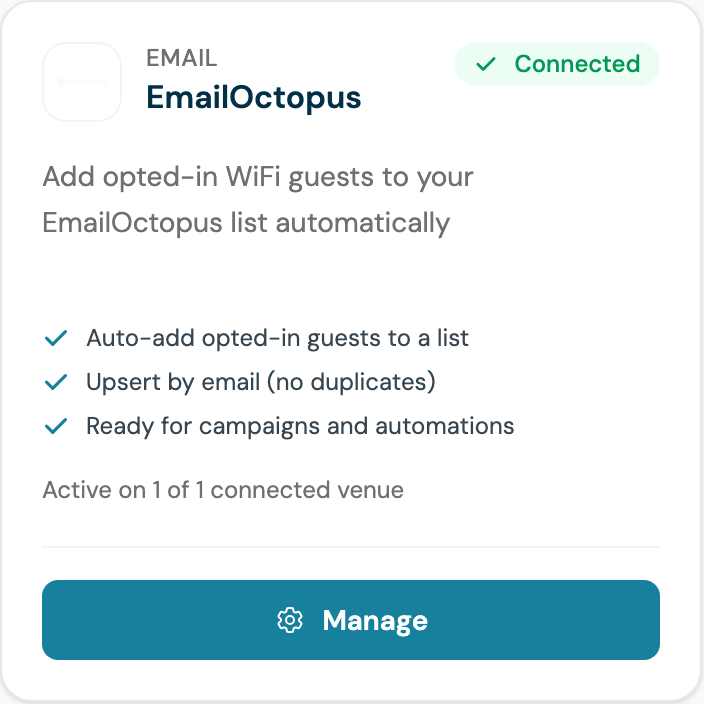
Step 7: Find the EmailOctopus card and click Configure
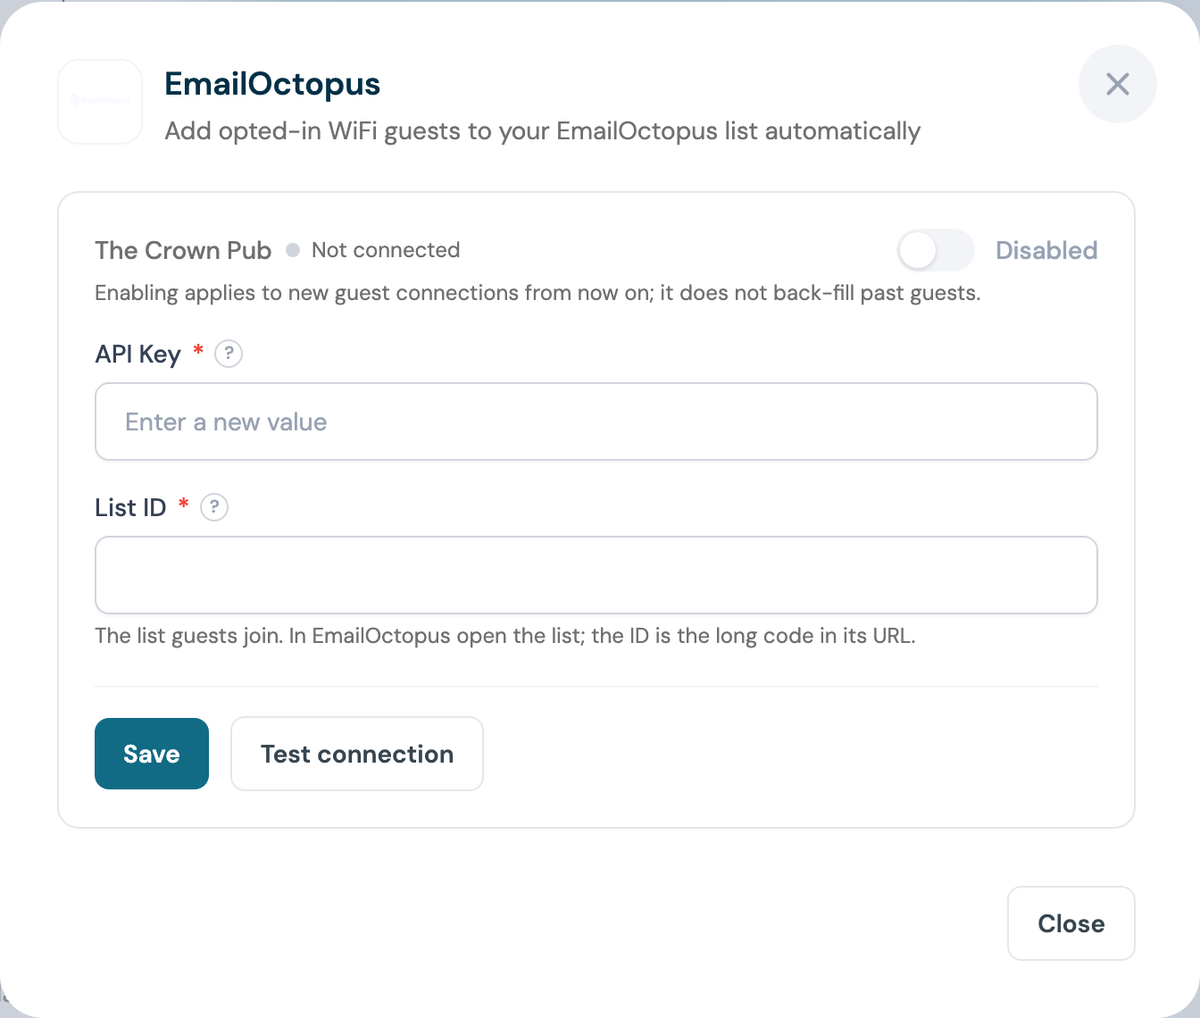
Step 8: Paste the API key and List ID
Both fields are required. The API key is write-only: once saved, CaptiFi only shows a masked confirmation.
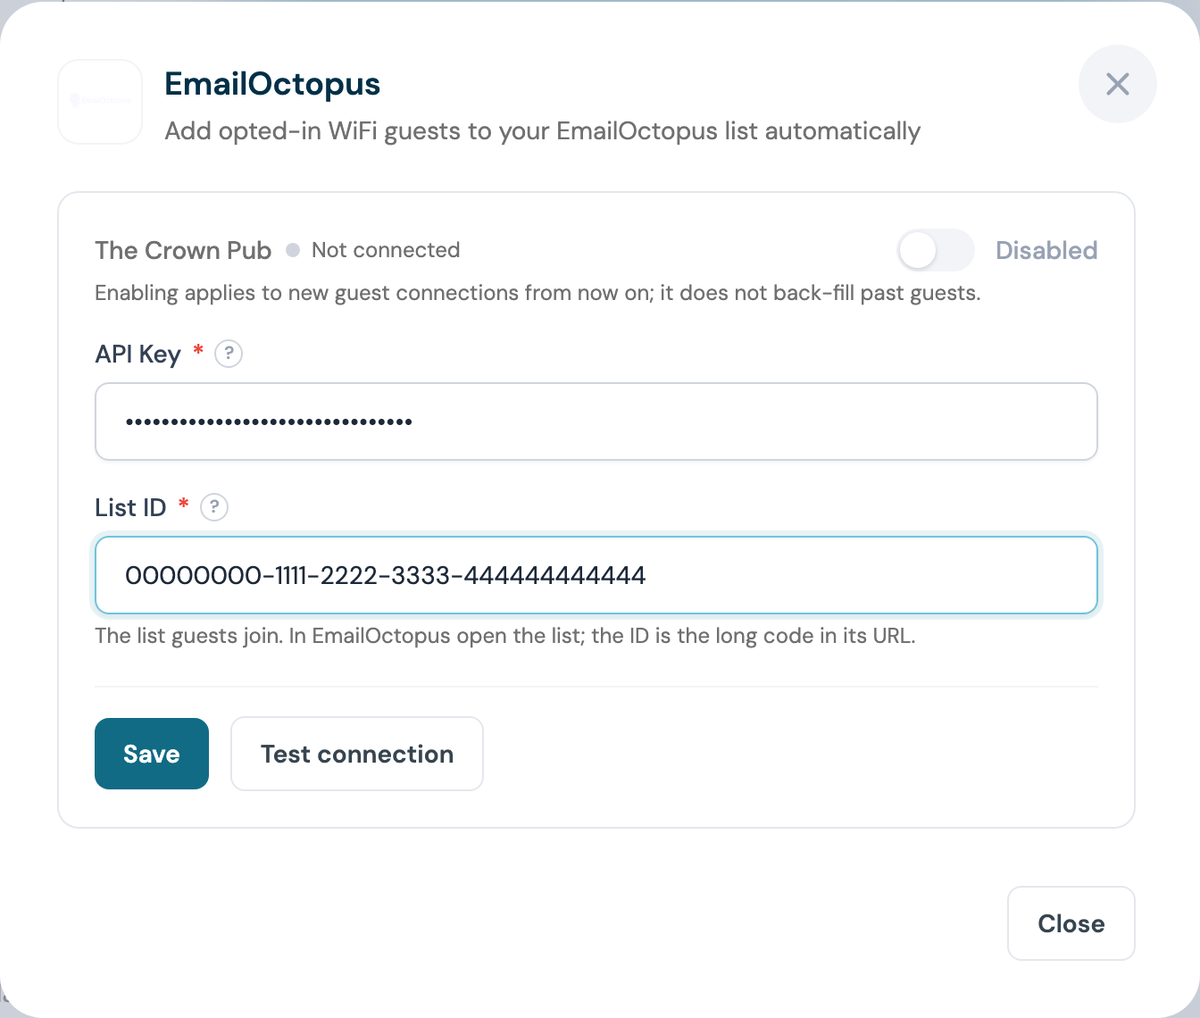
Step 9: Click Save, then Test connection
The test checks the key and the list together, so a mistyped List ID is caught immediately.
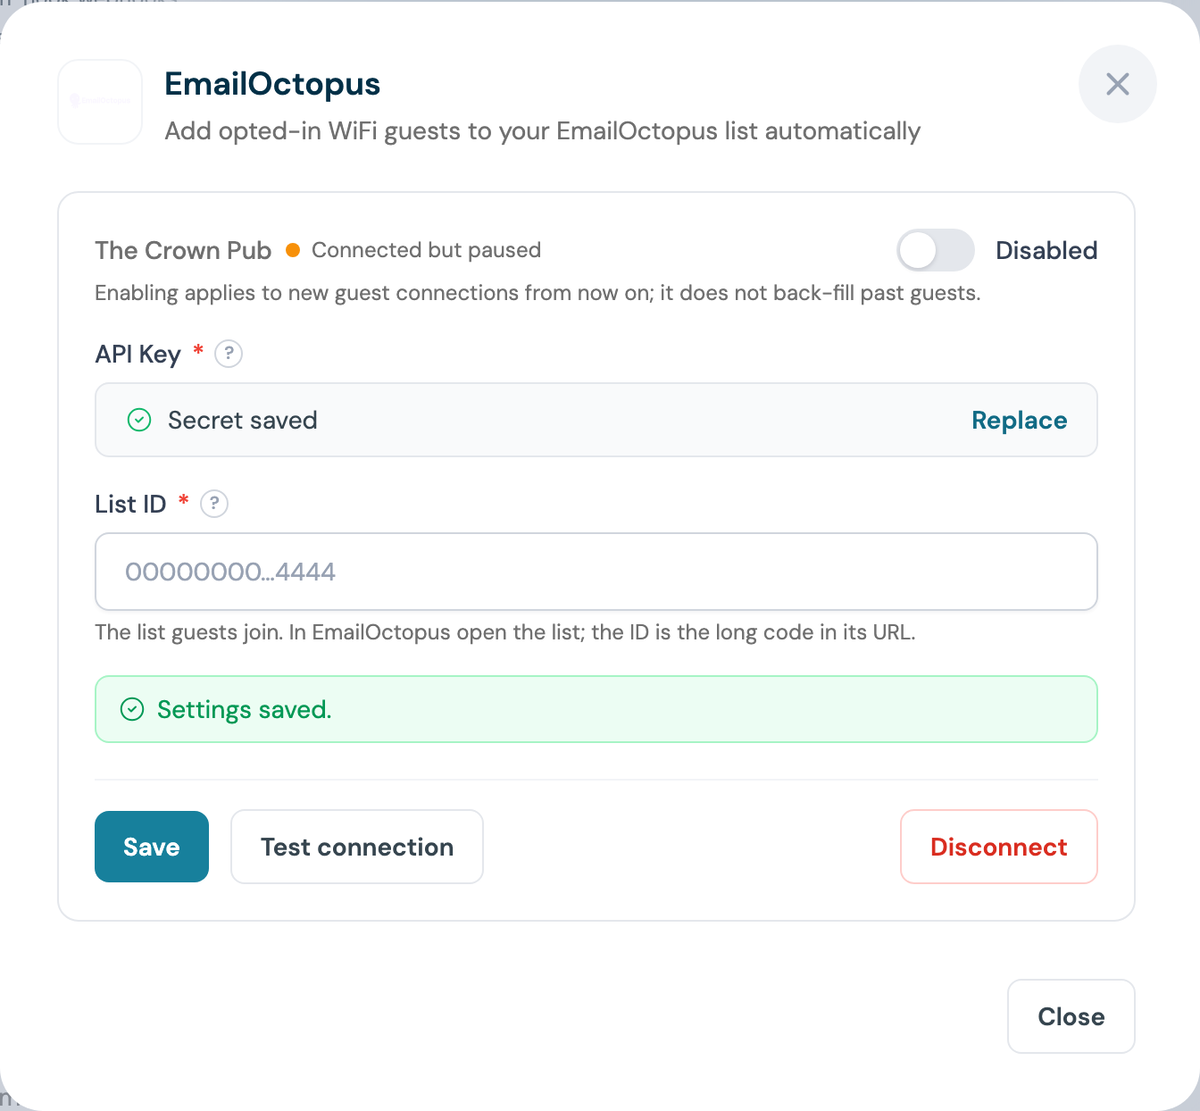
Step 10: Switch the venue on
The venue reads Connected but paused until you flip the toggle to Enabled.
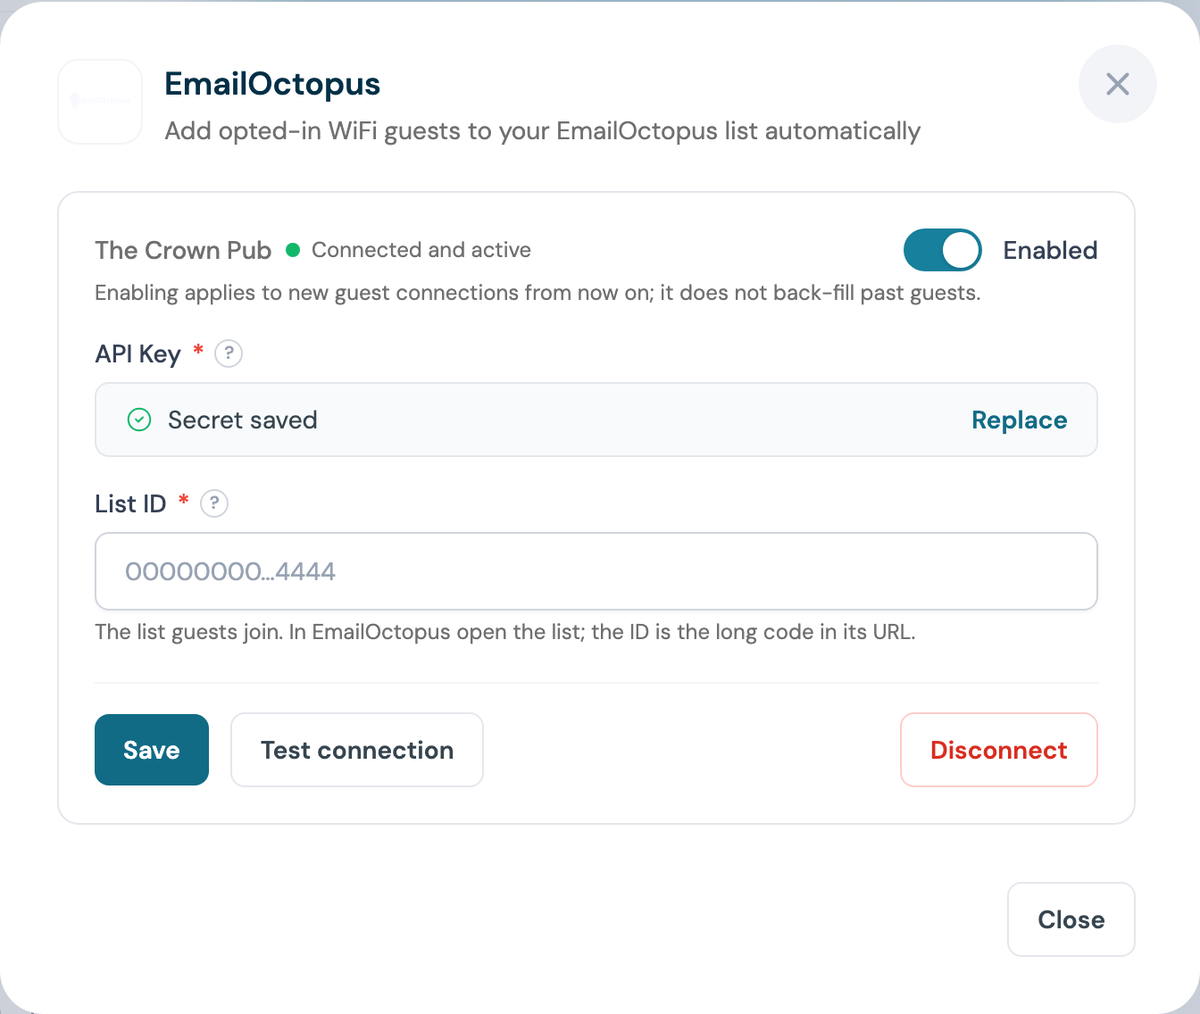
Enabling is not retrospective
Only guests who connect after you enable the integration are synced.
Step 11: Confirm the card says Connected
Part 4: Test it end to end
Step 12: Sign in as a guest
Forget the WiFi on a phone, reconnect, and complete the splash page with a real email address. Tick the marketing opt-in box.
Step 13: Check the contact in EmailOctopus
Open the list and search for that email. Within a few minutes it appears as Subscribed.
What gets synced
| Data | Notes |
|---|---|
| Email, first and last name | Only guests who tick the marketing opt-in |
| Subscription status | Contacts are added as subscribed |
| List membership | Contacts join the list whose ID you entered |
Important notes
- Only opted-in guests are synced (this respects GDPR consent)
- Contacts are matched by email, so repeat visits update the same contact
- Sync happens within minutes of the WiFi sign-in
- Each venue can point at its own list, or several venues can share one
- Unsubscribes in EmailOctopus are respected; CaptiFi does not re-add them
Troubleshooting
Test connection returns HTTP 401 - the API key is wrong or was deleted. Create a new key in EmailOctopus (Steps 1 to 3) and save it again.
"List ID could not be found" - the key works but the List ID does not match a list on your account. Re-copy the long code from the list's URL.
Guests not appearing - check the venue toggle is Enabled (Step 10), and remember only guests who tick the marketing opt-in are synced.
Contacts arrive without names - add first and last name fields to your form in the Splash Page Builder.