
Appearance
How to set up the Klaviyo integration with CaptiFi
Follow every step below and your WiFi guests will flow into Klaviyo automatically. The guide is split into three parts: what you do in Klaviyo, what you do in CaptiFi, and how to prove it works.
Time needed: about 10 minutes.
What this integration does
When a guest connects to your WiFi and ticks the marketing opt-in, CaptiFi creates or updates their Klaviyo profile (email, name, phone when you collect it) with WiFi properties for the venue and source. If you also set a List ID, the guest is subscribed to that list with explicit consent, so your Klaviyo welcome flow can fire straight away.
Before you start
- A Klaviyo account, and you must be an Owner or Admin in it to create an API key
- A CaptiFi plan that includes integrations (Growth or above; the 30-day trial runs at Growth level)
- Your venue live in CaptiFi with a splash page that collects an email address
Part 1: Create your Klaviyo private API key
Step 1: Open your Klaviyo API keys page
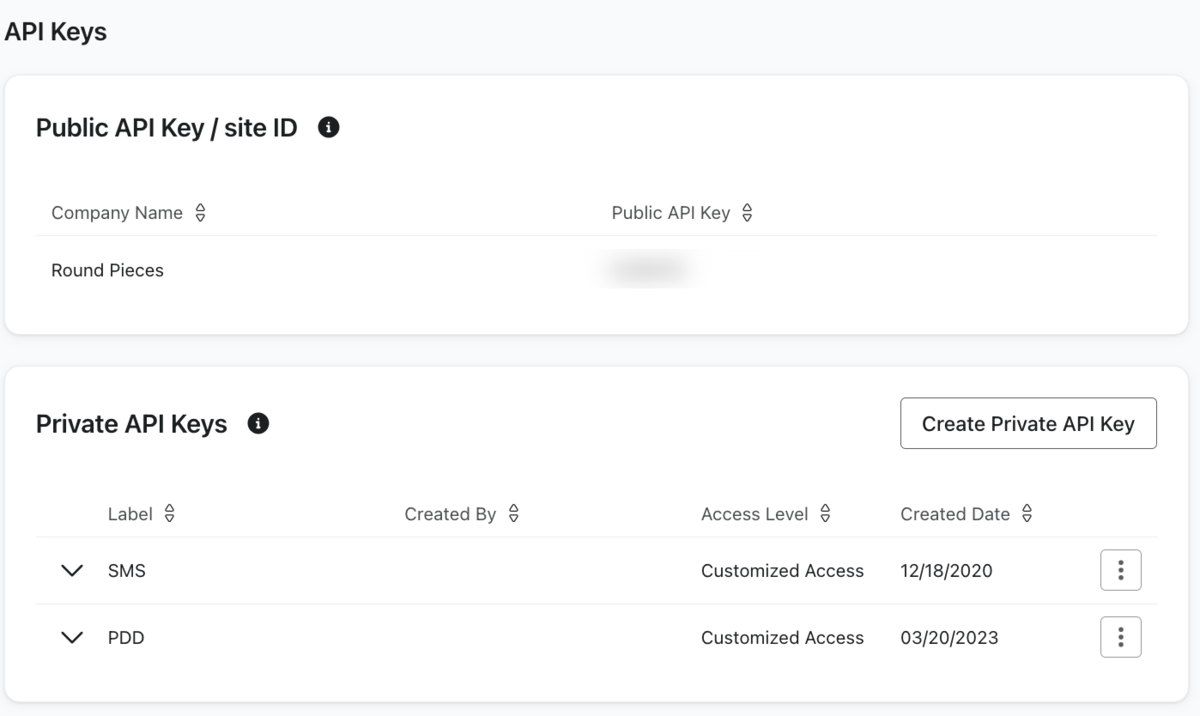
Log in to Klaviyo, click your organisation name in the bottom left, choose Settings, then click API keys.
Step 2: Click Create Private API Key
The button sits at the top right of the Private API Keys panel.
Step 3: Name the key and give it Full Access
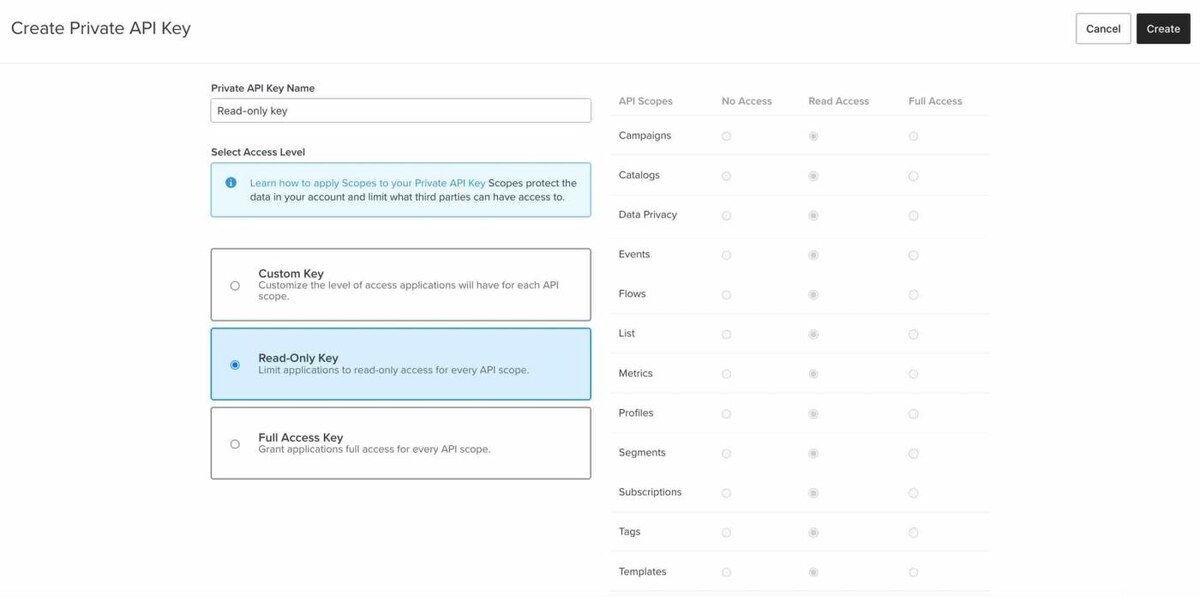
Type a name you will recognise later, for example CaptiFi WiFi, then select Full Access Key.
Full Access is required
CaptiFi needs to write profiles, lists and subscriptions. A Read-Only key will fail the connection test.
Step 4: Click Create, then copy the key
Klaviyo shows the key once only. Copy it now and keep it somewhere safe (a password manager, not a notepad on the bar). It starts with pk_.
Part 2: Optional, find your Klaviyo List ID
Skip this part if you only want profiles created. Set a List ID if you want guests subscribed to a specific list so your flows and campaigns can use them.
Step 5: Open the list you want guests to join
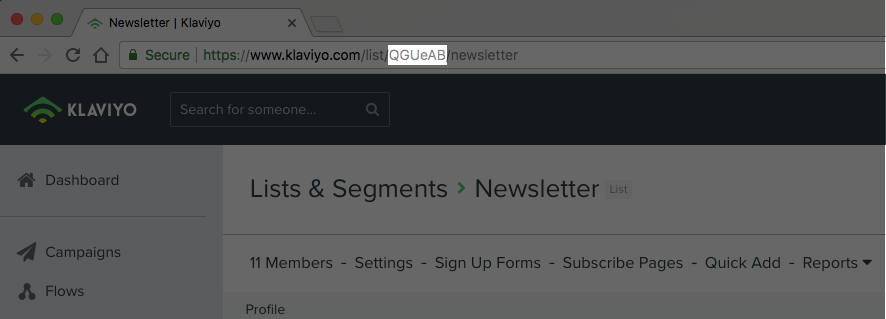
In Klaviyo go to Lists & segments and click the list (create one first if you need to, for example WiFi Guests).
Step 6: Copy the List ID from List details
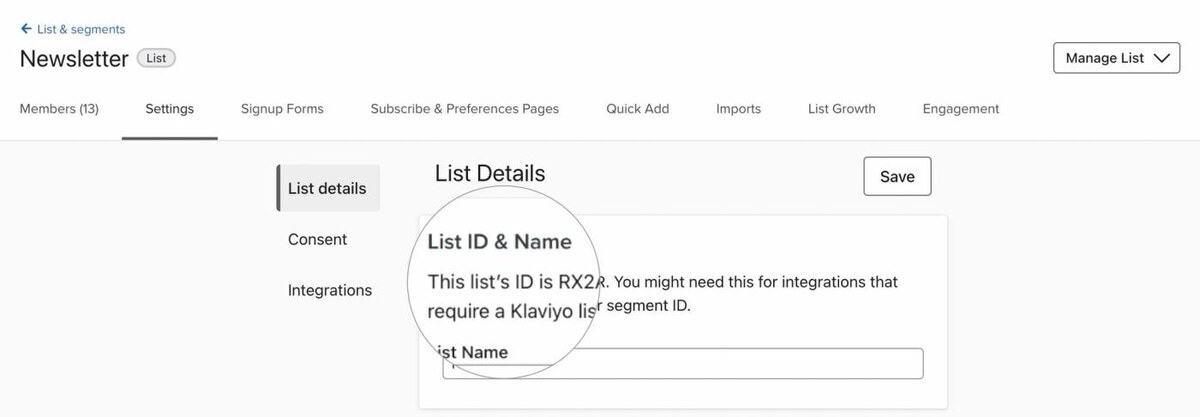
Open the Settings tab, then List details. The ID is the short code shown there, for example RX2AR.
Part 3: Connect Klaviyo in CaptiFi
Step 7: Open the Integrations page
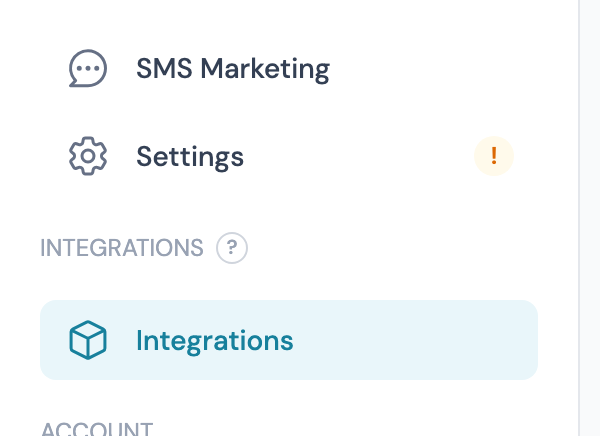
Log in to my.captifi.io and click Integrations in the left sidebar.
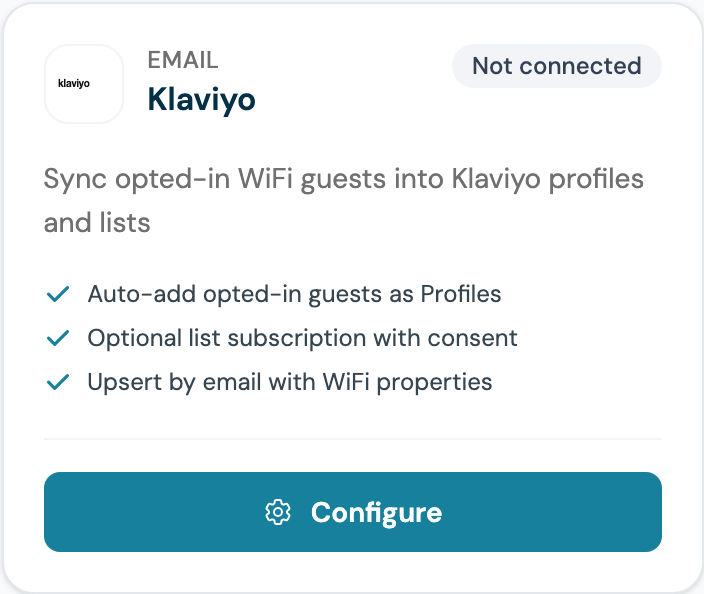
Step 8: Find the Klaviyo card and click Configure
Scroll to the Klaviyo card. It shows Not connected until you finish setup.
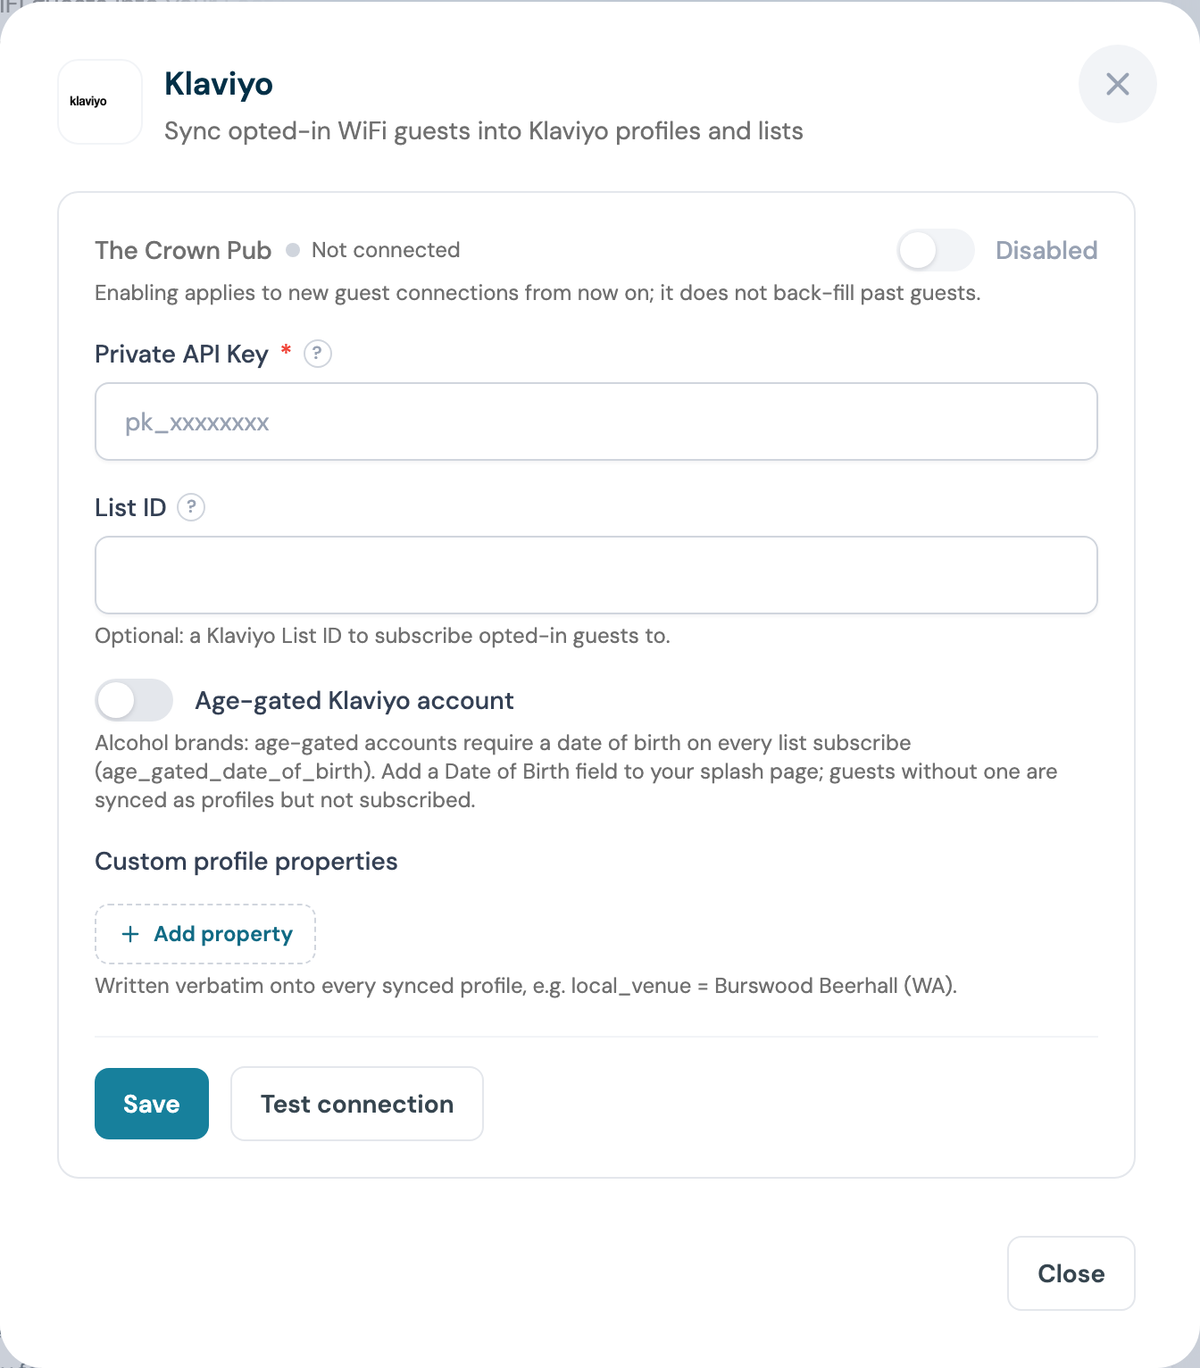
Step 9: Paste your private API key
The panel opens with one section per venue you manage. Paste the key you copied in Step 4 into Private API Key. The field is write-only: once saved, CaptiFi never shows it again.
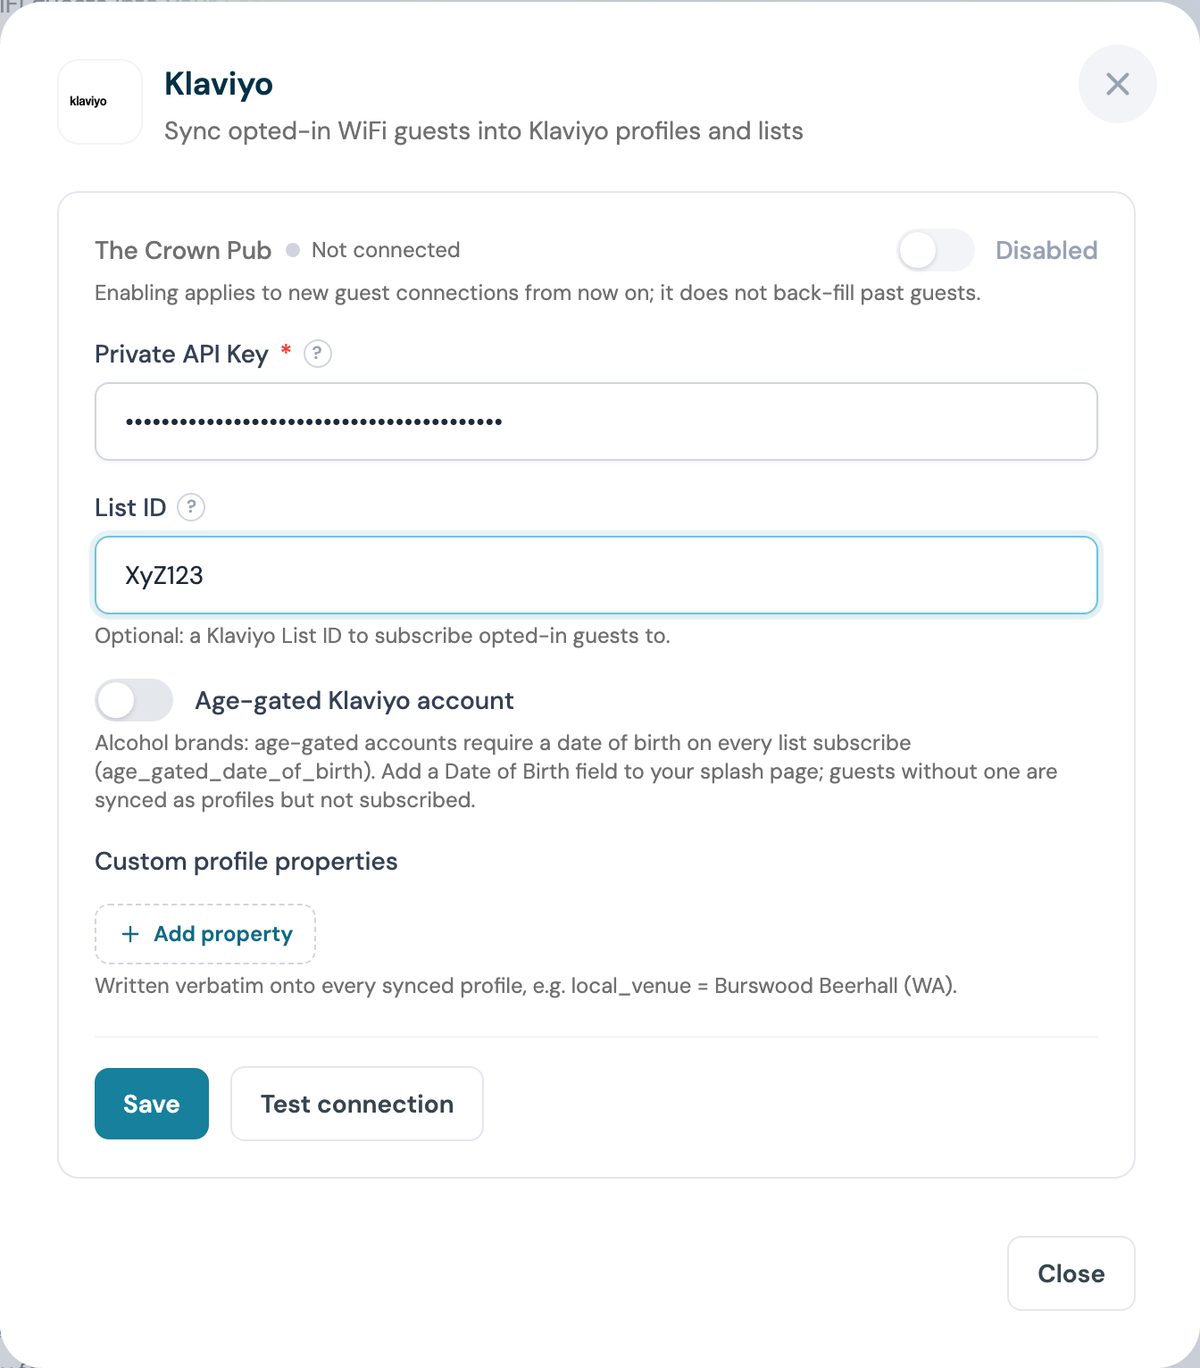
Step 10: Add your List ID (optional)
Paste the code from Step 6 into List ID. Leave it blank to create profiles only.
Step 11: Click Save, then Test connection
Save stores the credentials. Test connection calls Klaviyo with them and tells you straight away if the key is wrong.
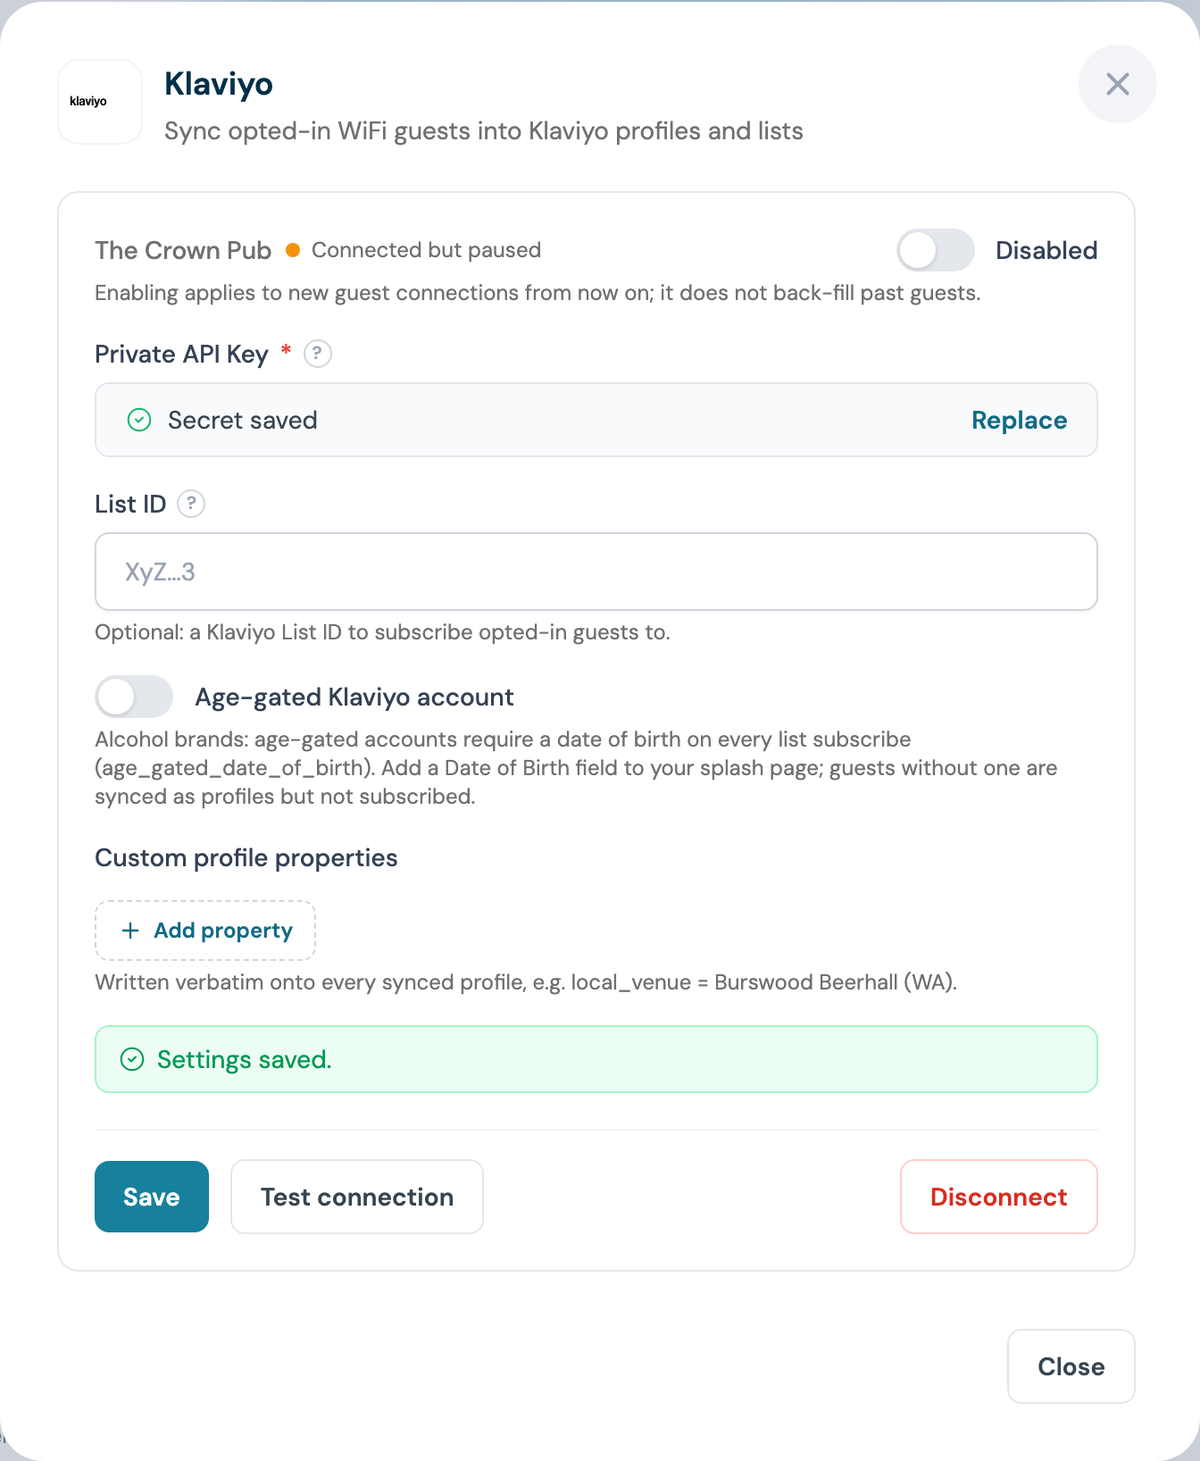
Step 12: Switch the venue on
The venue reads Connected but paused until you flip the toggle to Enabled. Nothing syncs while it is paused.
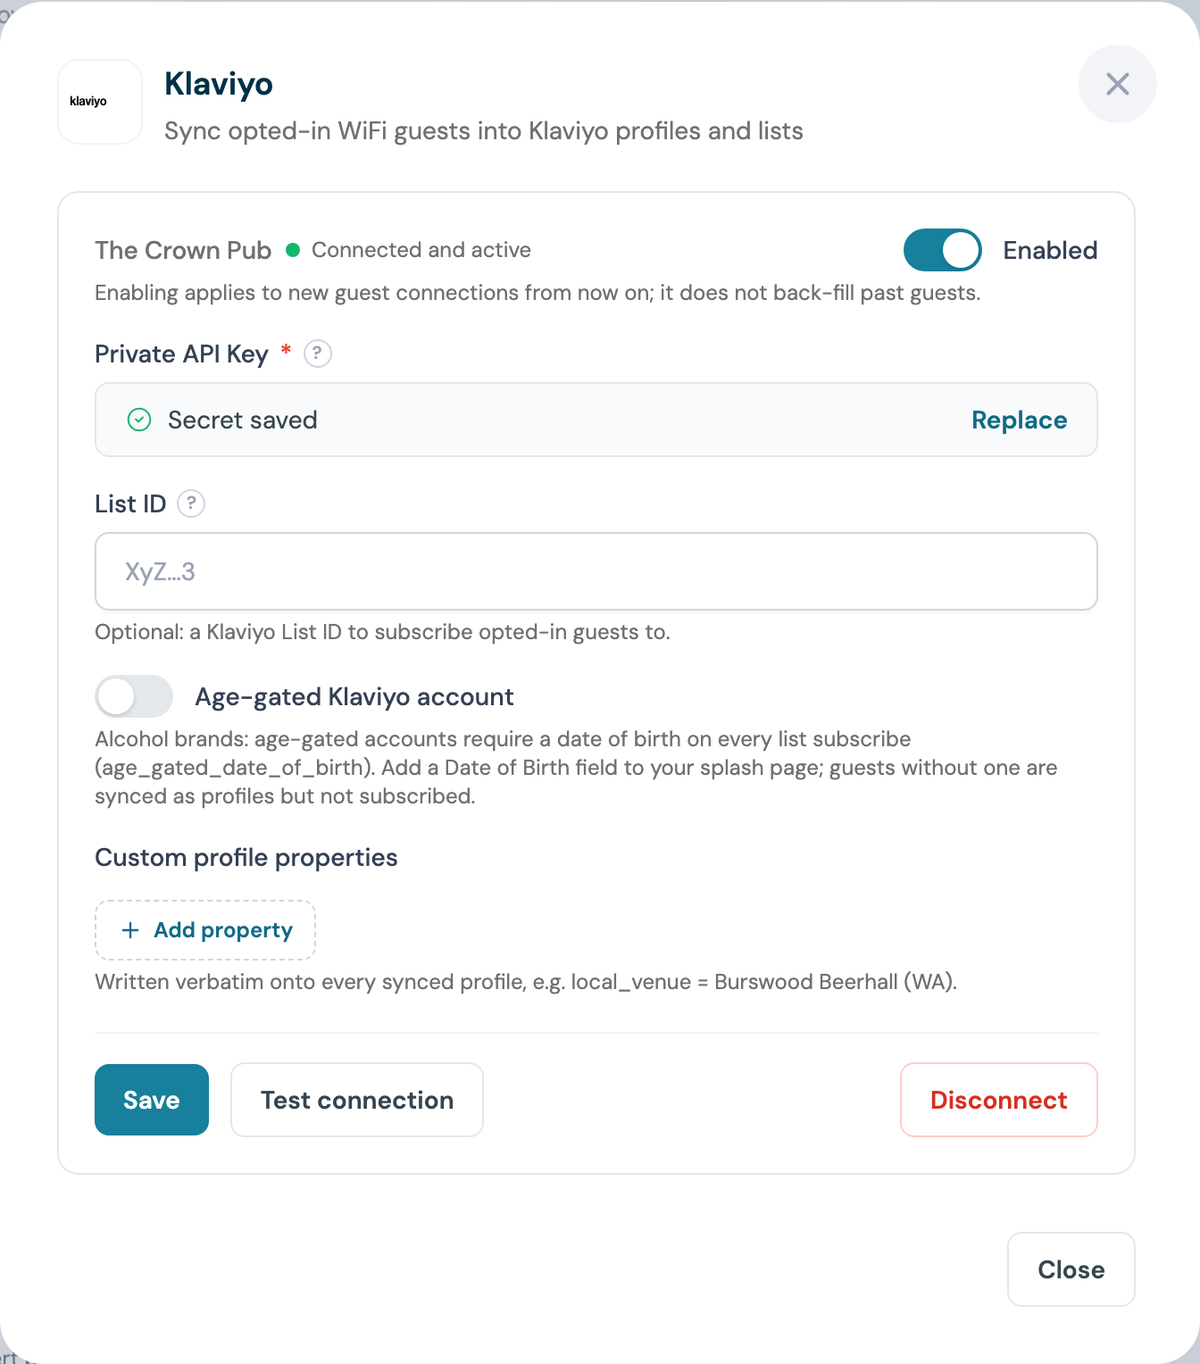
Enabling is not retrospective
Enabling applies to guests who connect from now on. It does not back-fill guests who signed in earlier.
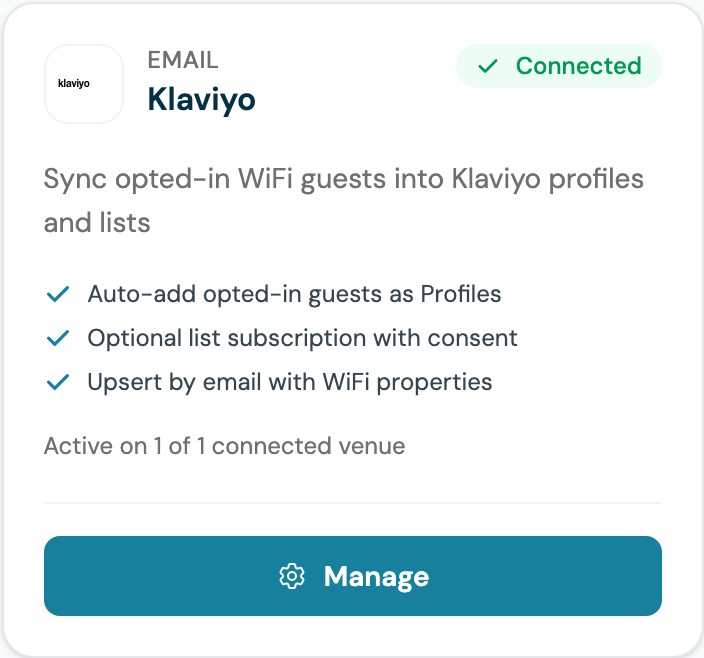
Step 13: Confirm the card says Connected
Close the panel. The Klaviyo card now shows Connected, tells you how many venues are active, and the button changes to Manage.
Part 4: Set your consent preference in Klaviyo
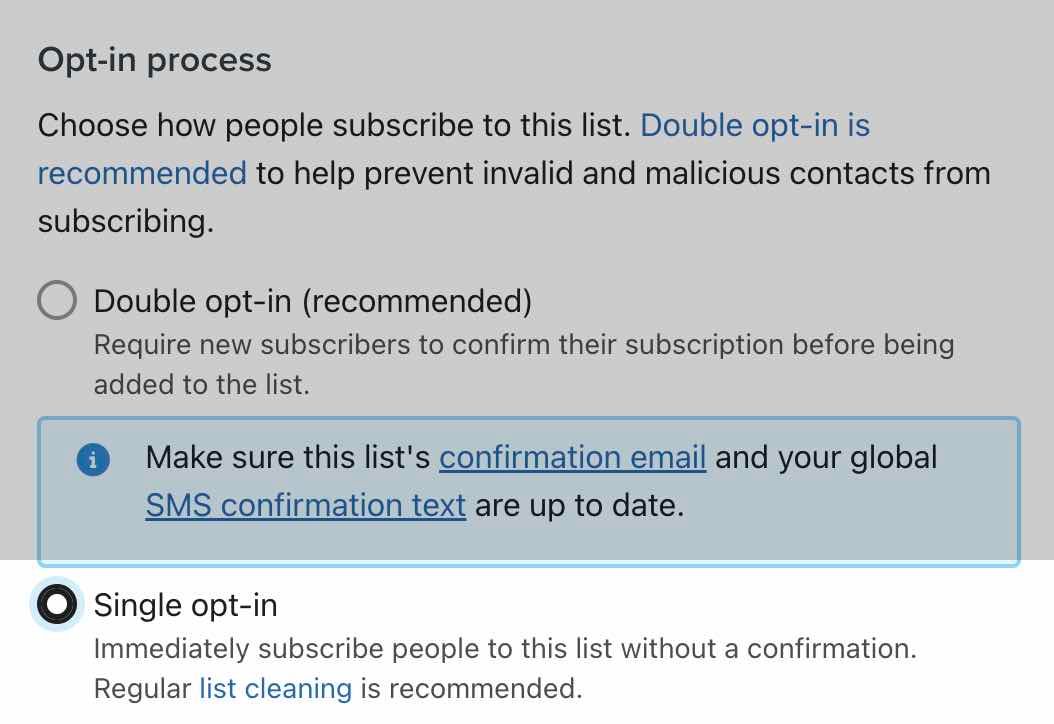
Step 14: Choose single or double opt-in on the list
Open your list in Klaviyo, go to Settings, then Consent. Double opt-in means Klaviyo emails each guest a confirmation link and only subscribes them when they click it.
Which to pick:
- Double opt-in is the safest choice for compliance and list quality, and is required by some regulators and by Klaviyo for certain senders. Guests must open the confirmation email, so expect fewer subscribers than sign-ins.
- Single opt-in subscribes the guest immediately. Your welcome flow fires while they are still in the venue, which is usually what venues want. CaptiFi has already captured explicit marketing consent on the splash page before sending anything.
Part 5: Test it end to end
Step 15: Sign in as a guest
On a phone, forget the WiFi network, reconnect, and complete your splash page with a real email you can check. Tick the marketing opt-in box.
Step 16: Check the profile in Klaviyo
In Klaviyo, search Profiles for that email. Within a few minutes you should see the profile with your venue and source properties, and if you set a List ID, membership of that list.
What gets synced
| Data | Notes |
|---|---|
| Email, first and last name | Only guests who tick the marketing opt-in |
| Phone number | Only if your splash page collects it |
| WiFi properties | Venue and source, written onto the profile |
| Custom profile properties | Any key/value pairs you define, on every synced profile |
| List subscription | Only when a List ID is set, with explicit consent |
| Date of birth | Only when Age-gated Klaviyo account is on, from the splash page Date of Birth field |
Age-gated Klaviyo accounts (alcohol brands)
Some Klaviyo accounts are age-gated: alcohol brands and other age-restricted businesses must supply a date of birth with every list subscription.
- In the CaptiFi Klaviyo panel, switch on Age-gated Klaviyo account
- In the Splash Page Builder, add a Date of Birth field to your sign-in form and set it to required
- Set the field's minimum age to 18, or the legal age where you operate, so under-age guests cannot submit the form at all
Every list subscription then includes the guest's date of birth as age_gated_date_of_birth. Guests who connect without a date of birth are still created as profiles, but are not subscribed to the list, so an age-gated list never receives a subscriber without one.
Custom profile properties
You can define up to 20 static key/value pairs that CaptiFi writes verbatim onto every profile it syncs. Use them to tag WiFi sign-ups for your segments and flows:
| Key | Value |
|---|---|
local_venue | Burswood Beerhall (WA) |
signup_channel | venue_wifi |
Add them under Custom profile properties in the same panel, then click Save.
Troubleshooting
Test connection returns HTTP 401 - the key is wrong, was revoked, or is Read-Only. Create a new Full Access private key in Klaviyo and paste it again.
Profiles appear but the list stays empty - no List ID is set, or the ID is wrong. Re-copy it from List details (Step 6).
Nothing at all appears - check the venue toggle is Enabled (Step 12), and that the guest ticked the marketing opt-in. Guests who decline marketing are never sent to Klaviyo.
The list is age-gated and subscribers are rejected - switch on Age-gated Klaviyo account and add a required Date of Birth field to your splash page.
Guests get a confirmation email they never click - your list is set to double opt-in. Switch to single opt-in in Settings, Consent if you would rather subscribe them immediately.